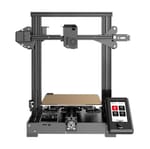
Creality Ender 5 S1 Review: High Speeds, High Temps
Rating

Well, well. It's been a while since we've seen a new Ender 5. High time it got an update, then. Read on for our Creality Ender 5 S1 review.
It was probably only a matter of time before Creality decided to S1 its second most popular 3D printer series, especially after seeing the success the upgraded Ender 3 S1 line has had.
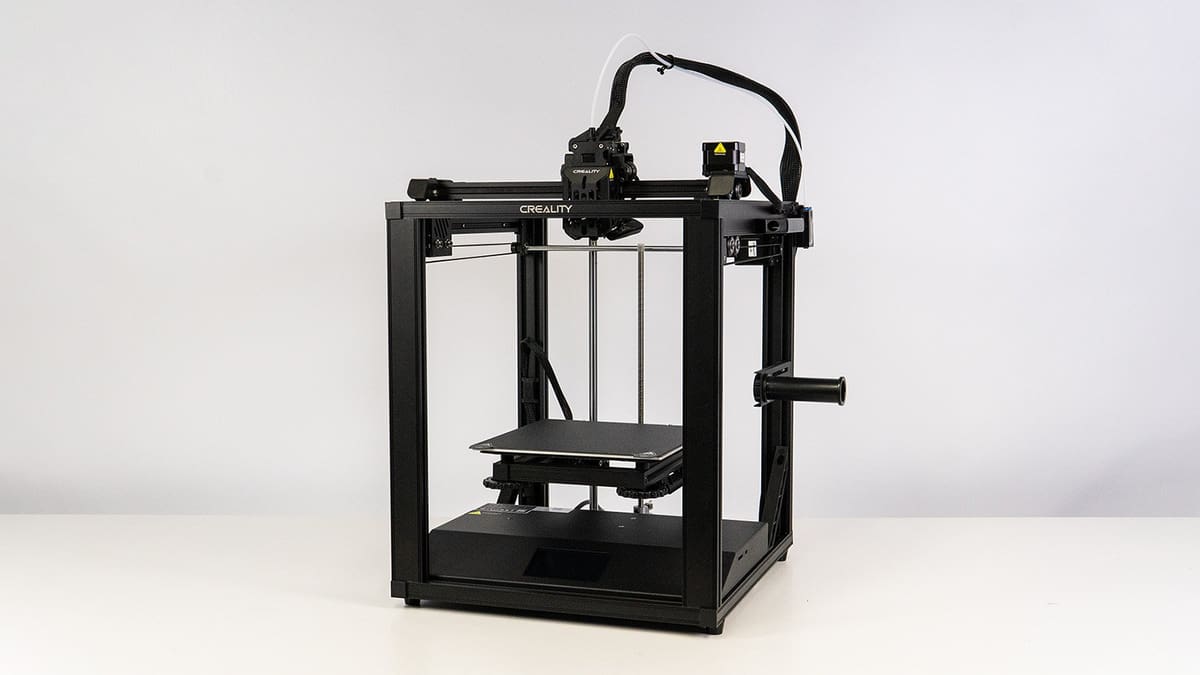
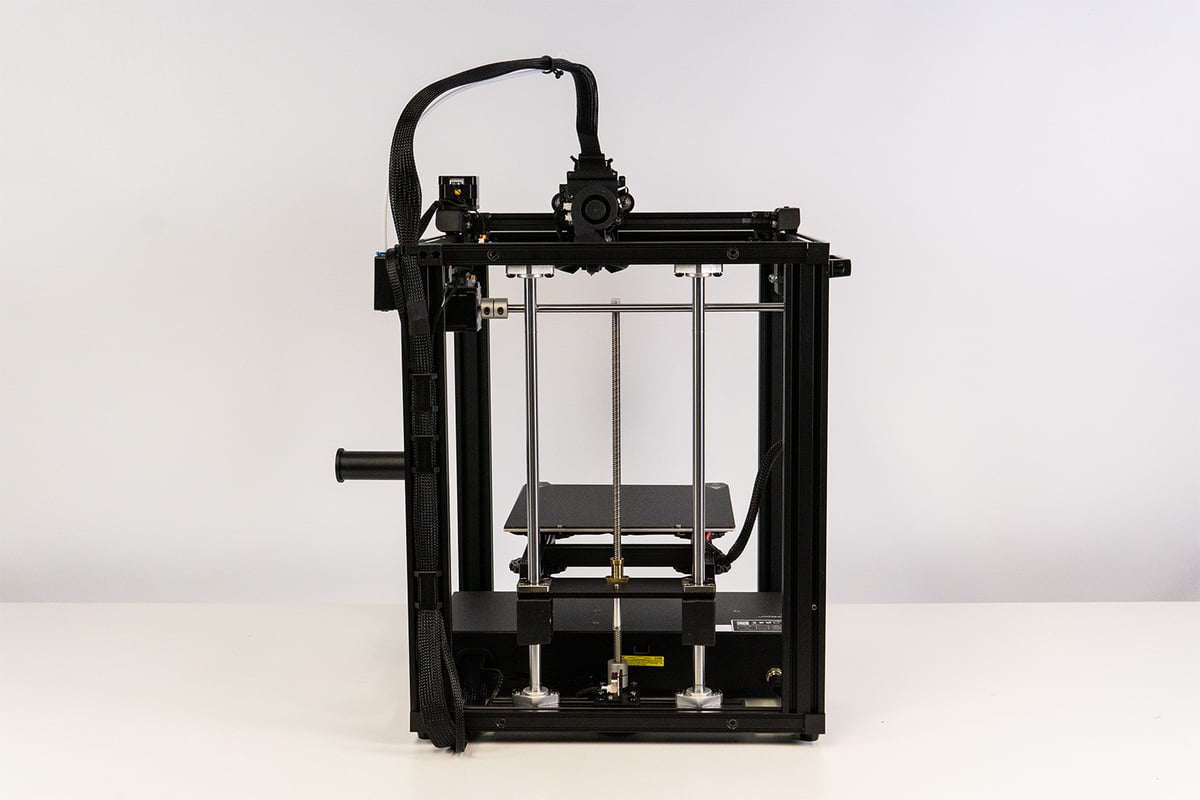
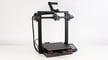
Here we are then, about to get our paws on the Creality Ender 5 S1, the new version of the box-like 3D printer that might have faded somewhat in the printing public’s memories over the last few years. Well, it’s back, and back with a bang.
Coming at you with an all-metal hot end capable of 300 °C alongside a complete re-design of Creality’s popular Sprite extruder, the reinforced cube frame also sets the printer up to produce fast prints at 120 mm/s (and even 250 mm/s in some cases). All major upgrades over its grandsire.
So, does it have what it takes to carry the baton, or is it too square to be hip? We’ve put it through the wringer to find out.
Verdict
Pros
- Fast printing speeds
- 300 °C hot end
- Solid performance
Cons
- Lack of enclosure limits high-temperature usage
- Cantilevered bed needs sporadic releveling
- PC-coated print surface easily damaged
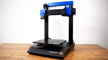
With the Ender 5 S1, Creality has released another souped-up version of one of its more popular models. Featuring Creality’s direct Sprite extruder and an all-metal hot end, the Ender 5 S1 can process professional-type materials up to 300 °C. Combined with an improved cooling fan and an enhanced cube frame for extra stability, the printer boasts maximum prints speeds of up to 250 mm/s.
Default print profiles for common consumer materials such as PLA, PETG, and ABS are set to 120 mm/s, though, which can still be considered quite fast, and generally will result in only a slight increase in overall print time – acceleration being the key here. We’ve achieved quality results off the print bed at any speed, although at max velocity, some errors can creep in. If you’re feeling the need for speed, though, Creality’s Sonic Pad (a $160 optional extra) provides the ability to run Klipper on the S1 and could help extract a little more pace and surface quality out of it.
Printing high-temperature materials on the Ender 5 S1 is a treat, although consistency is somewhat limited due to the lack of an enclosure.
Nevertheless, its fast print speeds and professional material capabilities, combined with its overall ease of use and solid print performance, make the Ender 5 S1 stand out at its price point. Currently available for $559, the Ender 5 S1 is a worthy successor to one of the most popular printer series.

The Tech
Cubism
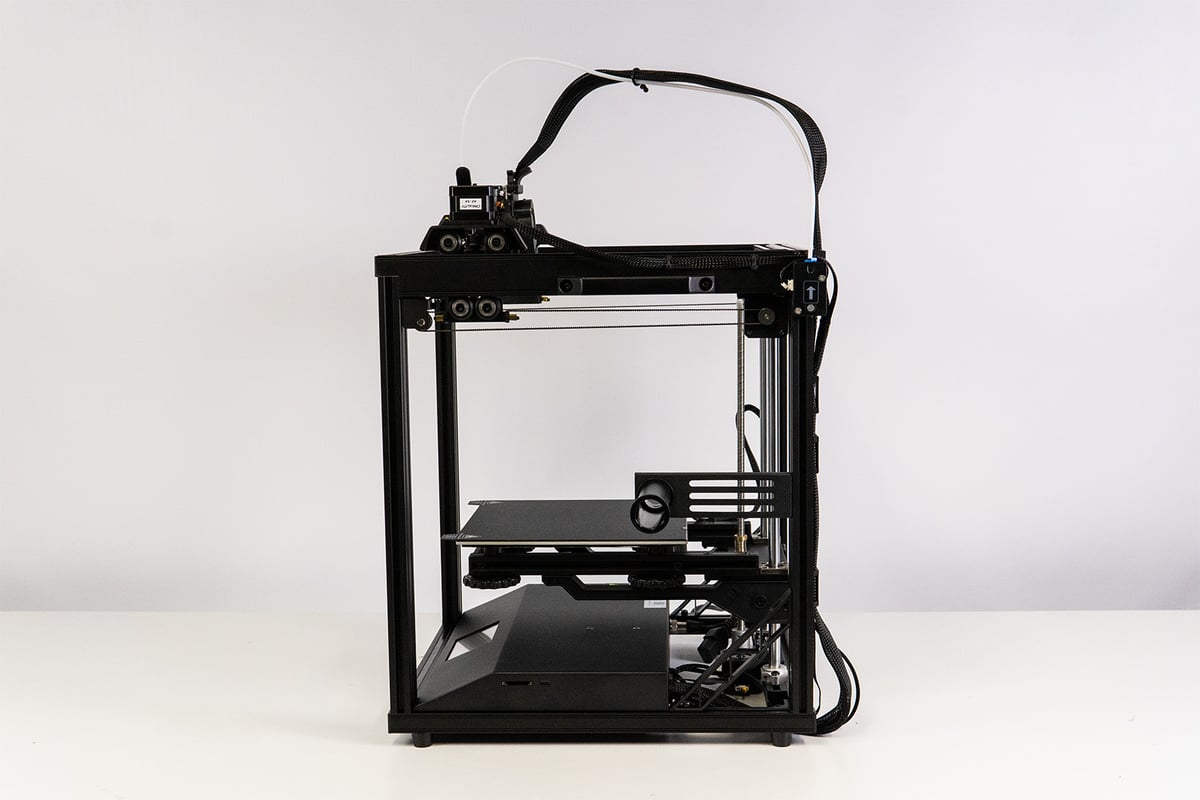
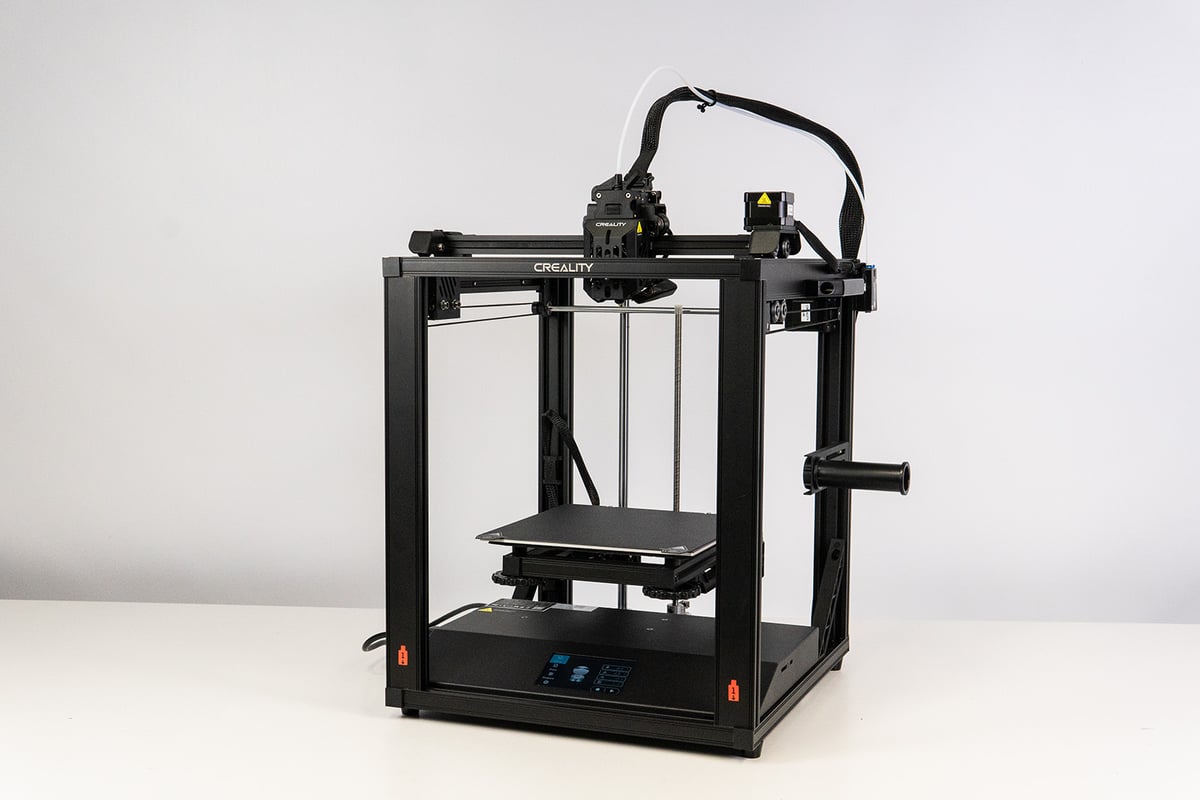
3D printer design actually goes well beyond the bog-standard bed-slinger many manufacturers riff on these days. One alternative is the cube-shaped design seen here, of which the Ender 5 series is one of the more prominent examples.
It’s been a few years since the original Ender 5 hit the market, though, and you’d be forgiven for having allowed it to slip out of memory. While its cube-shaped design looks similar to a CoreXY 3D printer at first glance, the motion system is still Cartesian, but with the bed (and not the print head) riding up and down the Z-axis.
A cubed frame typically boosts stability, which allows for faster printing speeds compared to your Ender 3-style 3D printers, which tend to be a bit flimsy when the print head is whizzing about at higher altitudes on the Z-axis. With the print head fixed on top of the Ender 5 S1’s squared frame, it generally allows it to travel and print much faster with fewer vibrations. To add extra rigidness to the 40 x 20 mm aluminum extrusion brackets that make up the skeleton, Creality added plastic crossbars for the rear end of the base. Certainly an improvement over the old Ender 5 versions, but why stop at plastic? Having large metal crossbars on each side surely couldn’t hurt.
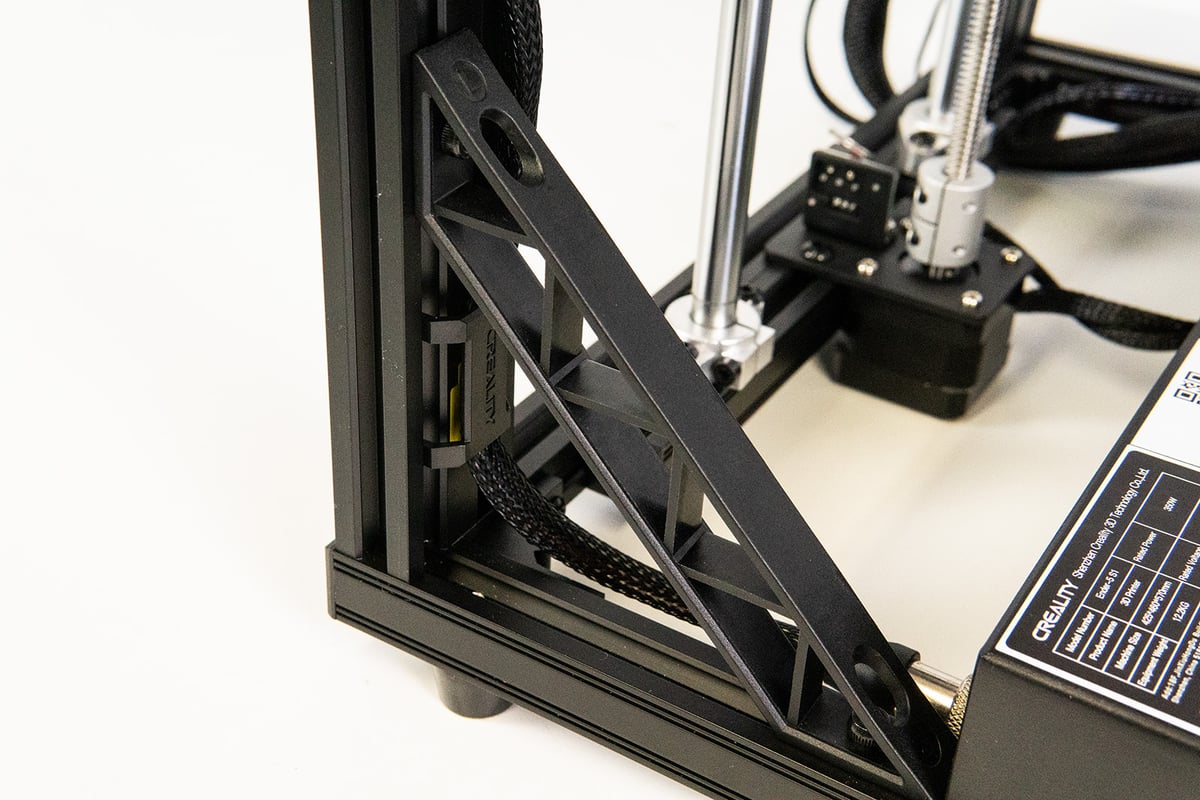
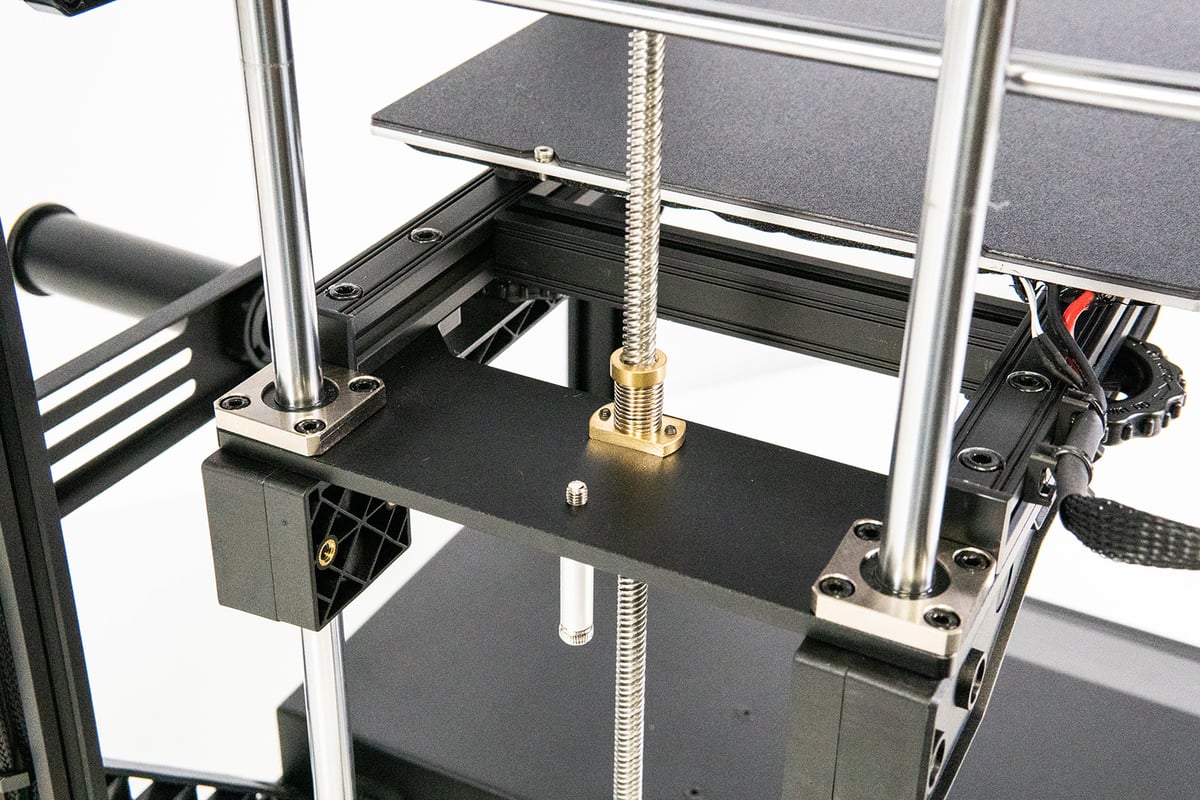
The downside to this design is the bed being suspended in mid-air. In fact, the old Ender 5 had a problem with the print bed – it was prone to sagging. For the S1, Creality has tried to mitigate that via additional braces underneath the print bed. However, having a cantilevered bed suspended solely on one side can only gain so much extra sturdiness from two plastic brackets.
As the Ender 5 S1 aims to perform at high speeds, a two-sided bed suspension with a stepper motor and rail guides on each side would have been desirable here. We’ve seen Creality use it on the Ender 5 Plus back in the day.
Lean but downsized
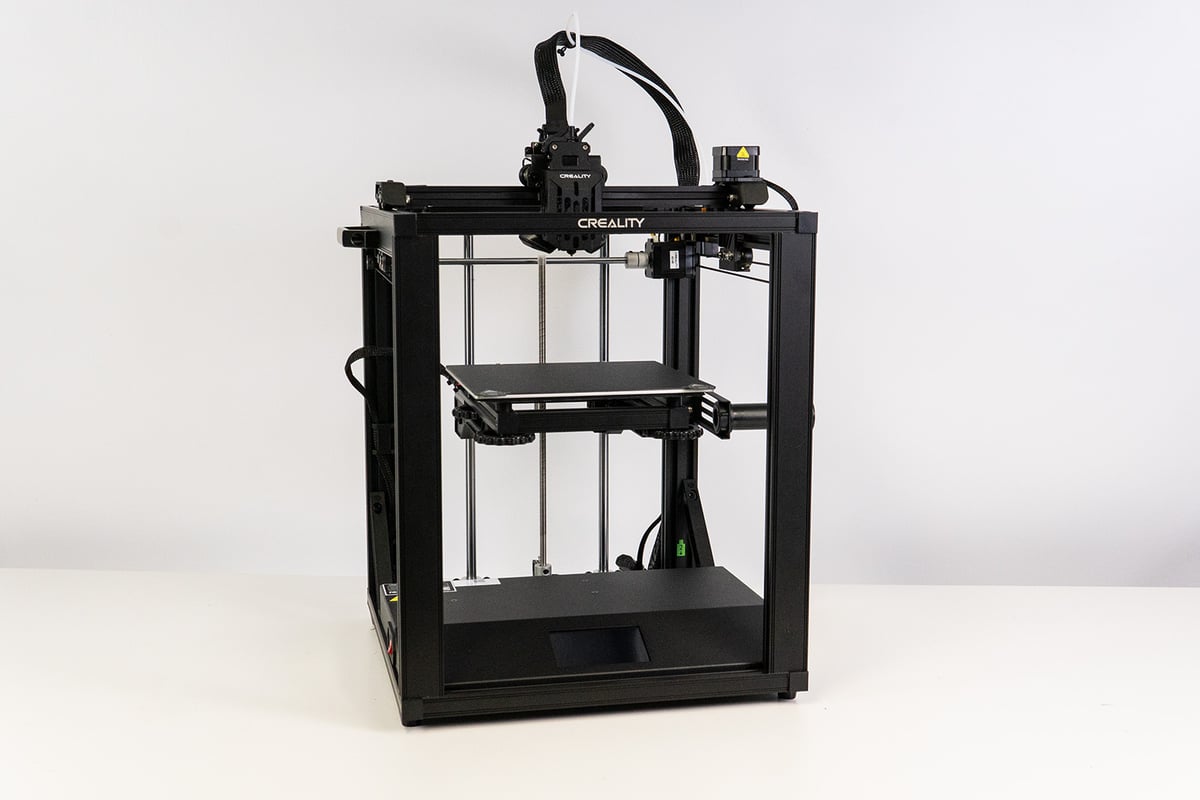
Inside its cubed frame rides a 220 x 220 mm-sized print bed that travels up and down a 280 mm long Z-axis, making the overall build volume slightly larger than an Ender 3’s. Compared to the original Ender 5, the S1 version loses 20 mm on the Z-axis though, which is attributed to the all-new extruder (more on that below). In practice, it doesn’t make much of a difference, but don’t go about expecting massive prints off this thing.
If you are familiar with the original Ender 5, you will likely remember its higgledy-piggledy cable management. The new S1 steps it up a couple of notches here with zip ties, cable clips, and smart cable routing to add to the overall slick attire of the S1. Much better.
250 mm/s on the speedo?
Back to the topic of printing fast: that sturdy cubed design sets the S1 up for whizzing-fast print speeds up to 250 mm/s and 2000 mm/s of acceleration. Interestingly, the S1’s profiles in Creality Slicer are set to only 120 mm/s for commonplace materials such as PLA, PETG, and ABS. That leaves the user having to dial up the speed manually should they want to print that quickly. Either way, it’s still a considerable step up from your average bed-slinging 3D printer, which will typically hit 50-60 mm/s.
In practice, time-saving between these two speeds is not as drastic as the numbers first might imply. Max print speed generally has a limited impact on smaller or more complex models, as the print head has to accelerate and slow down to take turns. Think of it as a Formula 1 car: it can go 390 km/h, but not around a hairpin. For reference, a Benchy takes 44 minutes to print at 250 mm/s, which is just two minutes less than at 120 mm/s. On an Ender 3 S1 set to 50 mm/s, though, it takes 1 hour and 33 minutes.
Rule of thumb, the larger the model, the more time can be saved – at least when the model geometry allows it. Still, even with large models, the print head will rarely hit its maximum speed. It’s not as simple as halving print duration by doubling the pace, but the Ender 5 S1 is fast, no doubt about it. Don’t be put off by estimated slicer times, though. For the 120 and 250 mm/s settings, estimates are off by quite a margin.
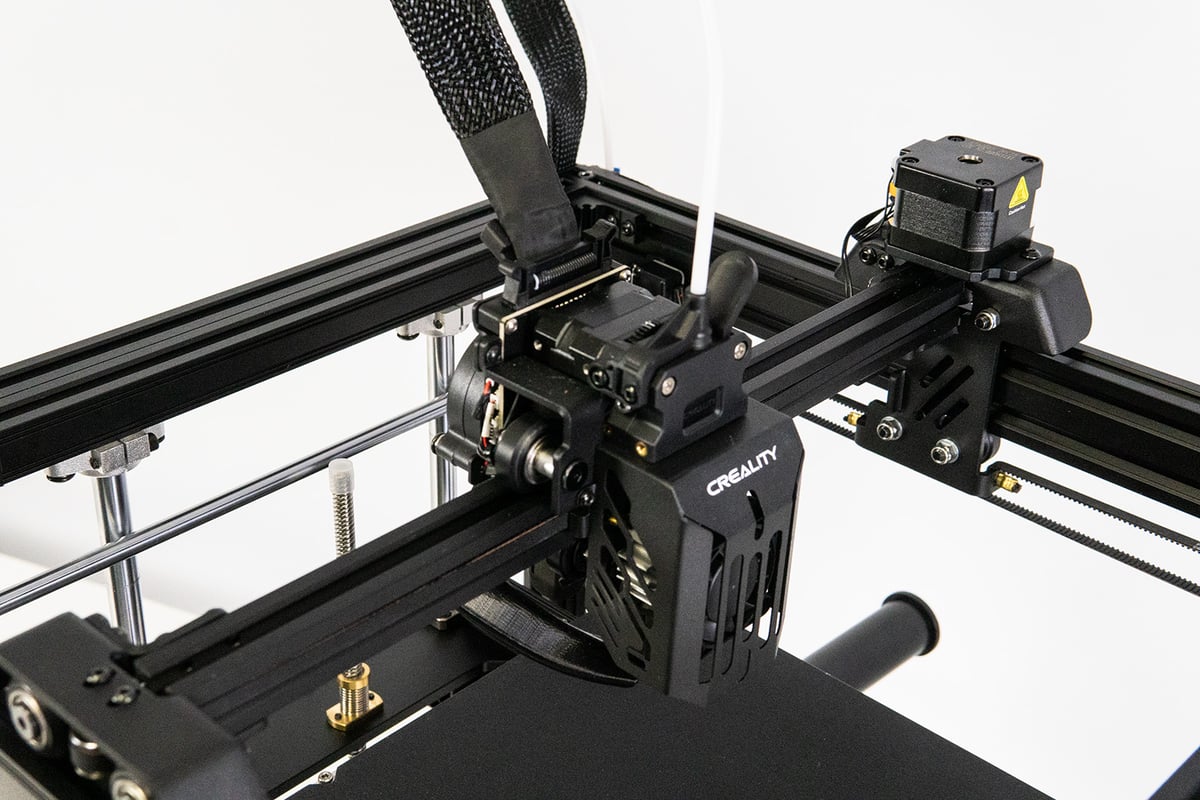
New Sprite
To accommodate these fast printing speeds, the Ender 5 S1 comes with a revamped print head setup. As with all S1 versions, the latest Ender 5 also features Creality’s self-developed Sprite extruder.
Having tested the Ender 3 S1 and its Plus version, we’ve already seen what it’s capable of. For the Ender 5 S1, it’s more of the same, meaning the dual-geared pancake stepper and its 3.5:1 reduction gearing ratio motors provide consistent feeding of filament – even the bendy ones such as TPU. Given the high print speeds possible and the concomitant higher throughput on the Ender 5 S1, this becomes all the more crucial.
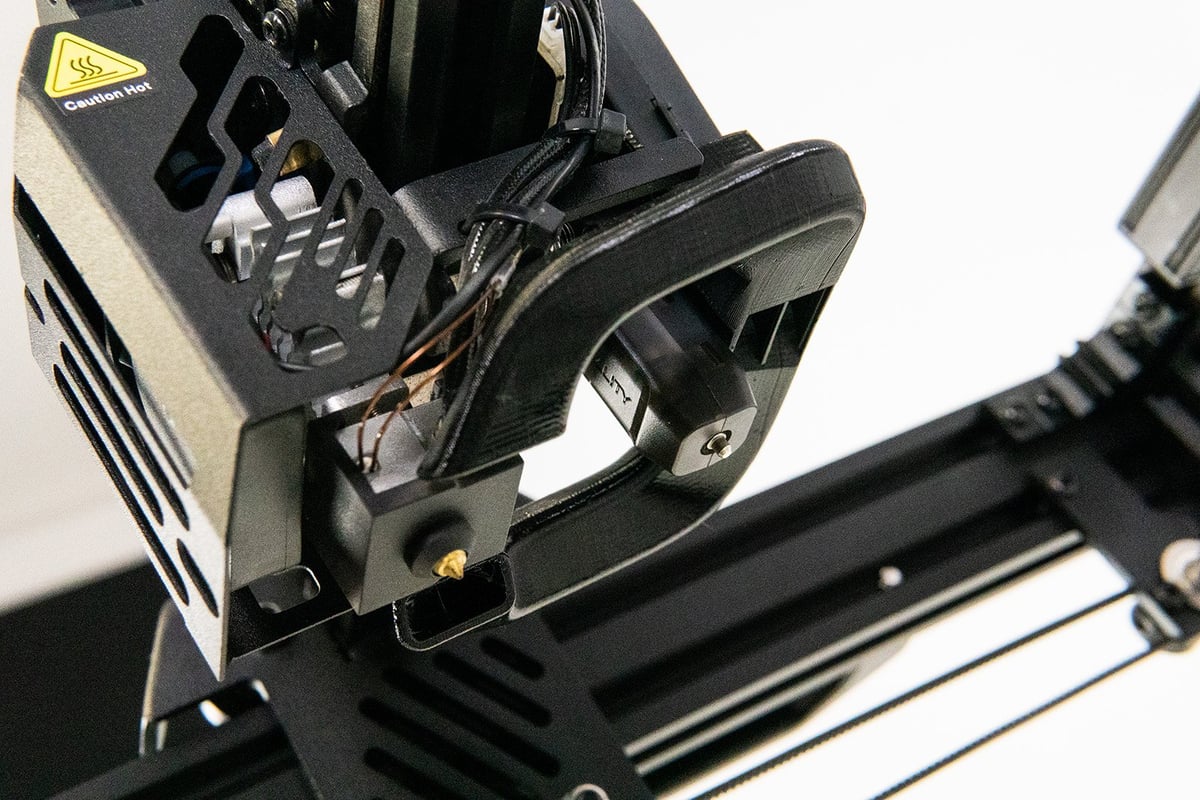
Even more paramount for consistent fast printing is the melting of filament, though. To assist with that particular challenge, Creality opted for a brawny heater block that sits on top of the hot end. This allows the hot end to spit out enough molten filament even at the whizzing print speeds the printer can perform at. Coincidently, this also entails a longer nozzle to reach all the way up through the enlarged heater block (something to be aware of when shopping for new nozzles).
The cold end also got buffed up, promising better heat dissipation due to its enlarged surface. That’s clearly an improvement, though we didn’t encounter a difference in performance from the other Sprite versions we have tested.
With the hot end being all-metal, the Ender 5 S1 is capable of hitting temperatures up to 300 °C. This expands the usable filament range from run-of-the-mill filaments such as PLA and PETG to more professional materials such as Polycarbonates, nylon, and various carbon fiber-reinforced blends. For consistent results with these high-temp materials, you’d be best upgrading to a steel nozzle and looking for an enclosure, though. Creality is seemingly flirting with the idea of an acrylic panel enclosure kit, but it has yet to hit its online store.
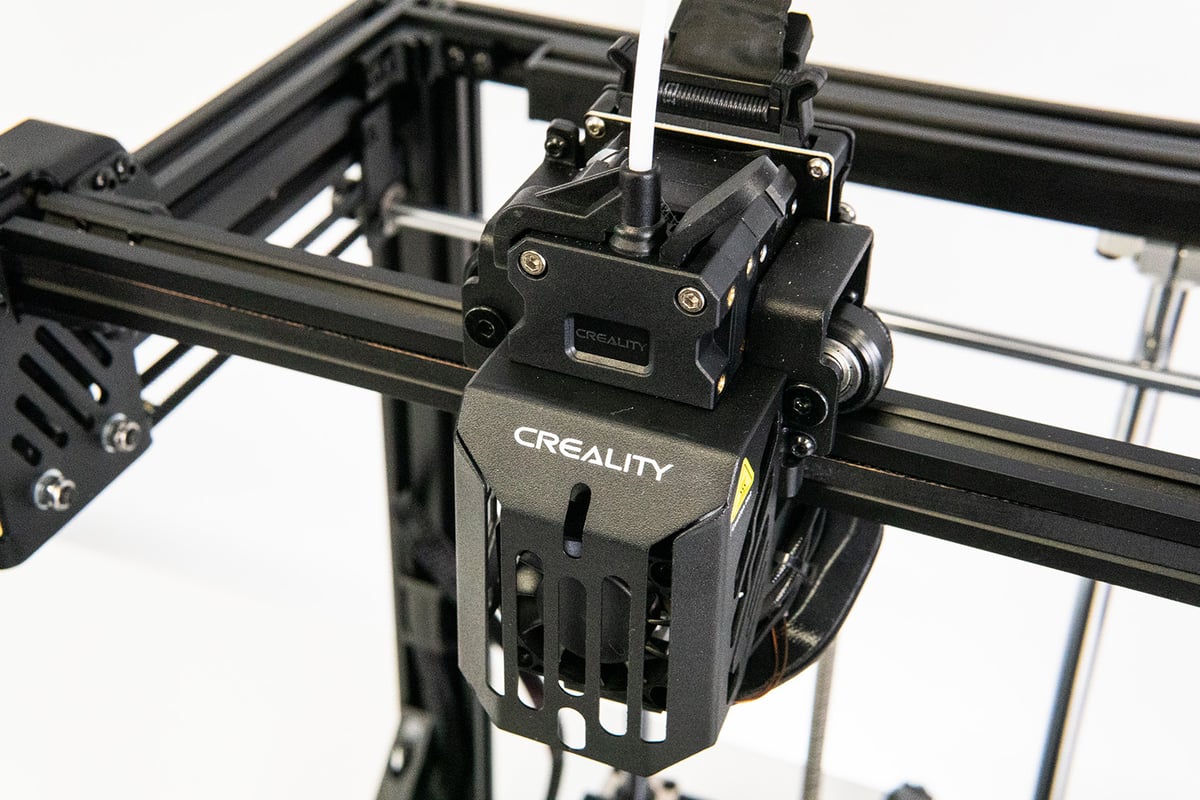
Big Fan
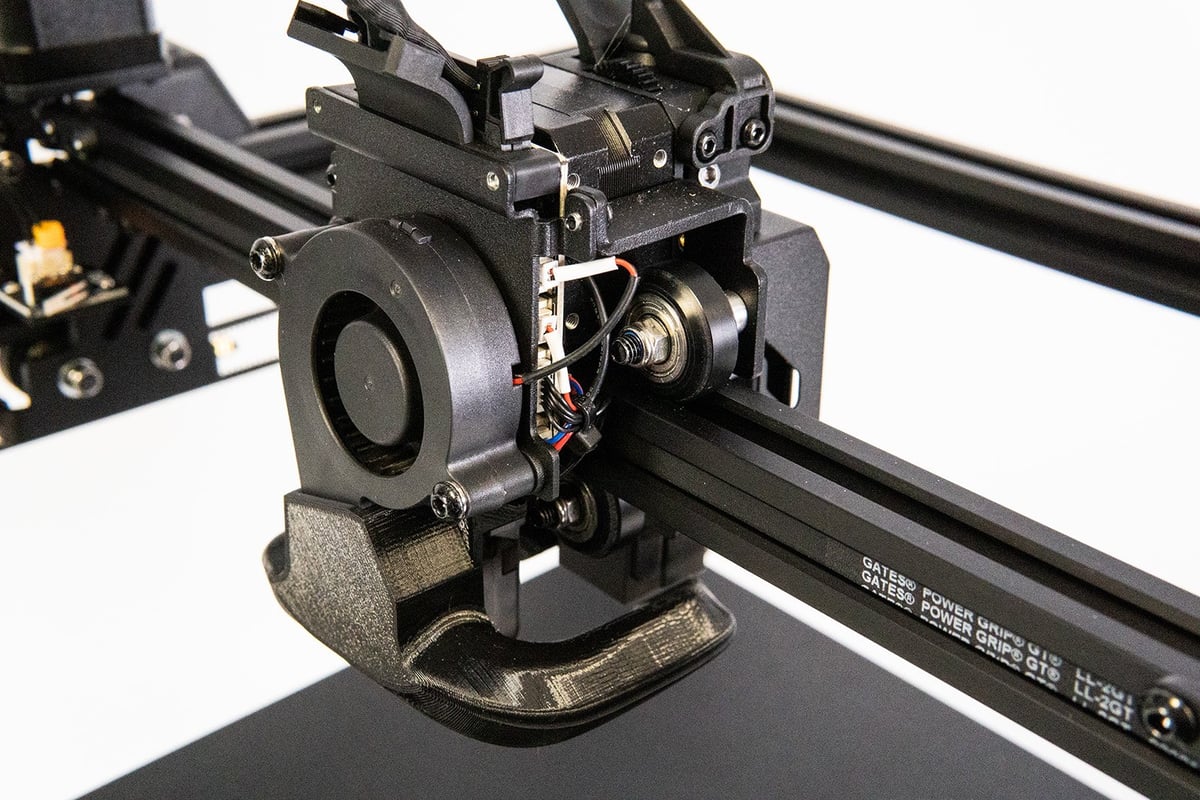
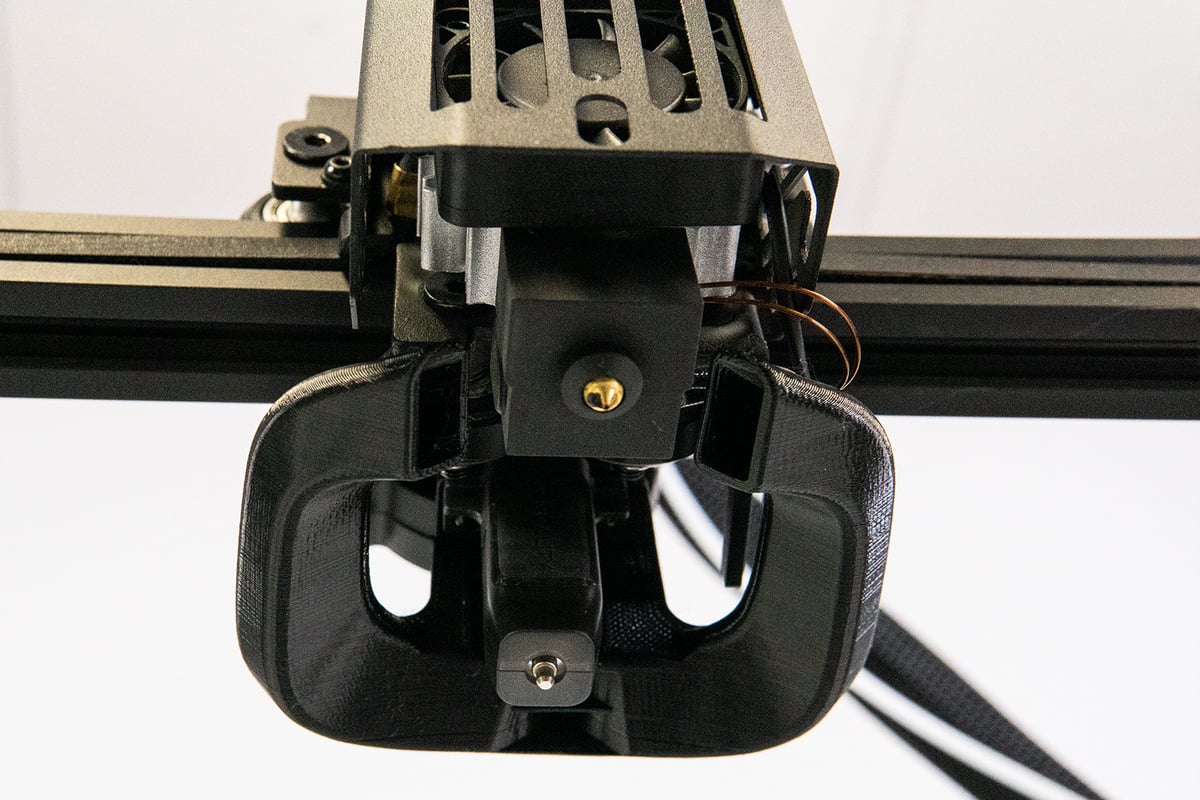
We’re big fans of the new big fan found on the Ender 5 S1. With this re-design, the part cooling fan now sits at the back of the print head, and has been beefed up to a chunkier 5015 version from the 4010 featured on the rest of the S1 cast. It blows its cool air via a dual-sided fan shroud onto the extruded filament.
The redesign also corrects one of the drawbacks of the original Sprite design, which was the sub-optimal placing of its part cooling fan. Originally, it blocked the view of the nozzle, something which would be twice as irritating on the Ender 5 here, where the field of view is already somewhat limited due to the boxy design. More importantly, however, was that due to its placement, it sucked in mostly hot air emitted by the print plate to “cool” prints. The fan location and the dual fan shroud, cooling two-dimensionally, are significantly better and all the more needed, as fast print speeds require efficient cooling, especially when it comes to overhangs, bridges, and other tricky parts.
CR Touch leveling
Almost hard to spot with that all-new design of the print head is the included CR Touch leveling probe, coming as standard with the S1 series. Tucked away in the back, the probe comes into play when you fire up the automatic leveling process via the user interface.
Unfortunately, besides being used to probe a mesh of the print bed, the CR Touch probe isn’t used for homing the printer. Instead, every time you start the leveling procedure, a print, or anything else that requires homing first, the print bed travels all the way down to the physical end stop located at the very bottom of the Z-axis, only to travel up again. And it does so in a slow manner – a bit of a time drain.
Otherwise, the probe works as it should. When fired up, it probes a mesh of 16 points across the print bed to factor in any unevenness you couldn’t flatten out via the auxiliary leveling procedure beforehand. Interestingly, the print bed’s suspension is somewhat of a hybrid: it uses both metal springs and silicon mounts. Typically, the former is exchanged for the latter as it tends to keep the level better over time. Presumably, this is to mitigate some of the effects the cantilever suspension has on the bed’s level.
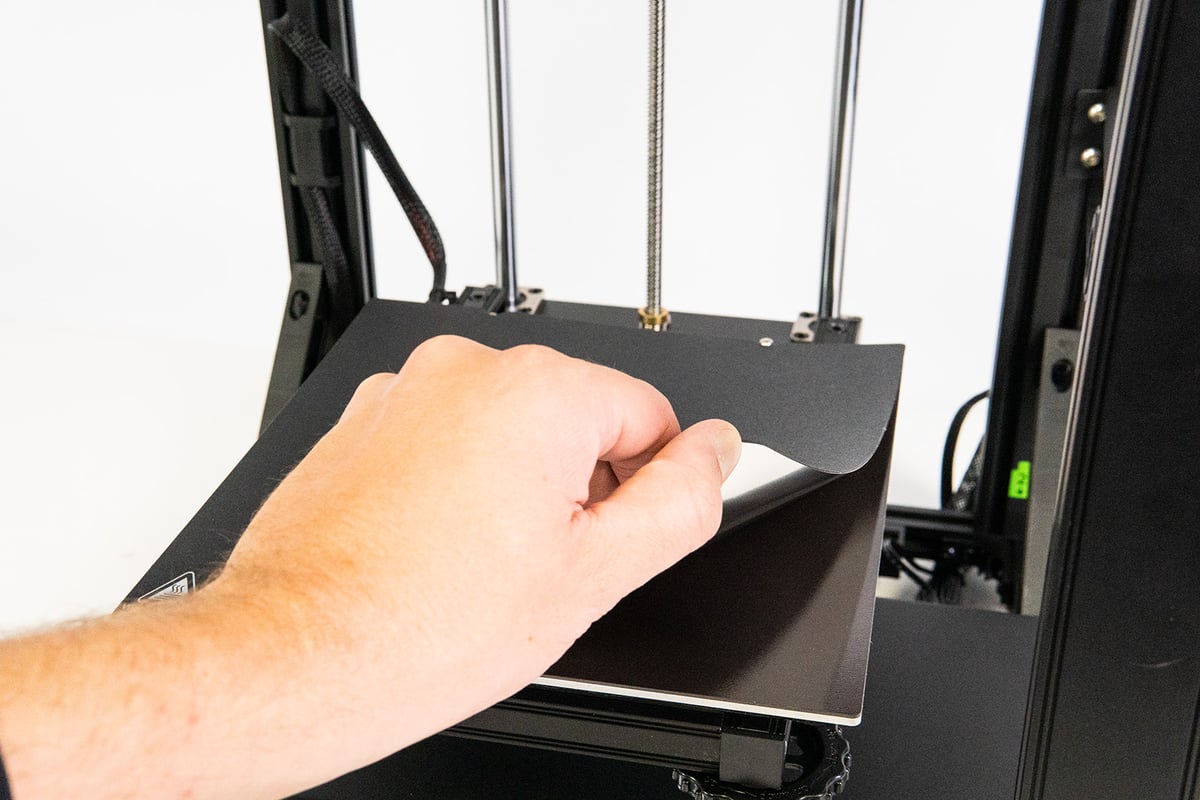
Print Bed
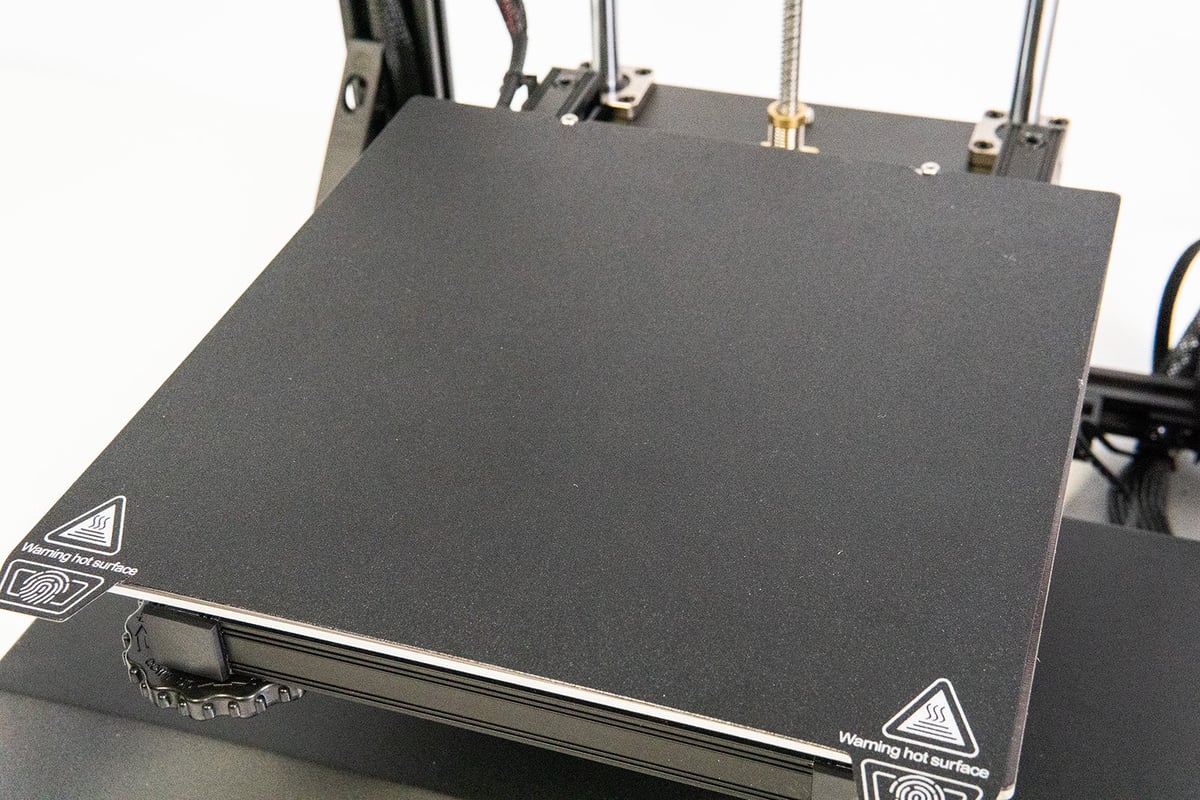
Another carry-over from the S1 Series is the flexible magnetic build plate. With two little bolts in the back, the grooved print plate snaps neatly into place and can be easily flexed to pop off prints. As with other S1 machines rocking a PC-coated print plate, we find the surface to adhere pretty well, but the relatively soft texture can be prone to nozzle scratching if your leveling isn’t on point. There is some degree of personal preference involved here, but we would have preferred a PEI spring steel plate.
The heated bed is capable of temperatures up to 110 °C, which you will need for your engineering-type materials, such as ABS or polycarbonates. Adhesion was generally pretty decent, only struggling with the more warp-prone materials, which, given the fact it has no enclosure, was to be expected. The temperature throughout print jobs is constant and with little deviation across the build plate.
Controls
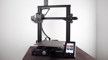
Serving as the printer’s UI is a 4.3-inch color touchscreen. Unlike the former Ender 5 design, the screen is no longer attached to the side but instead integrated into the printer’s base, helping with the printer’s sleek attire and footprint. On the downside, potential troubleshooting and replacement just got a bit more challenging.
In terms of connectivity, you’ve got a full-size SD card slot and a USB-C port to choose from. Both are located on the side of the printer, reasonably convenient in terms of reachability.
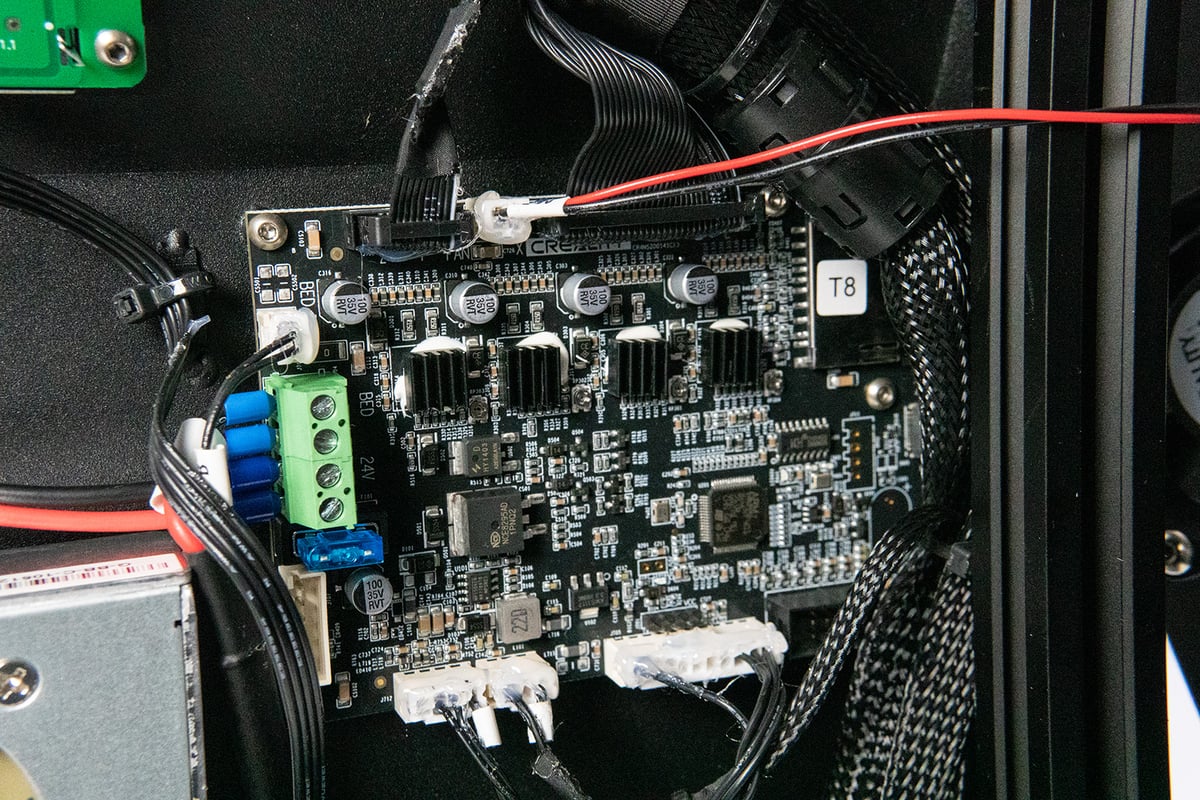
Underneath its hood, the Ender 5 S1 runs on the same Creality 32-bit motherboard (ARM STM32F401 CPU) and silent stepper drivers (Trinamic TMC2209), all S1 printers come with nowadays. Creality stated that Klipper firmware is also supported with the S1 via Creality’s Sonic Pad too – potentially further increasing print speed and performance with advanced techniques such as input shaping.
As far as the wiring and safety aspects of the Creality Ender 5 S1 go, it’s all very well done. You’ve got crimped instead of tinned wires, proper grounding, and neatly labeled wires, making potential upgrades and repairs feel less like your favorite red-wire blue-wire scene.
Printing & Usability
Assembly & Getting Ready
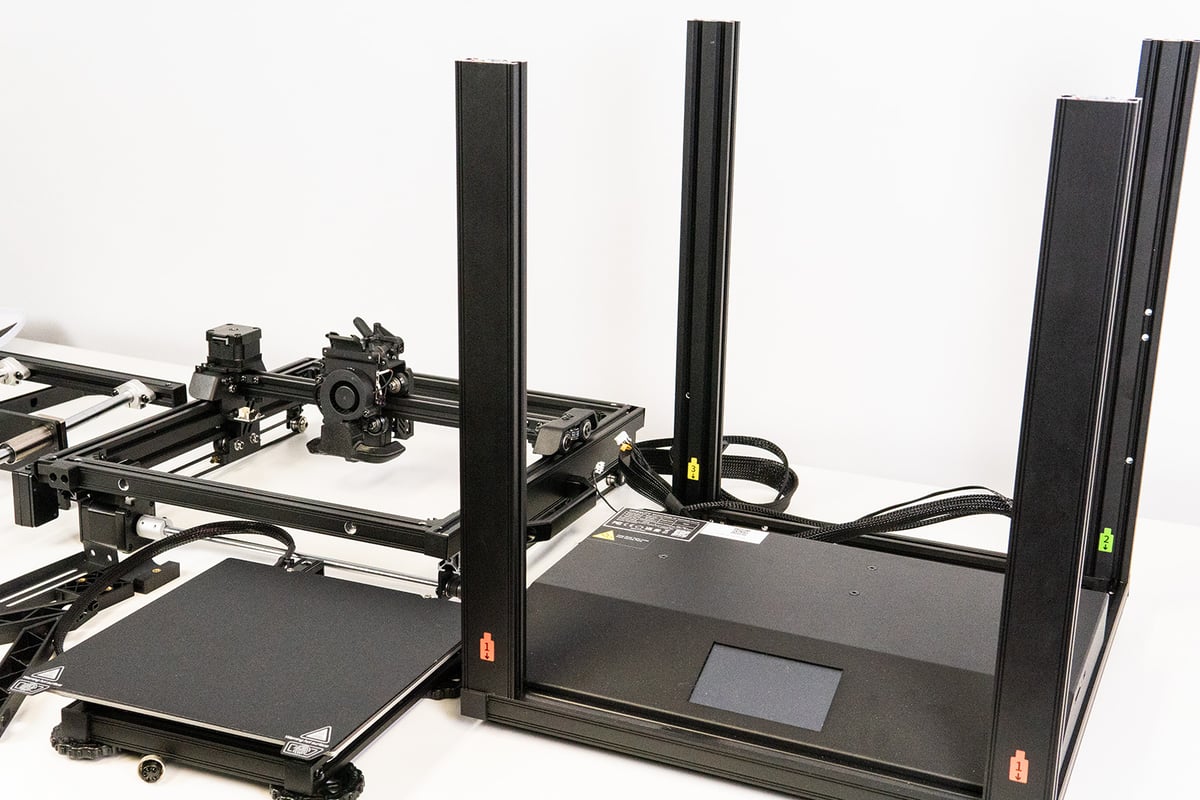
Assembling the Ender 5 S1 has us strolling down memory lane – you don’t come across that many printers nowadays that require a bit more assembling than just mounting the gantry onto the base. Its box-like shape dictates being shipped mostly in individual parts. However, its top frame with all the belting and the extruder, basically where all the action is, comes factory assembled, leaving you to put together the frame and install the bed.
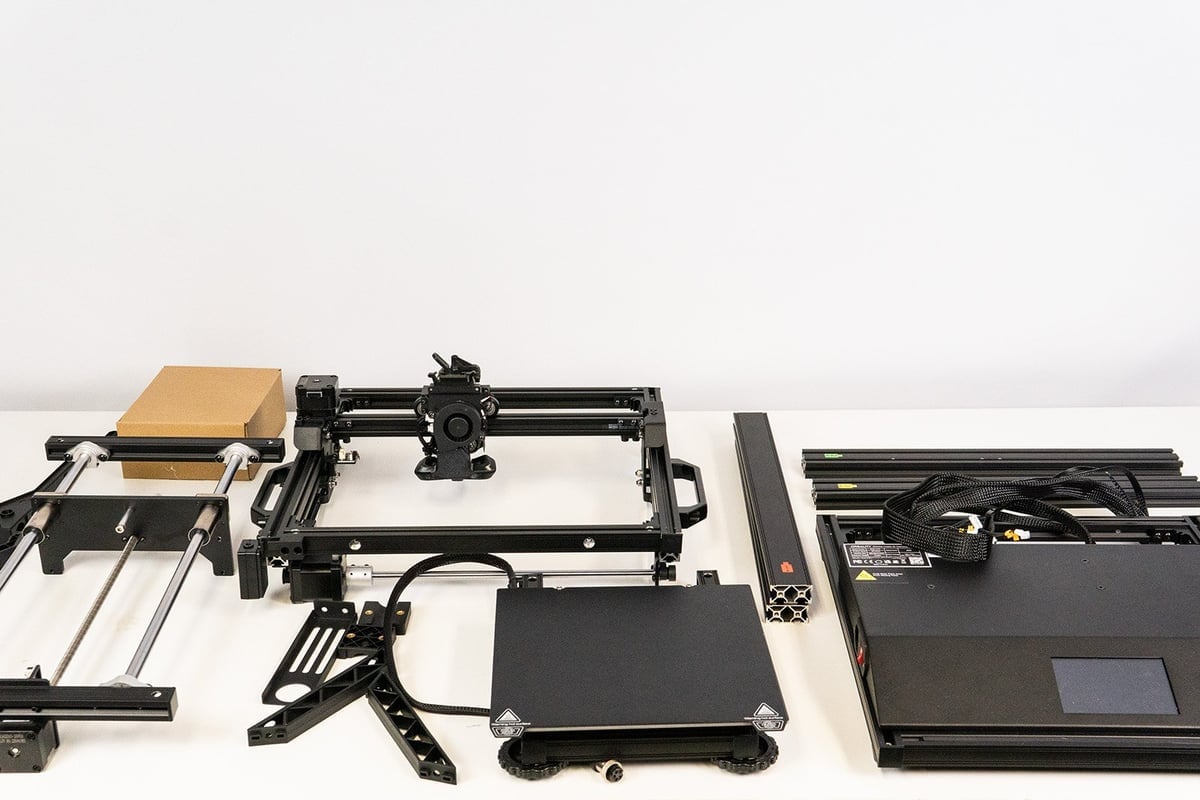
Creality’s instructions are better, an improvement on what we’ve seen with previous machines, but still far from optimal. An occasional glance at the assembly video included with the SD card can clear things up should you be unsure about which part goes where. Handily, the frame brackets come color-coded, so you shouldn’t end up in an IKEA-type scenario, having assembled the whole thing only to find out at the very end you mixed up a part or two. We’ve all been there.
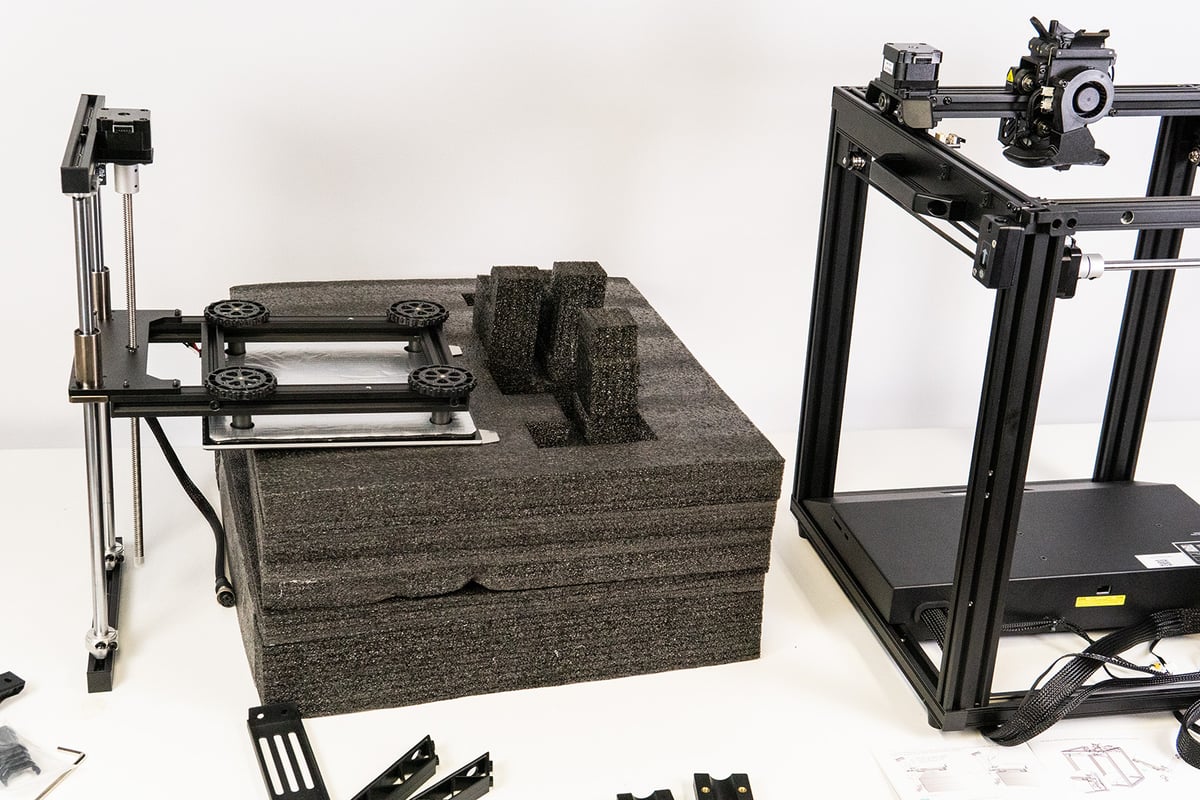
Installing the bed cantilever is the only part that’s a bit tricky. You will need a second pair of hands or some of that Styrofoam the printer comes in to rest the bed on while installing its gantry. But all the required tools are included (that’s one up on IKEA), and you will need about half an hour to an hour to piece it together.
One thing notably absent from the instructions is the need to check and potentially retighten belts and eccentric nuts. In our case, we didn’t need to grab the wrench; everything was neatly tightened, but having loose components can cause a lot of avoidable headaches when trying to figure out why early print results are not up to scratch.
Next up, you want to start the manual leveling process. As this is a printer with automatic bed leveling, you might think turning knobs and sliding a piece of paper back and forth is not required, but even with the CR Touch probe, there is no way of getting around it. You essentially want to get the bed leveled as close as possible, with the auxiliary leveling method of sending the print head to five spots on the print plate and playing around with the knobs. Then you can let the CR Touch probe do its thing. It can measure any leftover unevenness, but it can’t help you out with a totally skewed print bed.
After running the mesh calibration and starting your first print, you can still set the Z-offset should the nozzle-plate distance still remain off – the software will save any settings for future prints. We found that slightly adjusting the Z-offset after the initial calibration was inevitable and, as a matter of fact, we ended up repeatedly adjusting it throughout our time with the printer. Keeping a constant level over a longer period of time unfortunately seems to be something the S1 struggles with, even with the added silicon mounts. If you pay close attention to the first layer and adjust the settings on the fly via the interface, adhesion and print quality was excellent, though.
U, I, and the Slicer
If you’ve followed the leveling steps in the instructions, you’ve already acquainted yourself with the user interface. It is pretty straightforward, albeit with a few usability quirks, which we’ve already encountered on other S1 3D printers running the same UI.
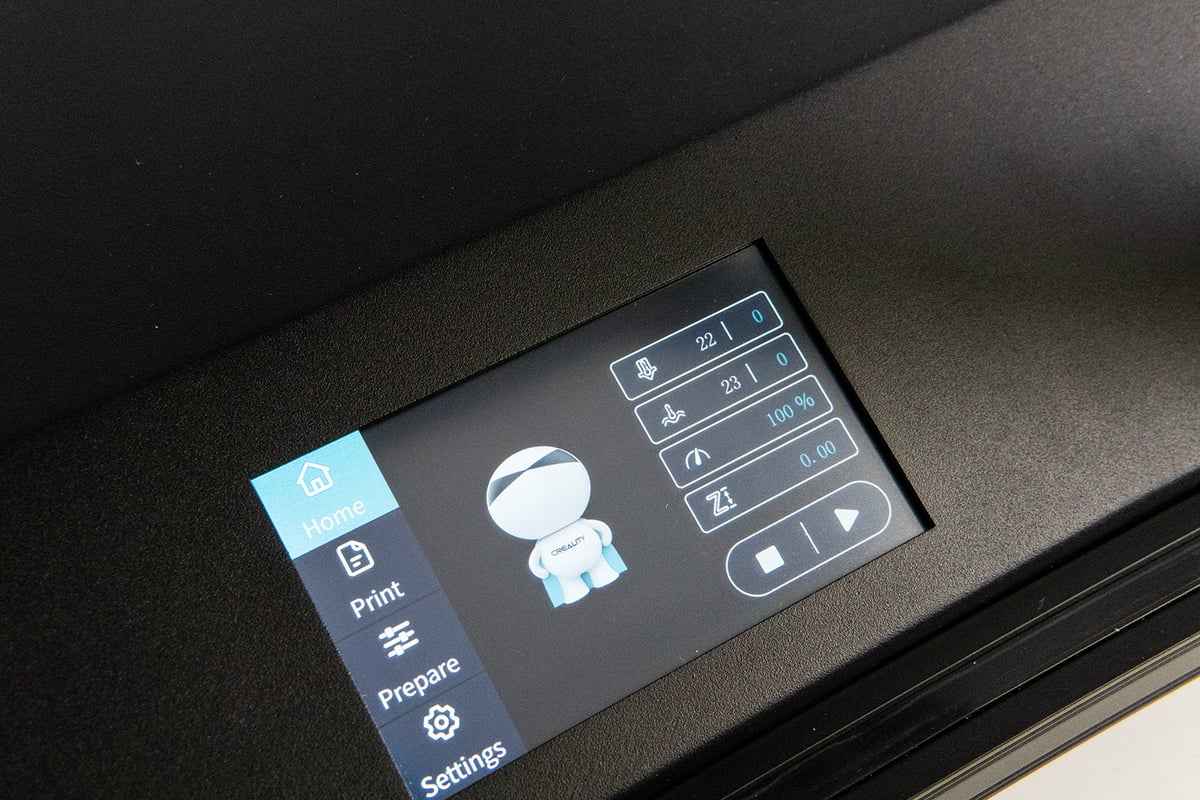
If you haven’t started a print, the displayed nozzle and bed temperature settings in the main menu can’t be accessed. Instead, you will have to navigate to the settings bar and set the temperature there. It’s a two-click detour; no stress, but cumbersome in any case. Once you start a print, you can tap away at the main menu settings. Why wasn’t it an option in the first place?
What really grinds our gears, though, is the fact that you can’t turn off the sound. Tapping through the menu will make you feel like a truck is reversing right next to you – beep, beep, beep. If we could choose, we’d have the mute function over the main menu usability any day of the week.
The Ender 5 S1 comes with the latest version of Creality Slicer as well as a profile for it, which we stuck to for most of our review. At the time of writing, crowd favorites Cura or Prusa Slicer don’t yet feature an Ender 5 S1 profile. However, you can easily set one up by taking the old Ender 5 profile, adjusting the build volume, and copying over the G-Code from Creality Slicer, should you wish to use the latest advancements these slicers tend to offer.
The benefit of using Creality Slicer (for now) is the print profiles provided. Creality does include a leaflet with the printer stating all the print settings for different materials, such as print speed, retraction, fan power, etc. Of course, you can also access them right away in the slicer if you select the Ender 5 S1 materials. When it comes to more complex filaments such as PC, HIPS, or ASA, it has the benefit of ridding you of having to remember crucial adjustments such as fan speed.
The default print speed for day-to-day filaments, such as PLA, PETG, and even ABS, is set to 120 mm/s. To go full throttle, you need to set the 250 mm/s manually. According to Creality, top speed is reserved for PLA only. However, nothing is stopping you from trying to print some of the other easy-going materials at that speed as well. For your professional-type filaments, we would advise sticking to the settings. In general, we found the provided profiles to be very well-tuned, providing us with decent print results with little need for adjustments.
Printing with it
Truth be told, we had our doubts when we first saw the claimed print speeds of the Ender 5 S1. The reality is, fast print speeds usually don’t produce good prints. Our first test print, the Creality cat, printed at 120 mm/s, and came out pretty decent, though. As a result, we fired up the same print, cranking up print speeds to 250 mm/s, and saw no noticeable differences in print quality.
Naturally, PLA is one of the easiest filaments to print with, but nevertheless, we were surprised by the printer’s performance even when we threw larger models at it and compared print results with both the default and super-fast print speeds. Thanks to the new fan duct, cooling is significantly better than on past Sprite extruder-toting machines from Creality, which allows the printer to produce clean overhangs and bridging even at high speeds.
PETG had us produce similar results and surprisingly, we saw close to no stringing from it, something PETG is infamous for. That is partly due to the filament we used, but having had the same spool running on the Ender 3 S1 Plus recently, we could certainly make out a difference in print surface quality. All that at 120 mm/s too, which goes to show retraction and cooling is on point. For science’s sake, we’ve even thrown a 250 mm/s sliced PETG print on there with more than decent results. Stringing and surface quality were still on par, but we’ve seen the occasional gap in extrusion – presumably due to the constant retraction.
Printing at such high speeds, it is all the more crucial, though, that the 3D printer sits on a solid basis. Printing at 250 mm/s will cause quite the vibration, and depending on the model, a difference in print quality will be noticeable compared to the default settings. It is definitely worth trying out, although if you want consistent print results, sticking to the vanilla settings will get you further. It is the possibilities of Klipper, with advanced functions such as input shaping, that could see the Ender 5 S1 get more consistent at top speeds, though.
If you plan on printing with materials requiring a very high temperature, you will likely run into some hiccups. Warping will be your primary bane here. We’ve run a handful of test prints with ABS, PC, and Nylon and had great results on smaller objects, but saw severe warping on print jobs that took hours to finish.
Naturally, these materials require constant temperatures. Even though we have all our printers set up in an enclosure in the All3DP offices (for health reasons), we couldn’t quite get the most out of these materials. Creality offers a separately purchasable enclosure for the Ender 5 S1, which we recommend going for if you aim to print with these materials regularly. Seeing as this enclosure effectively only covers the build chamber, we’d wager the results to be better than our large enclosures we mainly use at the office just to keep our lungs safe from plastic particles.
All in all, printing with the Ender 5 S1 is heaps of fun. The possibility to play around with high-speed settings and its broad filament range lets you experiment with the printer in a variety of ways. With its vanilla settings, the printer produces clean and fast prints without fuss.
Is It Worth It?
This new Ender 5 S1 is simply Creality doing Creality things. It has once again made intelligent and well-executed upgrades to a previously popular offering.
Touched up from head to toe, the Ender 5 S1 comes with an improved frame and bed suspension for extra stability, an all-new direct extruder, and a print head capable of printing exotic materials up to 300 °C. It also gallops along at fast print speeds without sacrificing print quality – thanks to the new dual-shroud part cooling fan.
Its form and mechanical arrangement allow it to print at default speeds of 120 mm/s and you can even crank it up to 250 mm/s for some materials. It’s not quite up there with high-speed 3D printers such as the delta Flsun V400 or some of the CoreXY setups, but it is pretty fast for a Cartesian 3D printer, although print quality can suffer a bit when going full throttle, depending on the model. For additional celerity, Creality’s new Sonic Pad and the ability to run Klipper on the S1 potentially allow for an exciting upgrade.
Further quality-of-life improvements include assisted leveling thanks to the CR Touch leveling probe, which probes the bed after manual aligning to factor in any residual unevenness. Keeping the level consistent over extended periods seems somewhat of a weak point of the Ender 5 S1, the added plastic bars underneath the cantilevered bed improve its general stability (something the original struggled with a lot more) but we’ve still had to re-adjust leveling and hope into the Z-offset during prints a little too often for our liking.
The ability to print industrial-type materials such as PC, nylon, and other advanced materials is nice, although, in its vanilla state, the Ender 5 S1 is not suited for consistent output. Switching out the brass nozzle to a metal one is a minor fix, but you will also have to equip the printer with some sort of enclosure to create a warm baking chamber, which these materials so desperately need. Creality is looking to release an additional purchasable enclosure designed to fit the S1’s frame, but in any case, you should factor in potential extra costs down the line should you be looking to print with those materials on a regular basis. For now, we see simply having the capability to do so as a bonus, though.
Its build volume of 250 x 250 x 280 mm might be a bit restrictive in some cases, making it slightly smaller than an Ender 3 S1 or its Pro variant, which also comes with the 300 °C capable Sprite. Considering the extra print speed and improved part cooling, we would gladly trade in the extra 20 mm, though.
Currently available for $659, the Ender 5 S1 might be a bit of an investment when compared to the army of cheap bed slingers out there these days, but you won’t find many alternatives in its price range that offer the same speed and temperature capabilities. Minor gripes aside, the Ender 5 S1 is a worthy successor to the original 5.
Features
Shrinkage
There’s been a slight decrease in the Ender 5 S1’s print volume over the Ender 5 Pro, which was the last Ender 5 we got our gauntlets on back in 2020. The print volume is now 220 x 220 x 280 mm, which is 20 mm shorter on the Z-axis than the 5 (Pro) was.
You could say the Ender 5 S1 is flirting dangerously close to just being a cubey Ender 3 with that sort of build volume, and there’s already an Ender 3 S1 Plus that has a 300 x 300 x 300 mm build volume. But Ender 5 S1’s selling points lie elsewhere.
Construction
Like those before it that bore its name, the Ender 5 S1 takes the form of an open-sided cube. Creality says this sort of shape gives improved stability, and it certainly looks is a more stable shape.
What it is good for is converting into an enclosure. With a little work, it shouldn’t be too difficult to fill those open sides in and create a chamber that can capture heat a little better and not let any drafts in. Useful when printing with trickier, more annoying filaments like ABS, PC, or ASA.
Direct Extruder
Creality’s new Sprite direct extruder is appearing on a number of its 3D printers now, and there ain’t nothing wrong with that.
The Sprite has impressed us with its appearance on other printers in the Creality range so far, performing superbly on the Ender 3 S1, Ender 3 S1 Plus, and even a Sermoon we’ve got lying around the office doing our dirty work.
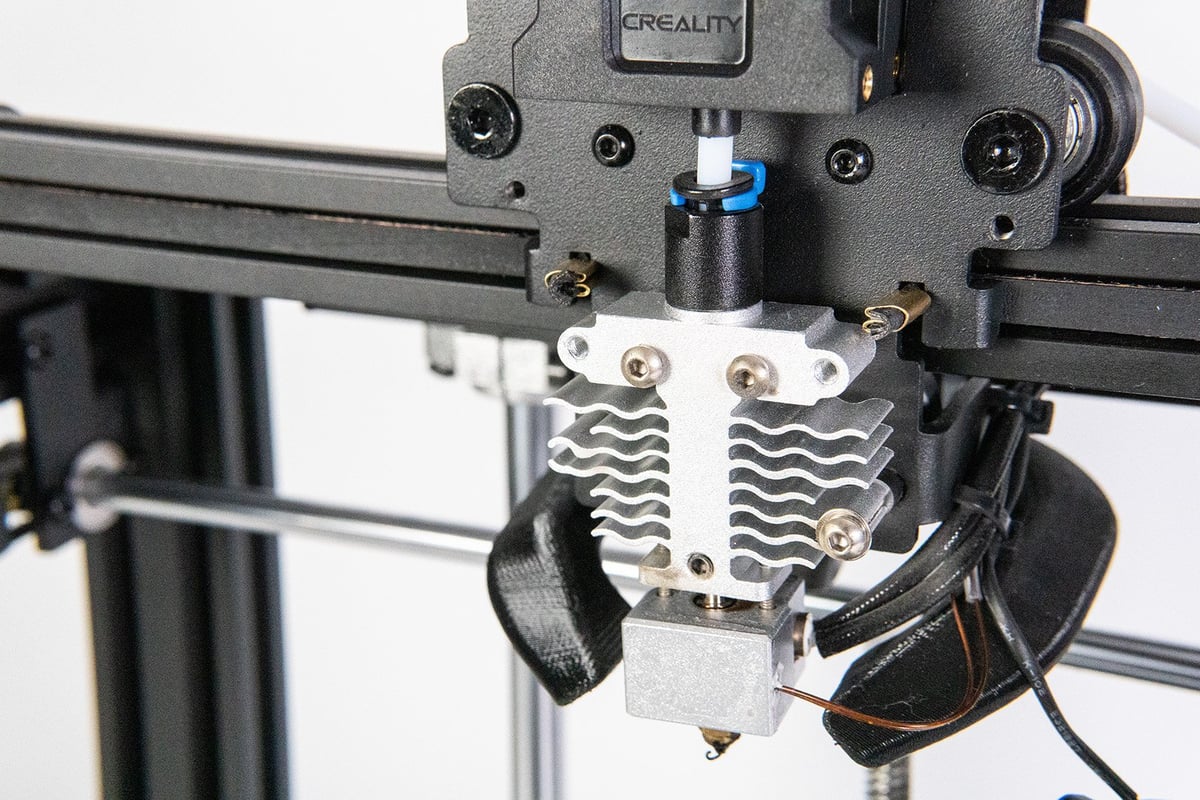
On the Ender 5 S1, Creality has fitted what it calls the “Pro” version of the Sprite. So, it’s an all-metal hot end with a titanium alloy heat break capable of hitting 300 °C, making it a fine choice for working with more demanding, engineering-level filaments such as PC. Swap out the brass nozzle for something a little sturdier such as stainless steel, and you can also work with carbon fiber or other abrasive filaments.
In our past dealings with the Sprite, we’ve found it super easy to work with, unloading and loading is as simple as can be, and it has consistently delivered strong results. We’ve seen more of the same on this one.

Automatic Bed Leveling
Creality has deployed its CR Touch automatic bed leveling system on the Ender 5 S1, so users should be able to get a lovely flat print surface on a consistent basis.
The CR Touch probe is a cheeky riff on the BL Touch style of touch probe, and we’ve come across it on a variety of Creality’s recent offerings. It works very well, and manual leveling knobs and Z-offset functionality within the menu are also there to help really dial it in too.
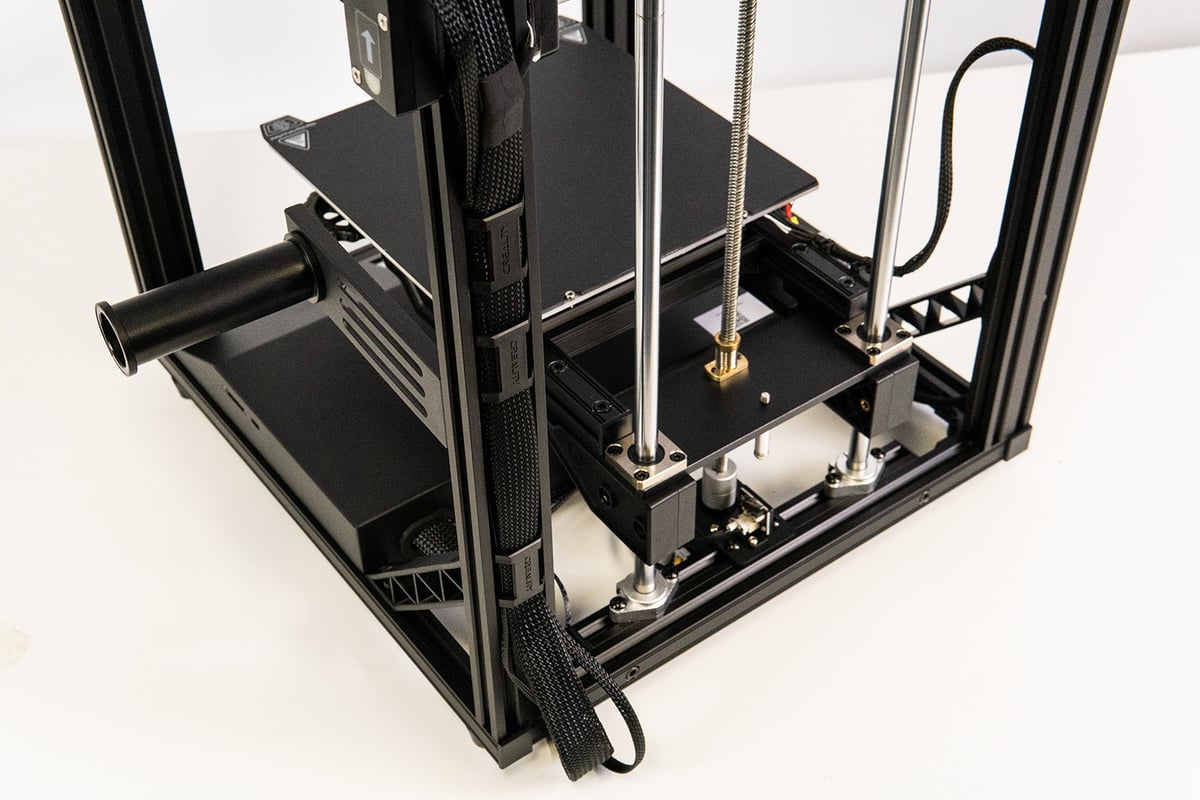
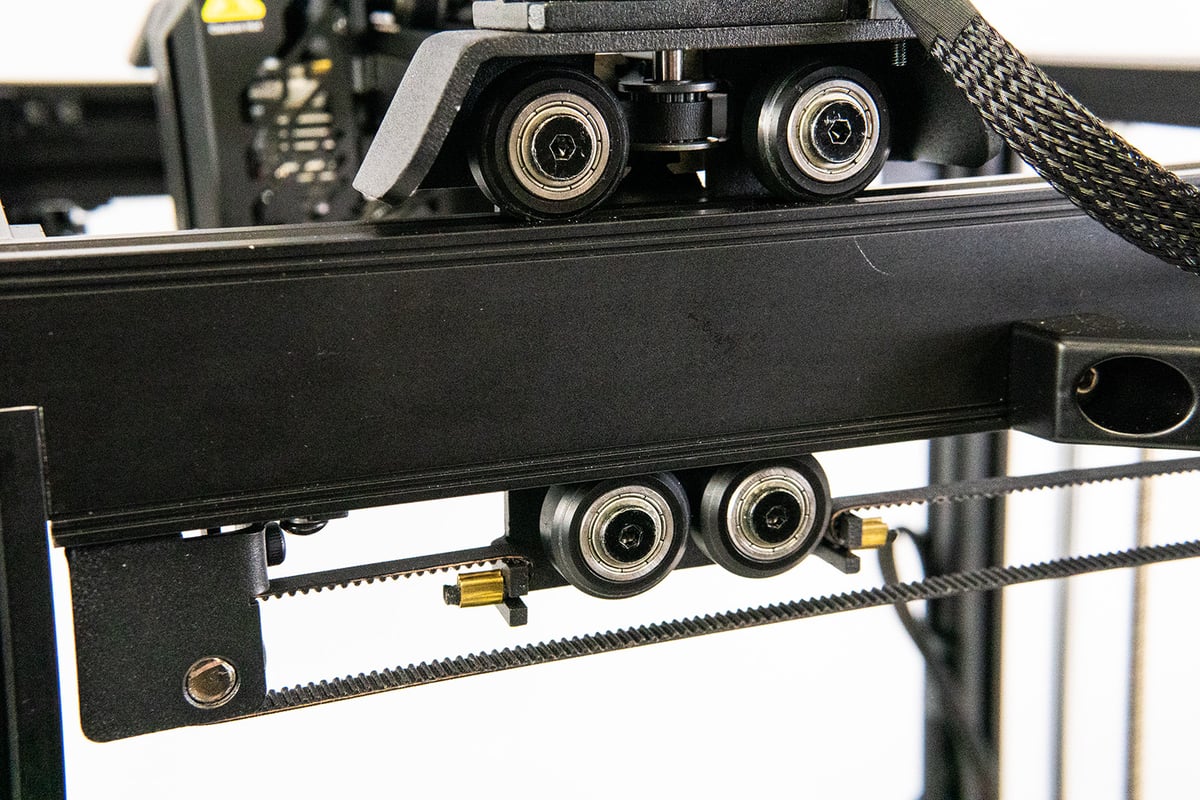
Upgraded Motion System
Creality also gave the motion system an upgrade. A trio of high-precision stepper motors power the X-, Y-, and Z-axes, and a steel transmission shaft connects and synchronizes the two Y-axis belts.
These all help with the fast printing speeds the Ender 5 S1 is set out to print with. Default print speeds are set to 120 mm/s and – according to Creality – even 250 mm/s for PLA. In testing, we’ve found the printer to achieve clean prints at high speeds, and you can even try your hand at running some of the other commonplace filaments at full throttle. We are talking PETG at 250 mm/s or even cranking up print speed for TPU prints.
PC-coated Spring Steel Print Sheet
Another item we’ve seen put to use in Creality’s S1 series is the PC-coated spring steel print sheet. On recent Ender 3 S1 machines, we’ve appreciated its ability to offer strong adhesion, but it can sometimes tend to offer adhesion that’s a little bit too good, and prints could be tricky to remove.
There’s an element of personal taste involved with print sheets like this. Some of us prefer PEI-coated, some prefer to use glass, and others will like the PC coating, as seen here. The good news is these things are easy to switch out and don’t cost the earth to change, so experimentation can be encouraged.
The fact that the heated bed reaches 110 °C, though, is a positive for everyone and should prove very useful when working with some of the trickier materials this hot end is be able to print with.
Further Features
Other notable features of the Ender 5 S1 include the following:
- Wi-Fi connectivity: Creality says you’ll be able to connect to its cloud app using Wi-Fi, but you’ll need to purchase the Wi-Fi box separately.
- 4.3-inch touchscreen: A color touchscreen is your UI on this particular printer. We’d like to see it have better menus than the Ender 3 S1 Plus we’ve tested, which left us a bit frustrated.
- Acrylic enclosure: Creality has said it will be offering an acrylic enclosure for the Ender 5 S1. Again it’s an optional purchase and does not come with the printer.
Tech Specs
General Specifications
- Technology: Fused deposition modeling (FDM)
- Year: 2022
- Assembly: Partially assembled
- Mechanical arrangement: Cartesian-XY-head
- Manufacturer: Creality
3D Printer Properties
- Build volume: 220 x 220 x 280 mm
- Feeder system: Direct
- Print head: Single nozzle
- Nozzle size: 0.4 mm
- Max. hot end temperature: 300 °C
- Max. heated bed temperature: 110 °C
- Print bed material: PC-coated spring steel sheet
- Frame: Aluminum
- Bed leveling: Automatic
- Display: 4.3-inch touchscreen
- Connectivity: SD card, USB
- Print recovery: Yes
- Filament sensor: Yes
- Camera: No
Materials
- Filament diameter: 1.75 mm
- Third-party filament: Yes
- Filament materials: PLA, ABS, PETG, Flexibles, PC, ASA, carbon fiber
Software
- Recommended slicer: Creality Slicer, Cura, Simplify3D, Repetier-Host
- Operating system: Windows, macOS, Linux
- File types: STL, OBJ, AMF
Dimensions & Weight
- Frame dimensions: 425 x 460 x 570 mm
- Weight: 12.1 kg
Featured Prints
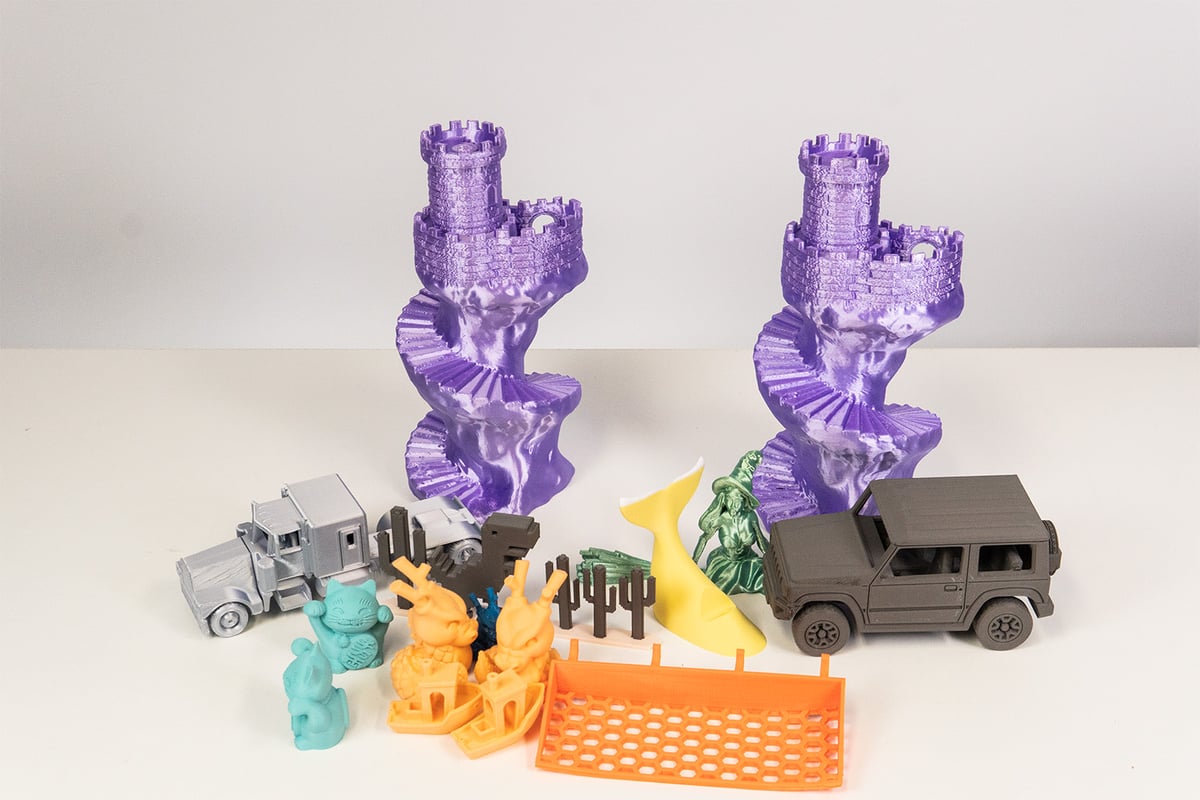
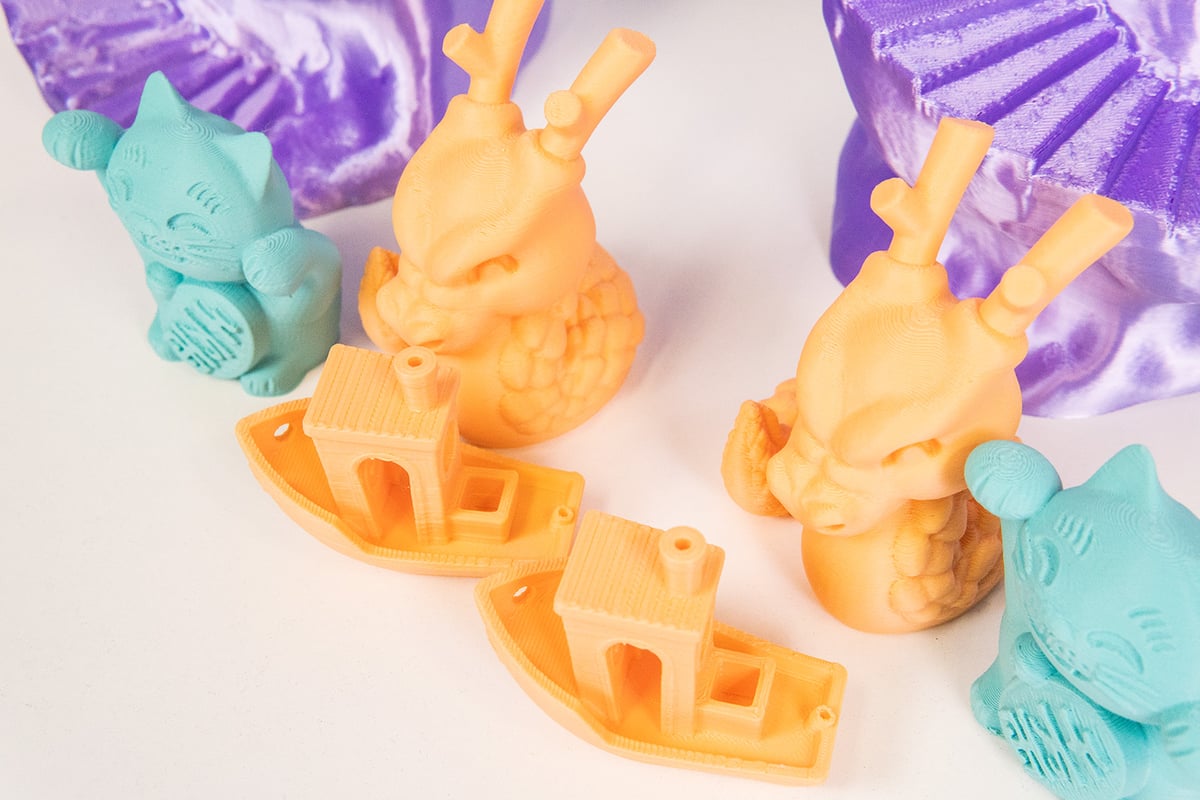
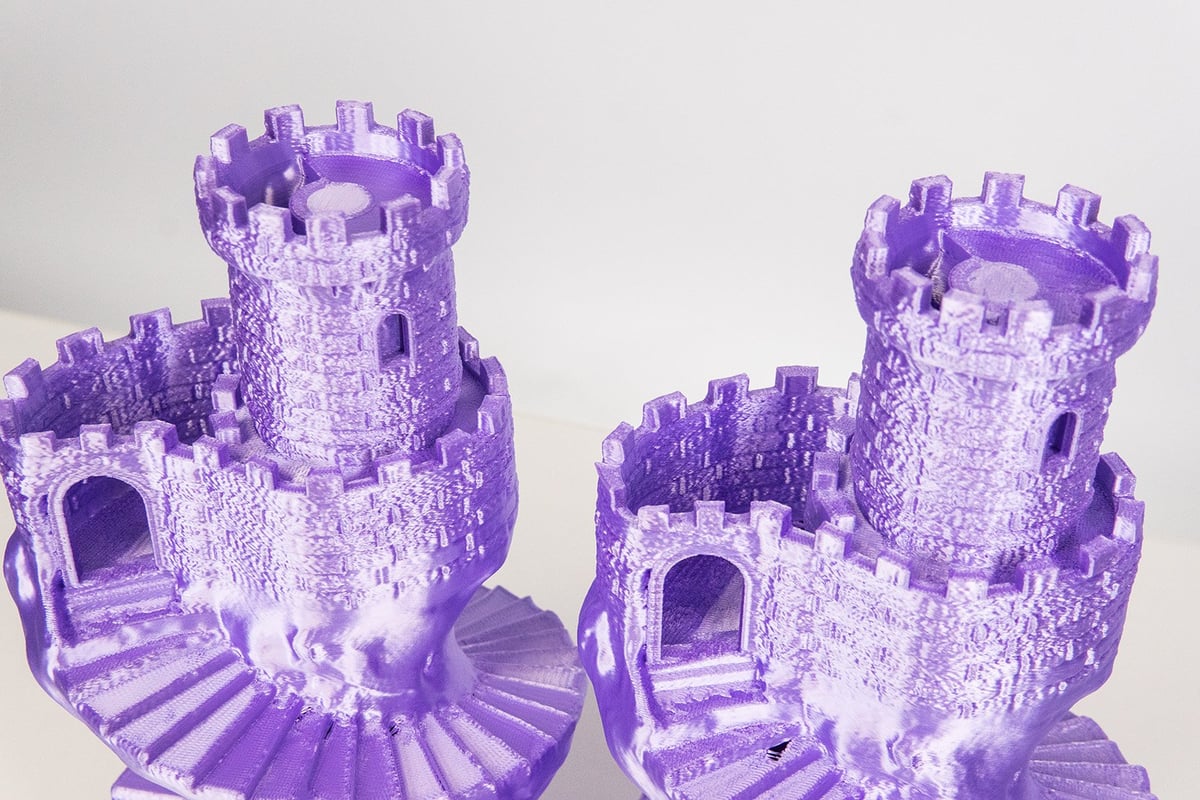
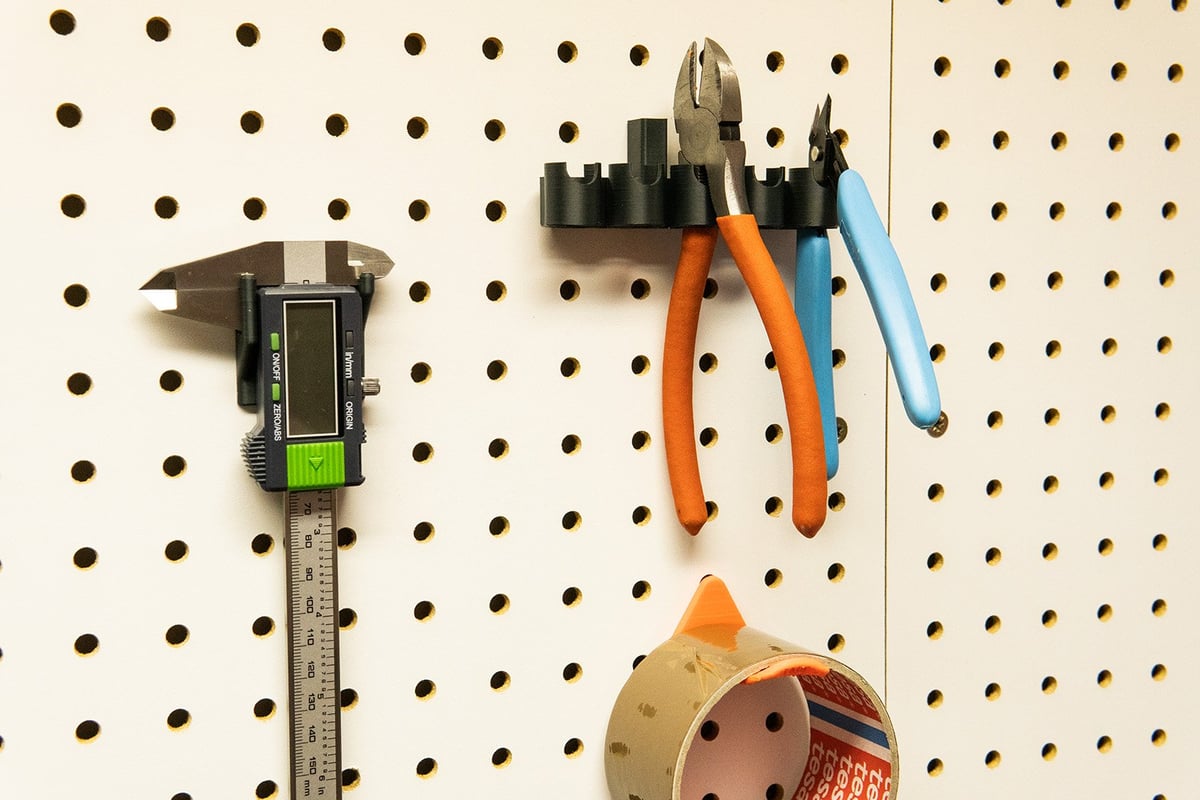
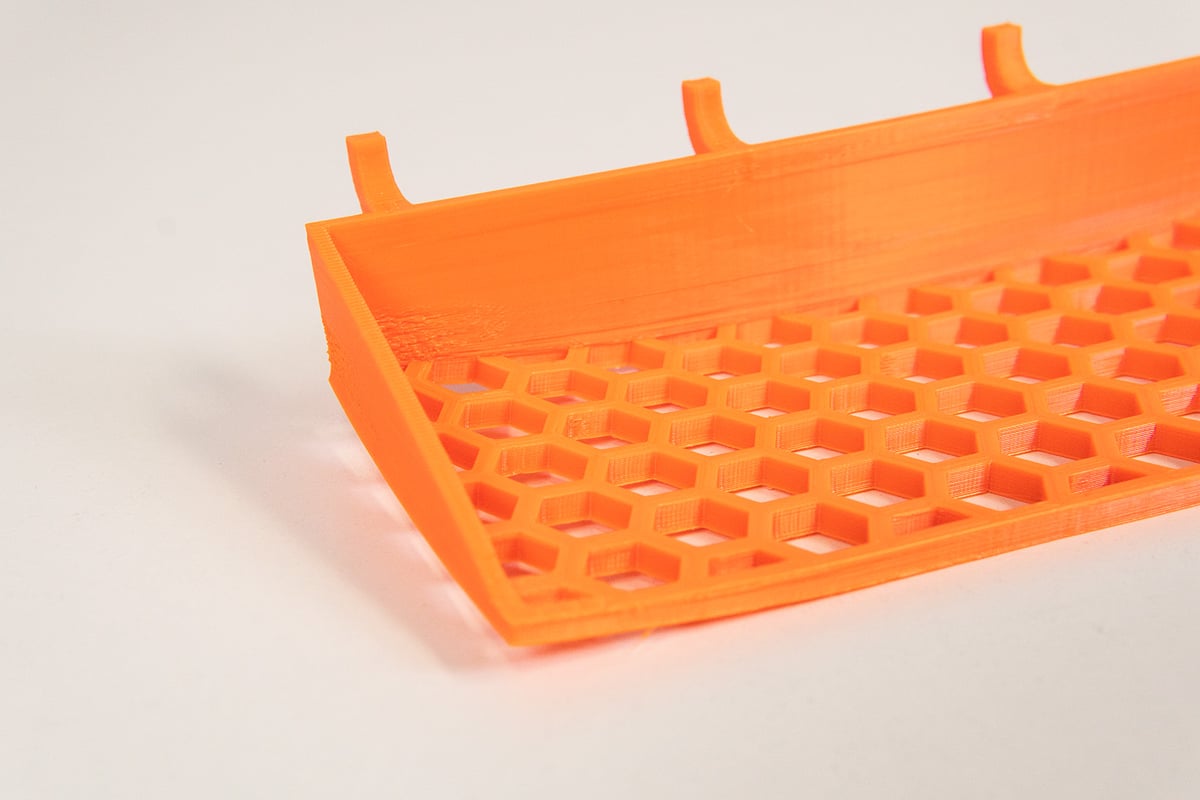
Like what you see? Here’s a list of the 3D models we printed over the course of the review.
- Witch Support Free Remix by robin3dverse, via Printables
- Chrome Dino with base by DraakjeYoblama, via Printables
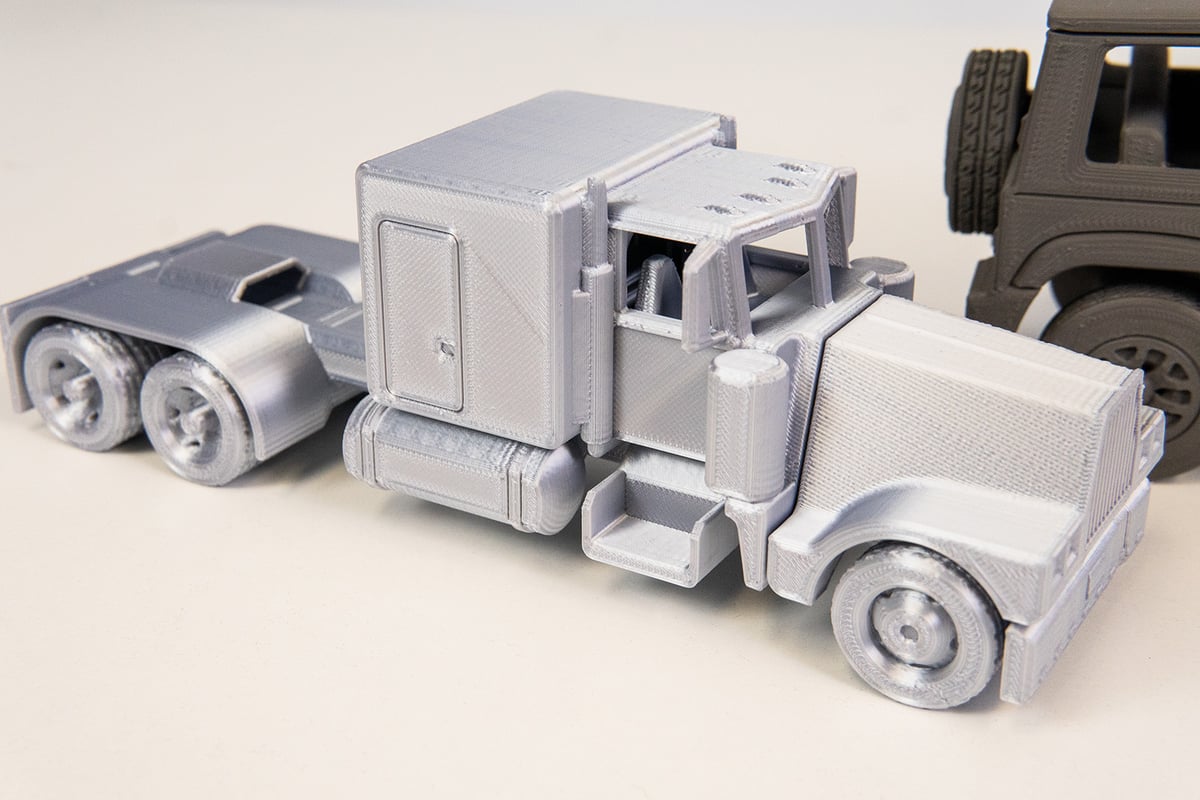
- Print in Place Peterbilt 359 Truck by Vit Budina, via Printables
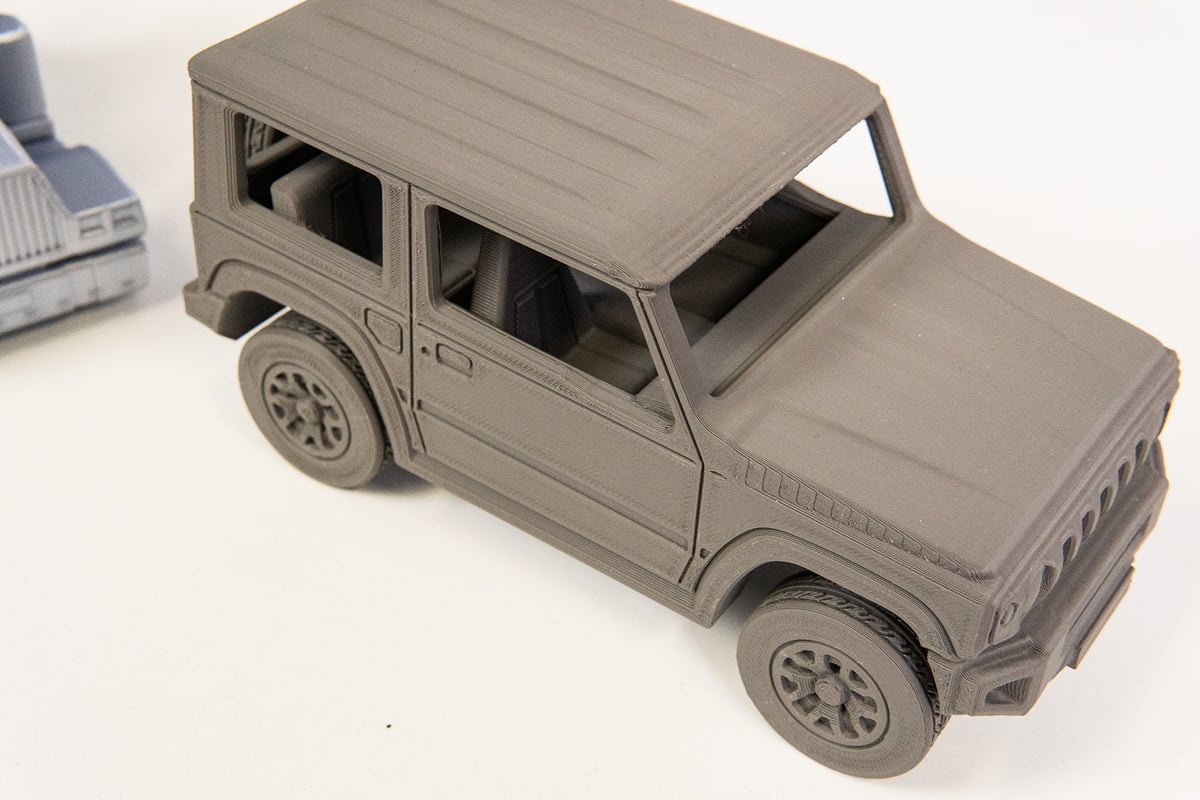
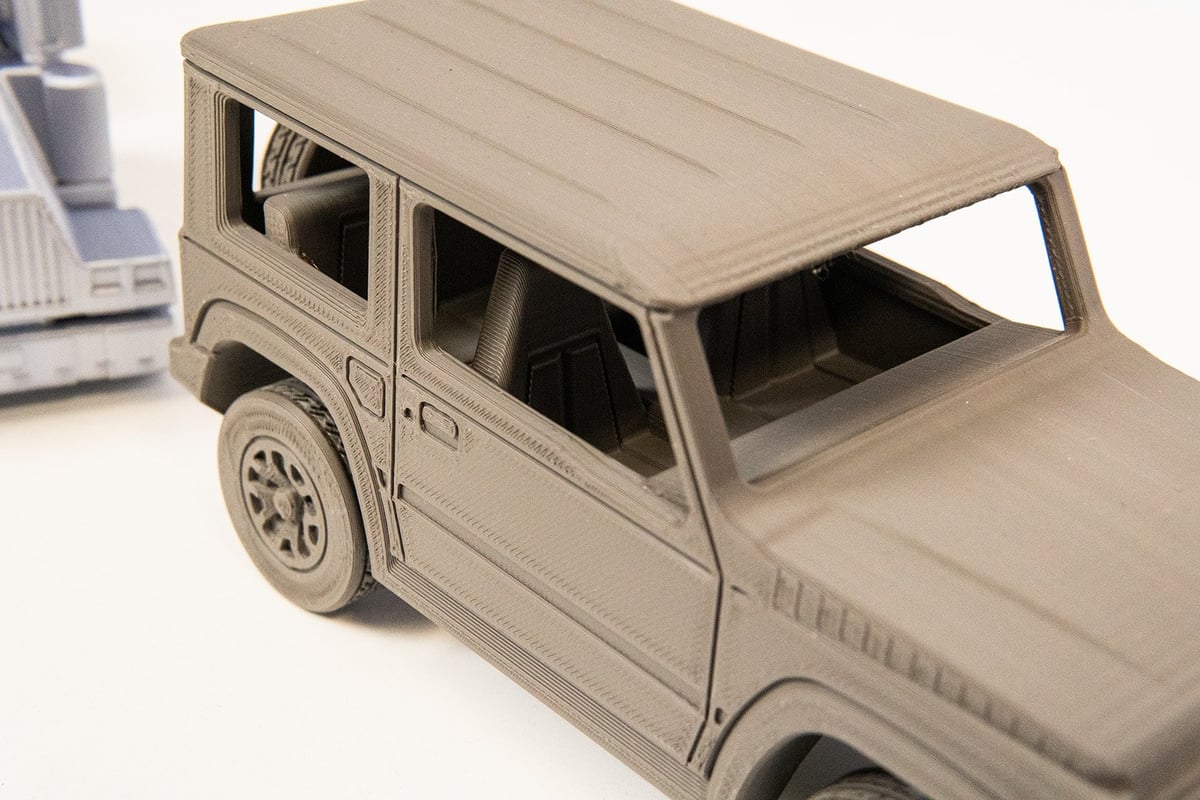
- Print in Place Suzuki Jimny by Vit Budina, via Printables
- Moby iPhone Dock by Moby_Inc, via Thingiverse
- Cali-Dragon, by McGybeer, via Printables
- Pegboard Vernier Caliper Holder by Klave, via Printables
- Pegboard Pliers Holder by Ricardocab, via Printables
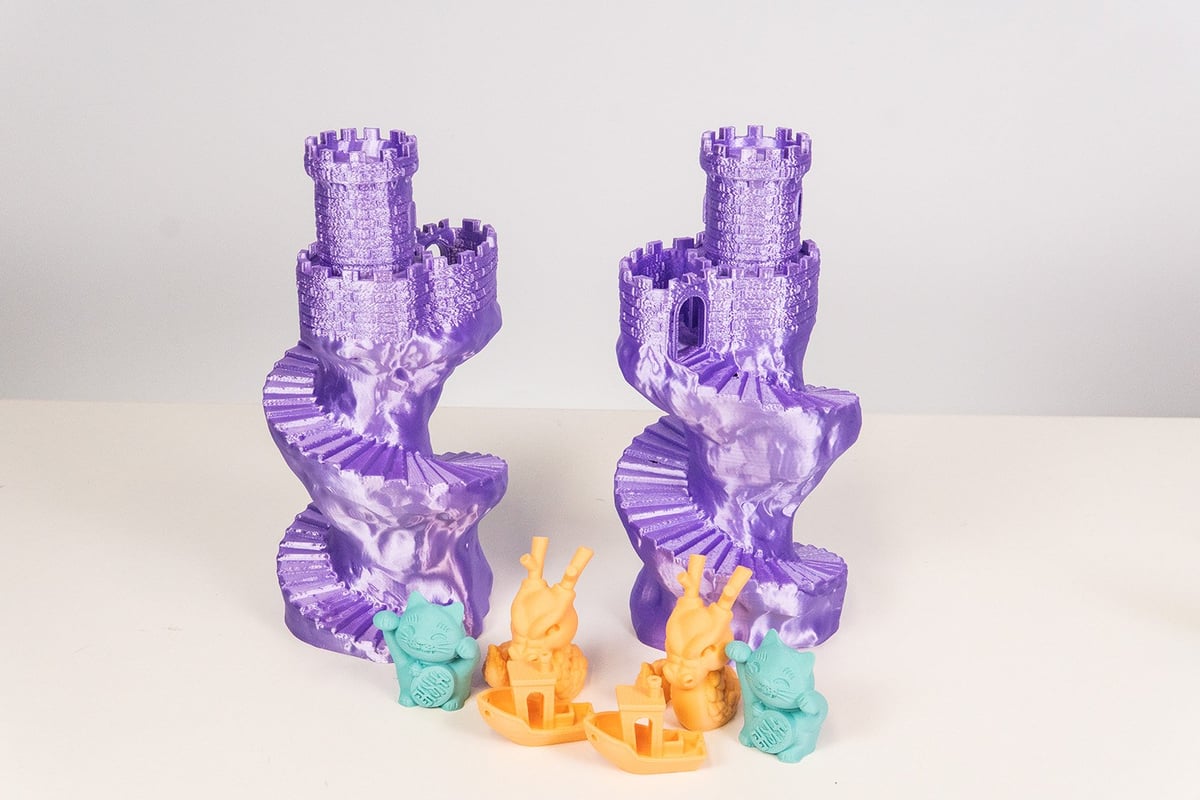
- Spiral Tower by Kijai, via Printables
- Peg Board Tape Holder by Bend121, via Printables
- Pegboard Screwdriver Holder by herbert, via Printables
Similar Printers
There are some printers just below we think are worthy alternatives to the new Ender 5 S1, but to skip all that noise and get to the best, head on over to our Best 3D Printers Guide.
Creality Ender 3 S1 Plus
Creality’s Ender 3 S1 Plus is roomier than the Ender 5 S1 at 300 x 300 x 300 mm, but it only has the standard Sprite direct extruder, which can only heat up to 260 °C. So, although you’ll have a bit more space, you’ll be missing out on access to some of the more exciting filaments out there. Your call!

Artillery Genius Pro
Although Artillery hasn’t been in the best form recently, the Genius Pro does offer automatic bed leveling, a high-temp direct extruder and a 220 x 220 x 250 mm build volume. It’s not the most expensive either, and with a bit of shopping, you can pick one of these up for $300, not a long way off half the price of the Ender 5 S1.
Voxelab Aquila S2
Another high-temperature direct extruder and 220 x 220 x 250 mm build volume FDM printer, Voxelab’s Aquila S2 can often be picked up on offer, and is often seen on our deals page. It wouldn’t be unusual to see this going for half the price or less of the Ender 5 S1, but it is missing automatic bed leveling.
License: The text of "Creality Ender 5 S1 Review: High Speeds, High Temps" by All3DP is licensed under a Creative Commons Attribution 4.0 International License.
CERTAIN CONTENT THAT APPEARS ON THIS SITE COMES FROM AMAZON. THIS CONTENT IS PROVIDED ‘AS IS’ AND IS SUBJECT TO CHANGE OR REMOVAL AT ANY TIME.