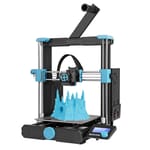
Creality Ender 3 S1 Pro Review: Worth the Upgrade?
Rating

Creality has beefed up all the specs for the Ender 3 S1 Pro in the hopes of creating a worthy upgrade to S1, but is it really worth it? Read on.
Creality’s Ender 3 family has had a lot of success lately. Despite having so many variations of what is essentially the same design, there seems to be even more added every few months.
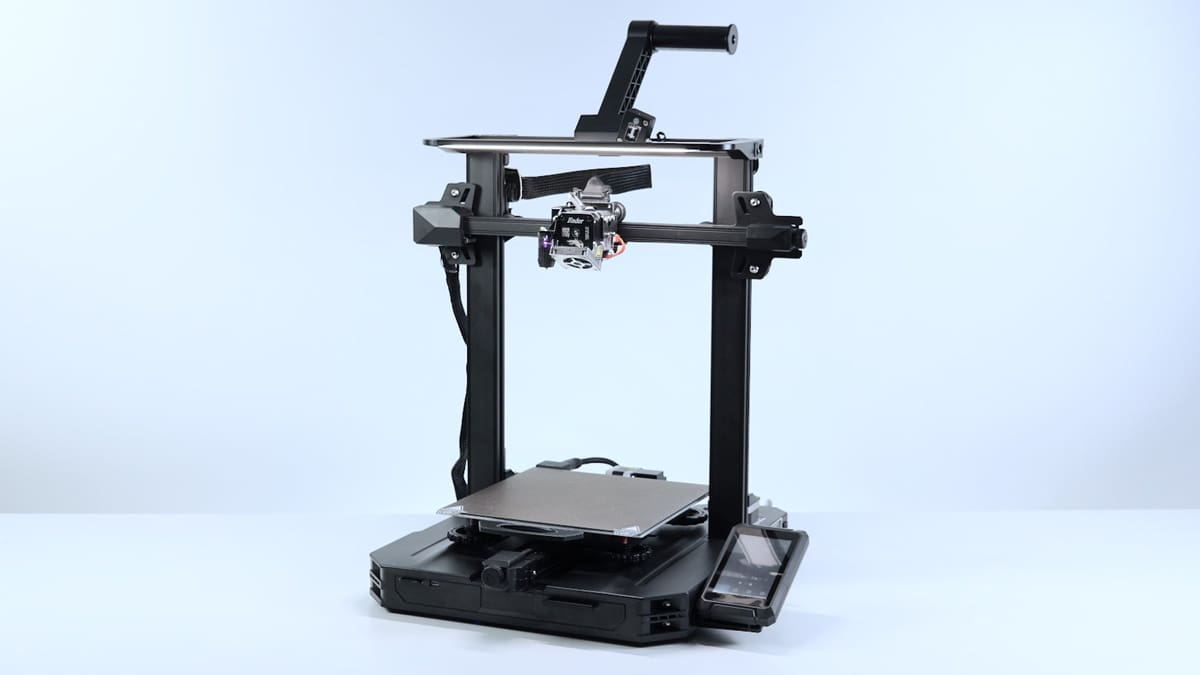
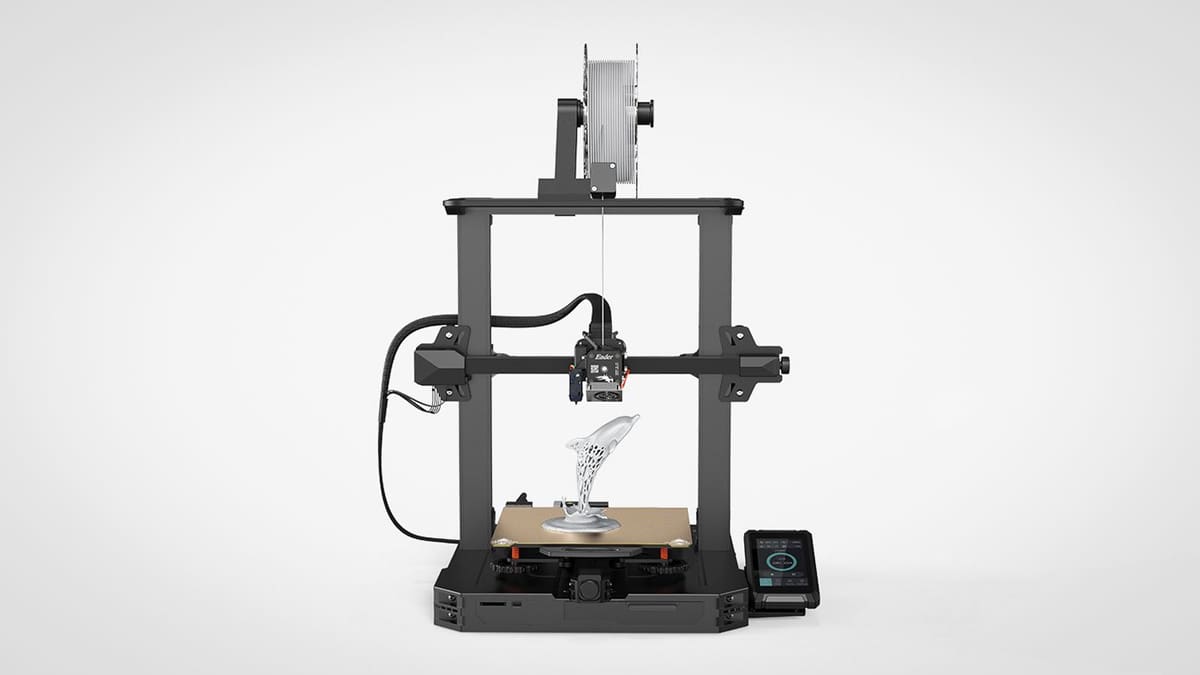
Creality has thrown everything in its arsenal at the Ender 3 S1. Spec-wise, it has all the makings of a legendary Ender 3 with its 300 °C capable Sprite Extruder Pro, dual Z lead screws, CR-touch bed leveling, PEI-coated build plate, and even a 4.3-inch touchscreen interface.

That said, 3D printers are finicky machines at the best of times, and delivering a flawless system that works out of the box is a tall feat, even for a company like Creality.
To test its pedigree, we put the S1 Pro through its paces, pushing the machine to its limits with super-long prints and complex designs.
Does the S1 Pro stand above all other printers in the Ender 3 series, or is it one of those over-hyped 3D machines that Creality no longer wants to talk about (*cough Ender 7 cough*)? Read on to find out.
Verdict
Pros
- Prints beautifully and reliably
- All-metal Sprite Extruder Pro
- PEI-coated spring steel sheet print bed
Cons
- Not enough attention to the experience
- No Wi-Fi and USB support
- Interface software needs some tweaks
Overall, the Ender 3 S1 Pro’s specs make it a superior machine next to the standard S1. The Sprite Extruder Pro, with its extra temperature headroom allowing the hot end to reach 300 °C, performed well through our tests and printed pretty much everything we threw at it that didn’t need an enclosure. The PEI-coated build plate also performed exceptionally, keeping standard materials in place with relative ease. Together, these two features are the best part of this machine.
However, we can’t blindly recommend it over the S1 for a few reasons, most of which have to do with the shabby approach to the quality of life features included on the Pro.
The 4.3 touchscreen, for one, is the sort of luxury feature users want in a modern 3D printer, but the implementation and overall user experience need some more work. Its limitations are in your face, and often force you to work around them — which should never be the case.
Not to mention the flimsy SD card locking mechanism that broke easily when we tried to insert the SD card the wrong way around and auto-bed leveling that requires far too much attention. These don’t break the printing capabilities of the printer outright, but their quirks leave a lot to be desired.
These are minor issues overall but, for a printer dubbed “Pro”, a little more effort could have been made to go beyond the expected and superficial. The light is an example here, which we feel is an unnecessary addition. It looks fancy, but because of its position, it is useless if you plan to use it for time-lapses.
All that said, the Ender 3 S1 Pro is still excellent at reliably delivering great prints if you are willing to work around its issues.

The Tech
Heat and Volume
Ender 3 S1 Pro offers a build volume of 220 x 220 x 270 mm — the same volume as the S1 — and comes with a Sprite Pro full-metal extruder capable of handling temperatures up to 300 °C. Technically, you could print carbon fiber with the S1 Pro very easily, but you will need to replace the brass nozzle with something hardened. Hardened steel nozzles don’t cost all that much more, and the spare nozzle included could very well have been one.
The print bed can heat up to 110 °C. However, during our tests, the print bed temperature was consistently 8-10 °C lower than the displayed temperature for any target temperature set below 85 °C. Above 85 °C the bed seemed to reach temperatures accurately, only varying towards the bed’s edges up to 10 °C. Once adjusted for the heating discrepancy, the bed performed well.
From the S1, With Love
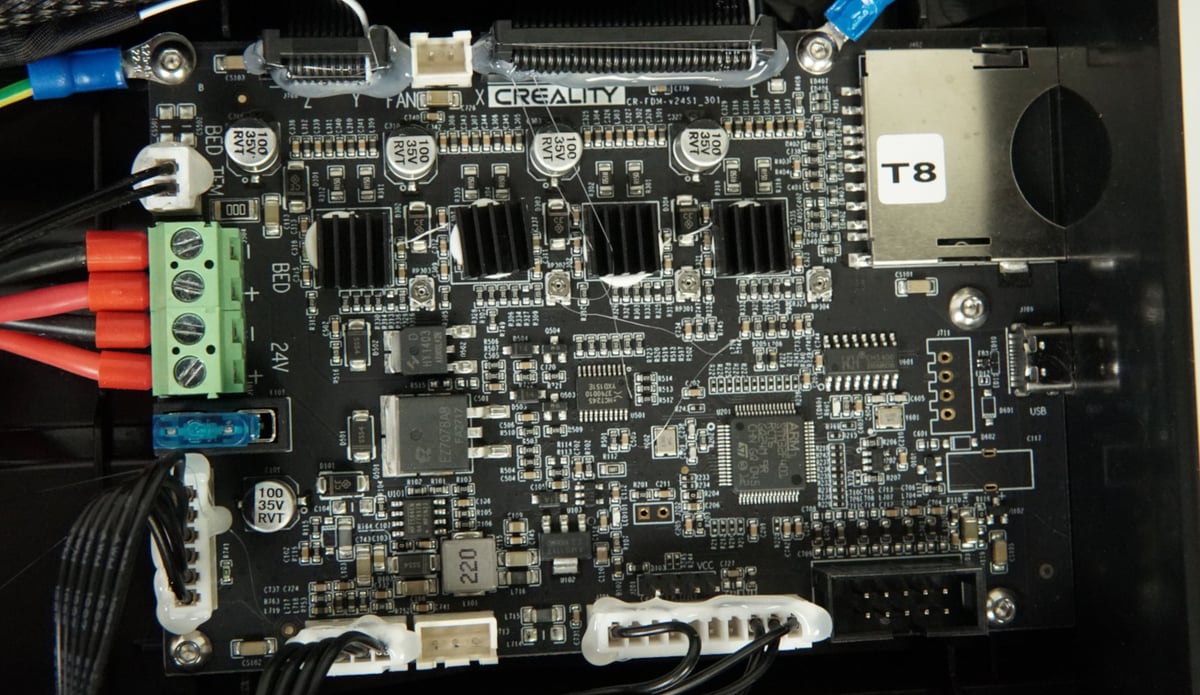
As the name suggests, the S1 Pro takes the desirable Ender 3 S1 feature set and tacks a few extras on. They both have dual Z-axis lead screws that share a driver to provide stability by eliminating X-axis sag, resulting in better prints. The CR Touch bed-leveling probe also makes a comeback in the Pro, a tried and tested component along with the CR-FDM-v2.4S1_v301 motherboard and Trinamic TMC2208 drivers, which are very effective in reducing stepper motor noise. The beloved tool drawer makes another appearance here, too, making good use of the blank space under the printer.
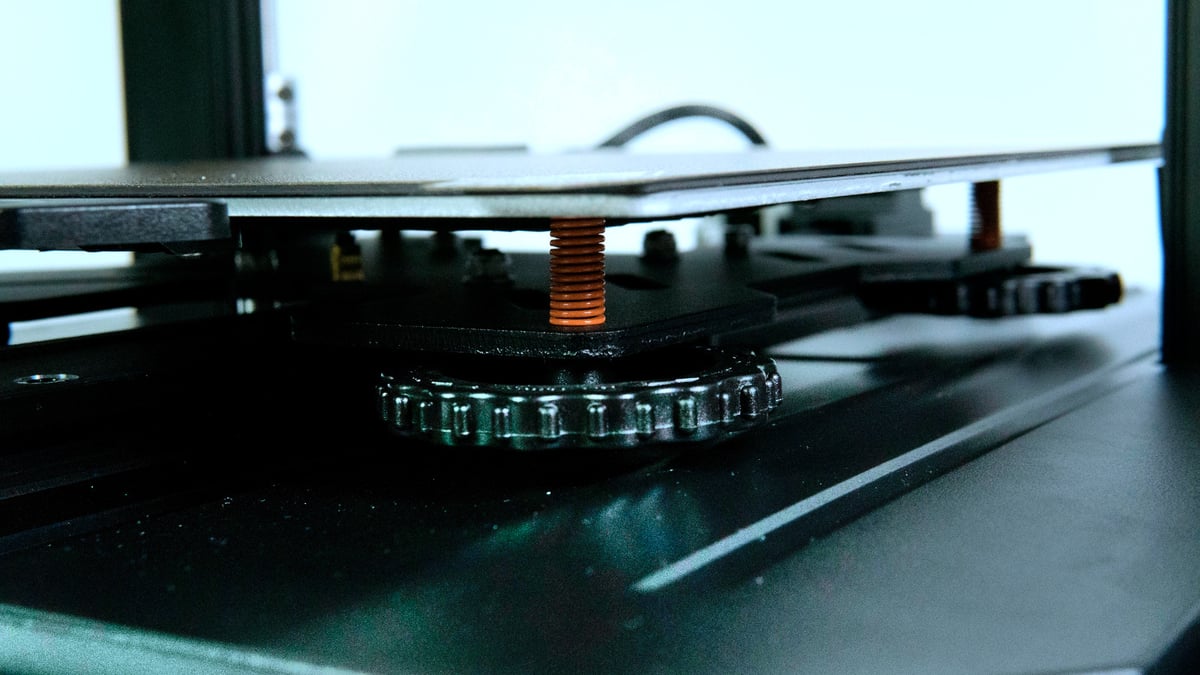
Automatic Bed Leveling
Creality brings both the bed knobs and CR Touch to the S1 Pro, which is a great option to have in case the automatic leveling isn’t doing its job. However, all is not rosy with this setup. If you plan to get a super-accurate first layer using the method mentioned in the manual, it may not work.
In the manual, Creality says you need to first automatically level the bed, then set a Z offset using the paper method, and it’s done. Unfortunately, this didn’t work for us. The printer we received for review had a lower bed in its center than its four corners, and the leveling process did not give us the best first layer even after updating the firmware and rerunning the automatic leveling routine.
The printer seems to not use the mesh that it supposedly creates with the automatic leveling process. We got the best results by running auto leveling first, then adjusting the Z offset, and then going through the manual leveling to get as many points on the bed as level as possible. We then reran the auto-leveling process so, even if the mesh is ignored, you still have a good chance at getting away with a decent first layer.
The problem here appears to be hardware quality control. We went as far as to install Klipper on the machine during our testing, hoping the issue would be fixed. Other S1 Pro users have come to the same conclusion, with some users detailing their trouble with auto-leveling in a Reddit post on bed leveling issues. At least one user found a twisted X-axis to be causing the problem.
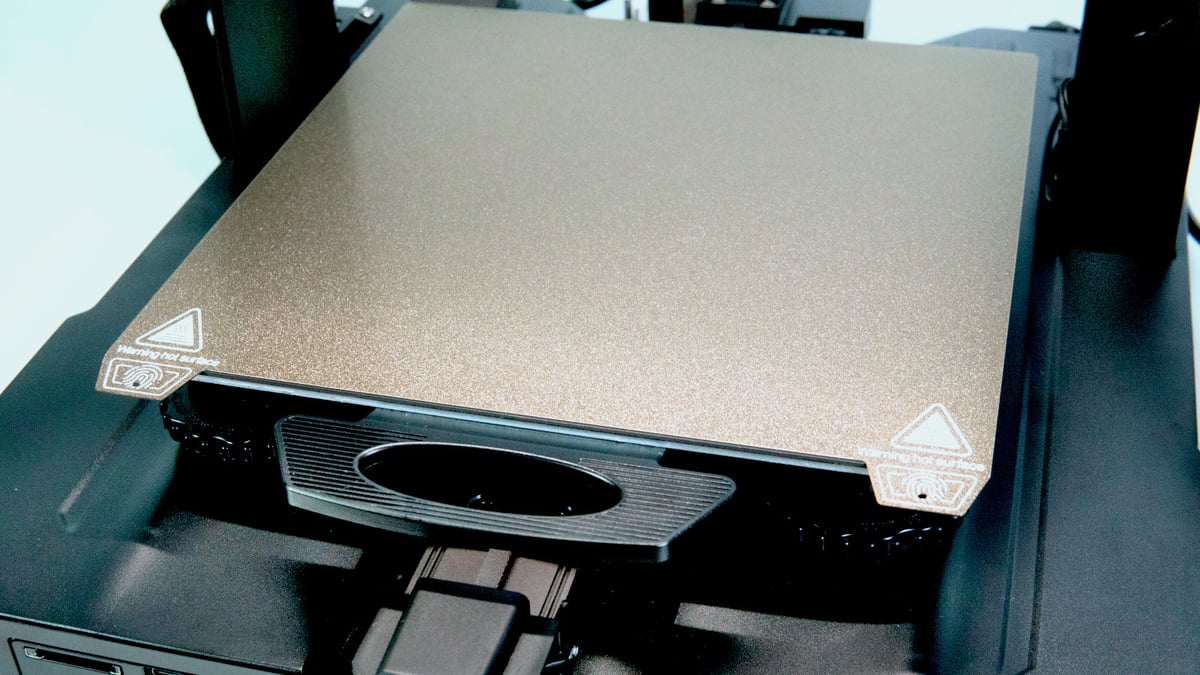
PEI Spring Steel Build Plate
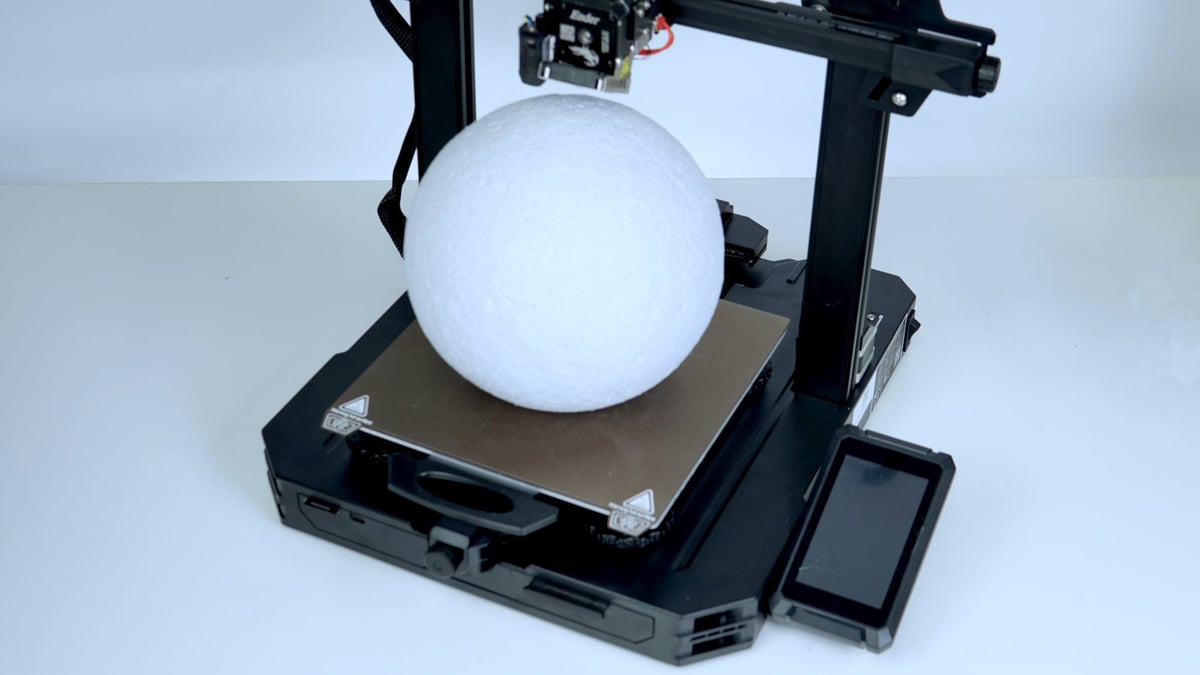
The S1 has a PC-coated build plate, but for the S1, Creality has sprung for the PEI-coated one. The build plate is magnetic and sits firmly in place. It has a rough texture but seems reflective under the overhead light on S1 Pro. A double-sided plate would have been nice here, offering a smoother print surface to users if needed. Regardless, the build plate is top-notch — providing just enough adhesion to keep parts in place while printing. Upon cooling, the prints pop off and, most of the time, you don’t even need to flex the plate.
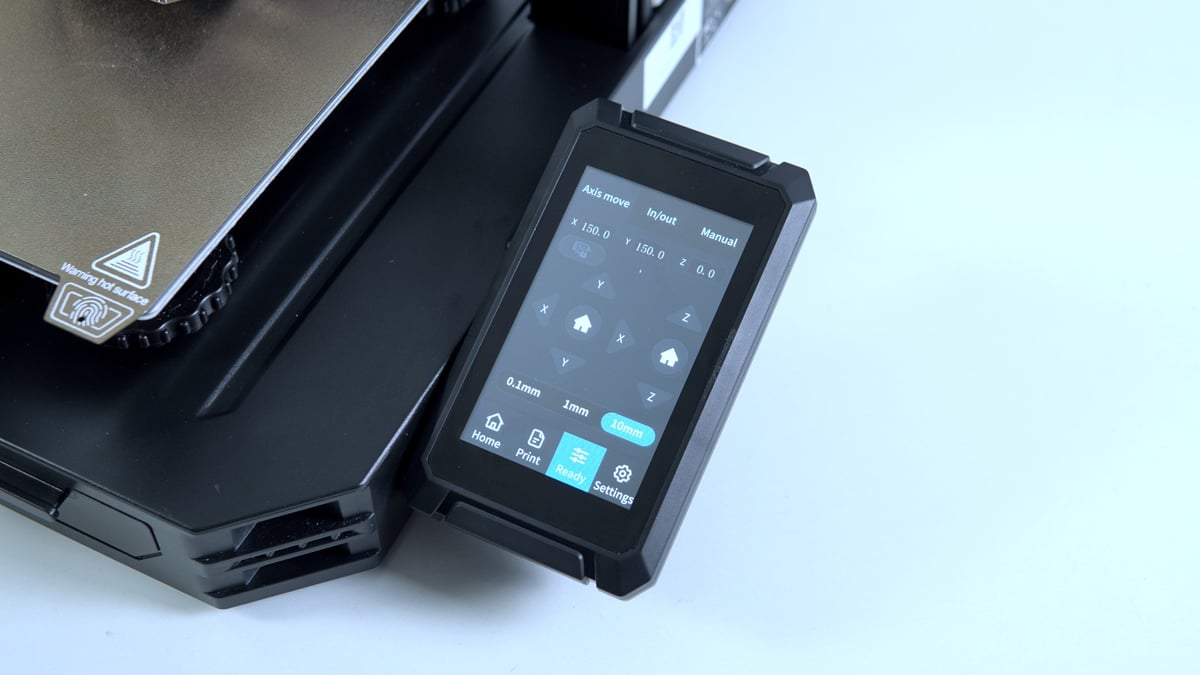
4.3-inch touchscreen
The touchscreen is a nice upgrade from the knob-controlled interface on the S1, with a pleasant and intuitive menu system that has everything you need easily accessible. While printing, it gives you access to only the settings you probably need, including nozzle temperature, bed temperature, print speed, and Z offset, along with the option to pause or stop.
The interface is also available in several languages. You have the usual English and Chinese, but can also choose from German, Spanish, French, Italian, Portuguese, Russian, and Turkish.
Strangely, the screen is not optimized for long file names, like the ones Creality’s slicer automatically gives to all its sliced files. The maximum character count on screen is a measly 20 characters — anything longer than that ends with ellipses. This problem is in both the file browser and the information displayed while printing.
You also can’t have many files on your SD card, thanks to an arbitrary cap of four pages. That is a maximum limit of 20 of the latest items displayed. A workaround could have been to put some files into a folder, but the machine doesn’t read folders from your SD card. You can work around these issues, but the point here is this isn’t a pro experience.
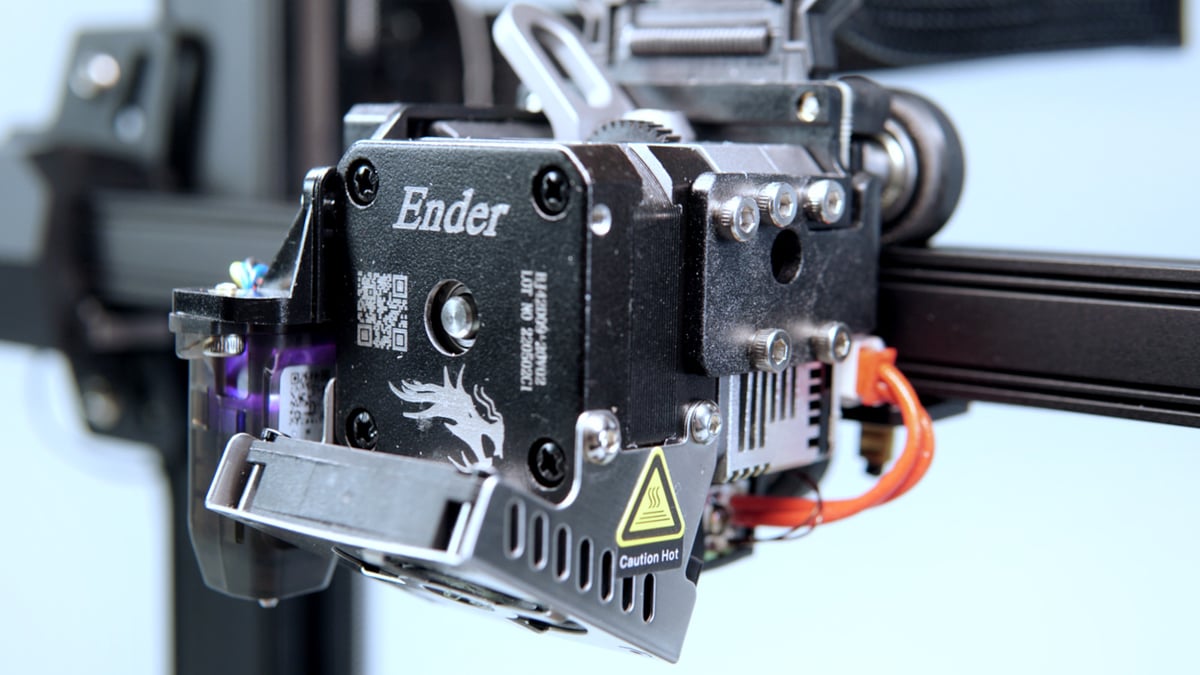
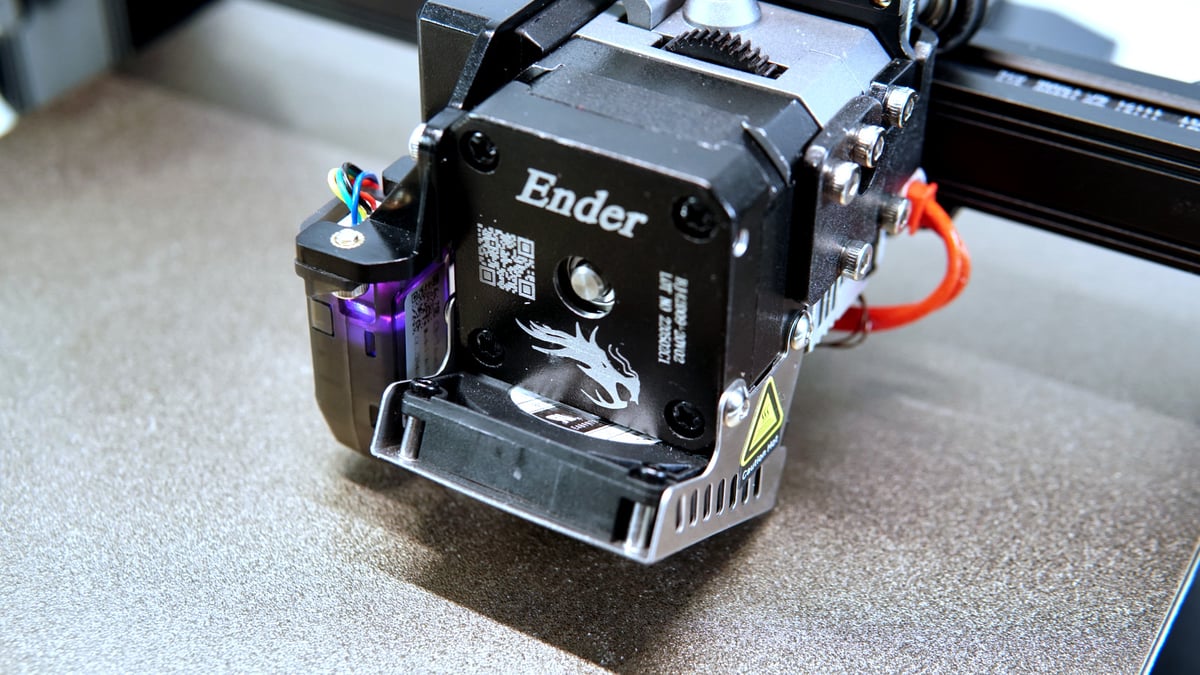
Sprite Extruder Pro
Creality has struck gold with the Sprite Extruder Pro. It weighs in at 334 grams and is almost entirely metal. Being an all-metal extruder with no Teflon tubing means the nozzle can safely reach temperatures up to 300 °C.
The extruding mechanism has 80 N of force which we found to work well with every filament we tested, offering sufficient torque and preventing blocks. However, we did get some TPU stuck in there. This incident was mainly our fault for loading TPU after ASA. ASA requires a much higher temperature, and we recommend clearing the nozzle before switching to low-temperature flexible filaments like TPU. Our blatant disregard for the rules clogged our nozzle and got the TPU stuck in the extruder.
But, our mistake gave us an opportunity to disassemble the Sprite Pro, and it was a treat to do so. The extruder is a well-thought-out, easy-to-disassemble bit of tech. Keeping track of the screws was a bit tricky, but we managed by taking pictures every step of the way.
The extruder’s design is the key to its success. There is ample focus on cooling, with ample part fan output to instantly cool the molten plastic.
As mentioned, the extruder is somewhat heavy, and this does produce a bit of ghosting. The effect can be reduced by slowing down your printing speed, but we don’t recommend it because the ghosting is negligible. The ghosting is likely kept in check thanks to the base of the printer, which is good at keeping the machine grounded. So, unless you need your prints to look flawless, it is not worth wasting time on functional prints.
Printing & Usability
Assembly and accessories
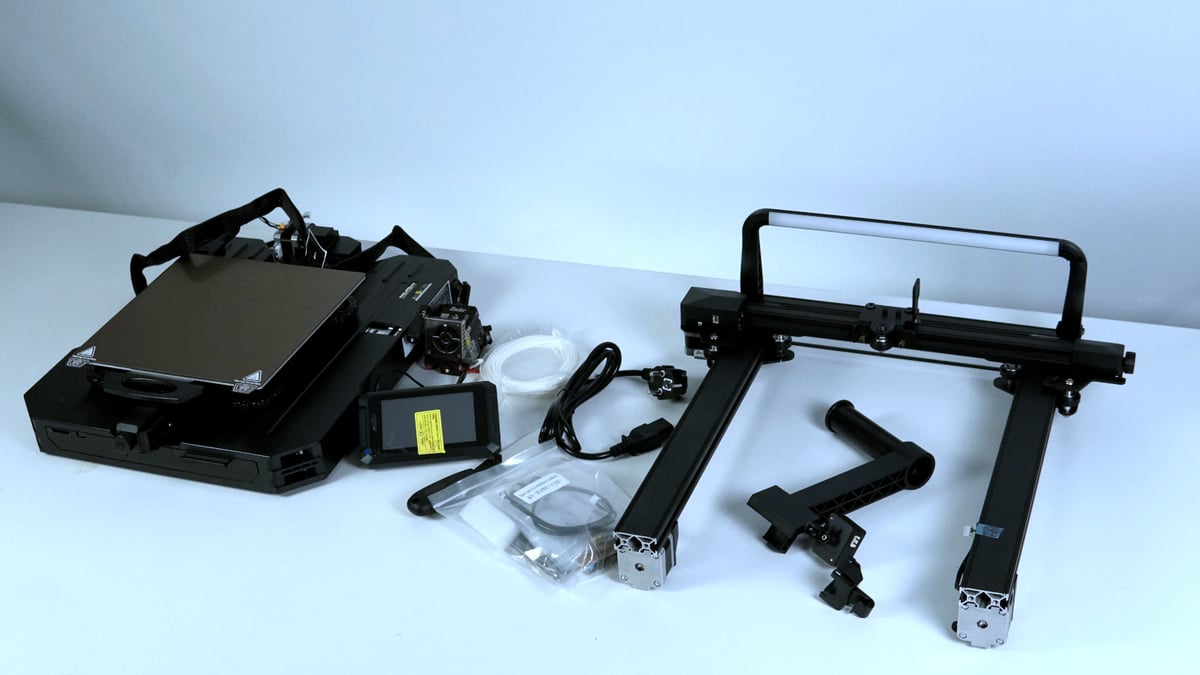
Setting up the Creality Ender 3 S1 Pro was very straightforward. Instructions provided in the manual were to the point, and all screws came in marked packets, making them easy to identify. The printer comes mostly assembled, and it took around fifteen minutes to get it fully assembled and ready to go. The included SD card has an instructional video that offers a nice visual guide of what needs to be done.
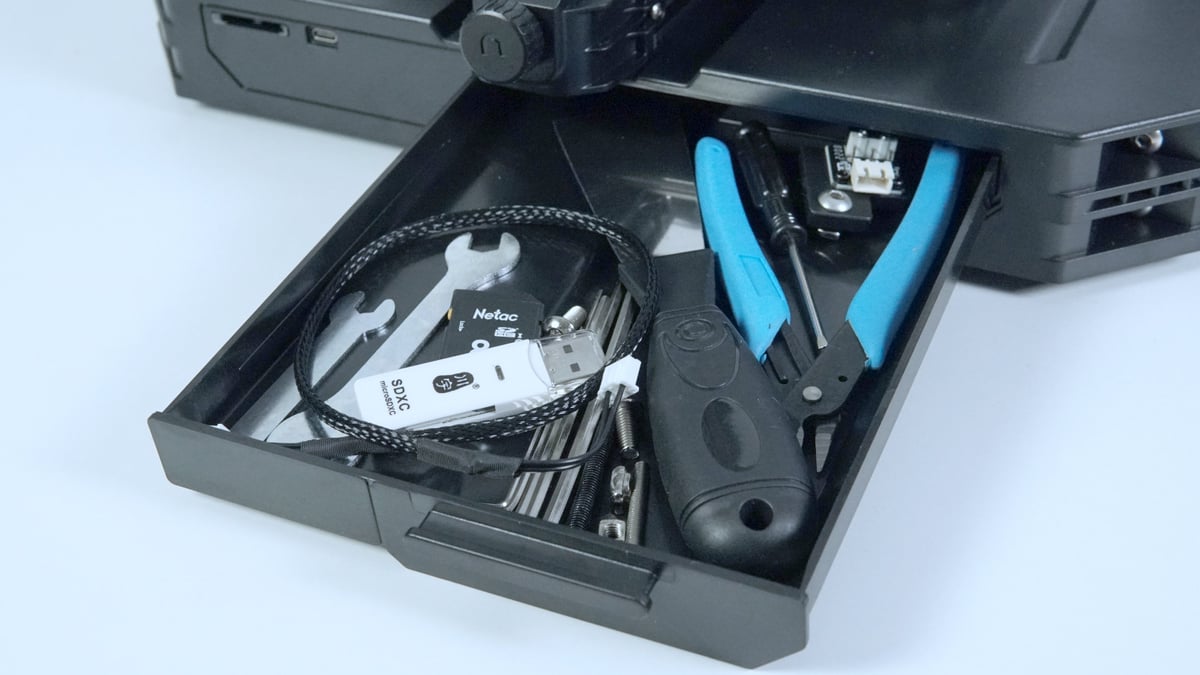
All the tools required for assembly are in the package, as are the SD card and a roll of white PLA filament. A dedicated nozzle removal tool isn’t available, and you will have to use your personal tools for that. The S1 Pro comes with a lovely little drawer, and all your tools can fit in if you arrange them well. It is an excellent use of empty space.
Once assembled, the Ender 3 S1 Pro is very sturdy — there isn’t much wobble in the gantry. The wide base, though made of plastic, is thick and heavy enough to ground the printer, making it very stable.
The printer doesn’t come with a handle which would make it easier to transport, but it does come with a file for one in the SD card, so you can print a handle if you need one.
The S1 Pro’s build quality is very good overall, but the SD card slot seems to be a weak spot. The slot’s little clicky locking mechanism can easily break if you insert an SD card the wrong way.
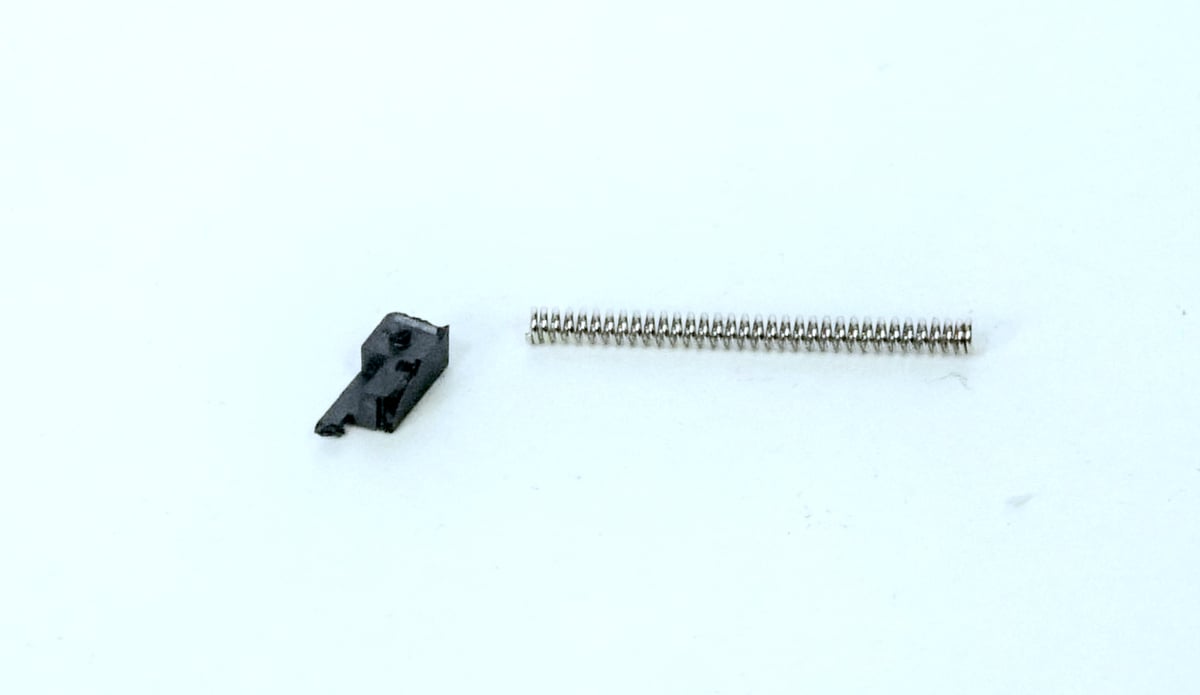
Even when intact, it doesn’t necessarily lock the SD card in; you can easily pull the card out. Once broken, the tiny spring and plastic bit cannot be repaired as it is part of the motherboard unit. The SD card’s performance also gets a little iffy, and you have to wiggle the card to get it to work.

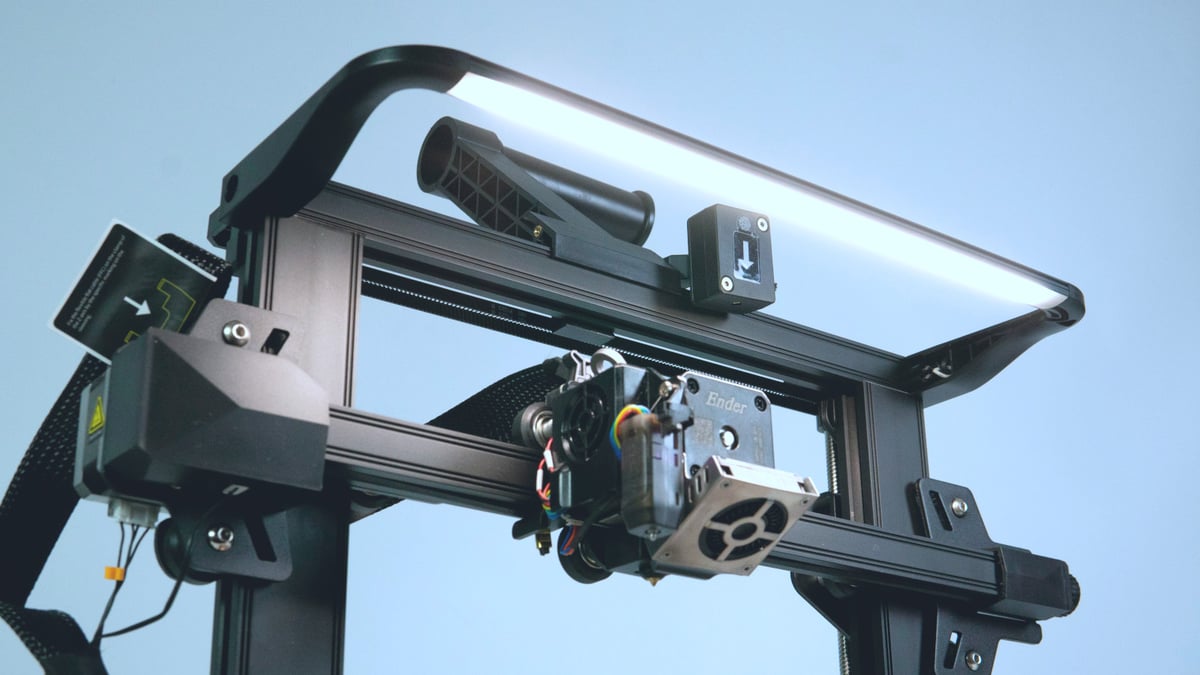
Lighting
One of the new features of the S1 Pro is a nice little LED light bar on the top. The printer’s lighting looks very fancy, but it is not built to support the weight of the machine. Chances are, at some point, the machine will accidentally get picked up by the light fixture because of its proximity to the top of the gantry.
The lighting is also on the harsher side and directed from the top. So, while it is great for keeping an eye on your print in a dark room, it might not be the best if you plan to shoot time-lapses or any videos. The harsh light from the top shows layer lines more prominently and produces dark shadows on the bed.
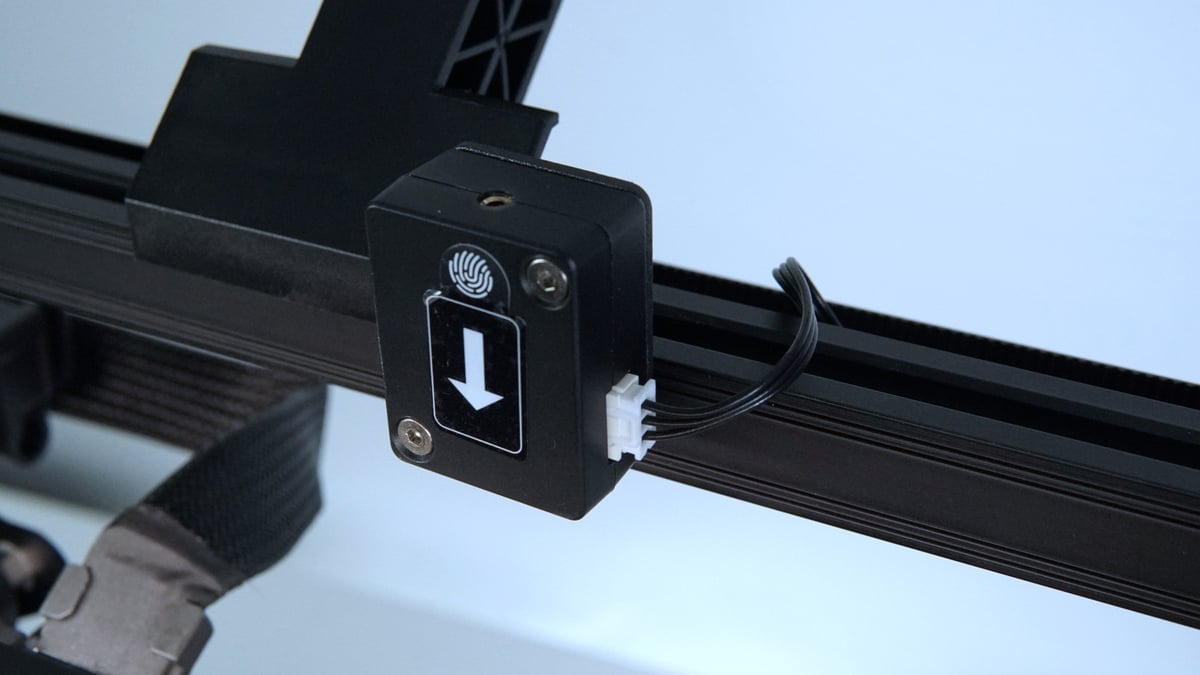
Fortunately, the light comes with a handy switch on the right side which makes it easy to turn on or off. There is no option to trigger it remotely, which would be great if the machine had Wi-Fi.
Updating
Like any well-supported printer, the Ender 3 S1 Pro gets regular updates from Creality. The latest at the time of writing added support for its laser engraver attachment.
However, the upgrade instructions provided in the downloaded firmware folder are less than adequate, failing to even mention that the MicroSD slot for the screen is inside its casing, which you have to open up.
You must also update your screen and firmware for the machine to work correctly. If the screen seems to lag after updating, just install the latest screen firmware.
Overall, updating the machine is not the most pleasant of experiences.
Experience
The printing experience with the Ender 3 S1 Pro wasn’t as smooth as we had hoped. It does have its quirks, especially with the leveling of the bed. Once we figured out the right way to get the printer leveled, printing on it was much better.
While we did enjoy using the touchscreen, the software is a little buggy. There were more than a few instances where the screen lagged on us and even froze once mid-print. A hard restart rectifies the problem, but updating the software did not solve the issue.
We appreciate that the S1 Pro uses a full-sized SD rather than a MicroSD, but it would have been more beneficial for the user if Creality switched to USB drives. Incidentally, it is also worth noting that the USB Type-C port on the machine cannot read a USB Type-C drive, which is a missed opportunity, in our opinion.
That said, the Ender 3 S1 Pro delivers where it matters, with great prints. You can’t fault it in this aspect but, as an overall experience, it wasn’t polished enough to deserve to be dubbed “Pro”. Perhaps using the term Neo instead of Pro would have tempered expectations a little better.
These quirks in the S1 Pro will be a problem for most novice users, but learning how to solve these issues is part of the charm of 3D printing. You have to take the time to tweak the printer to get the best out of it. While this isn’t the best experience, it is a brand of printer that a lot of the community know about, and it is easy to get all the help you need — especially on places like Reddit.
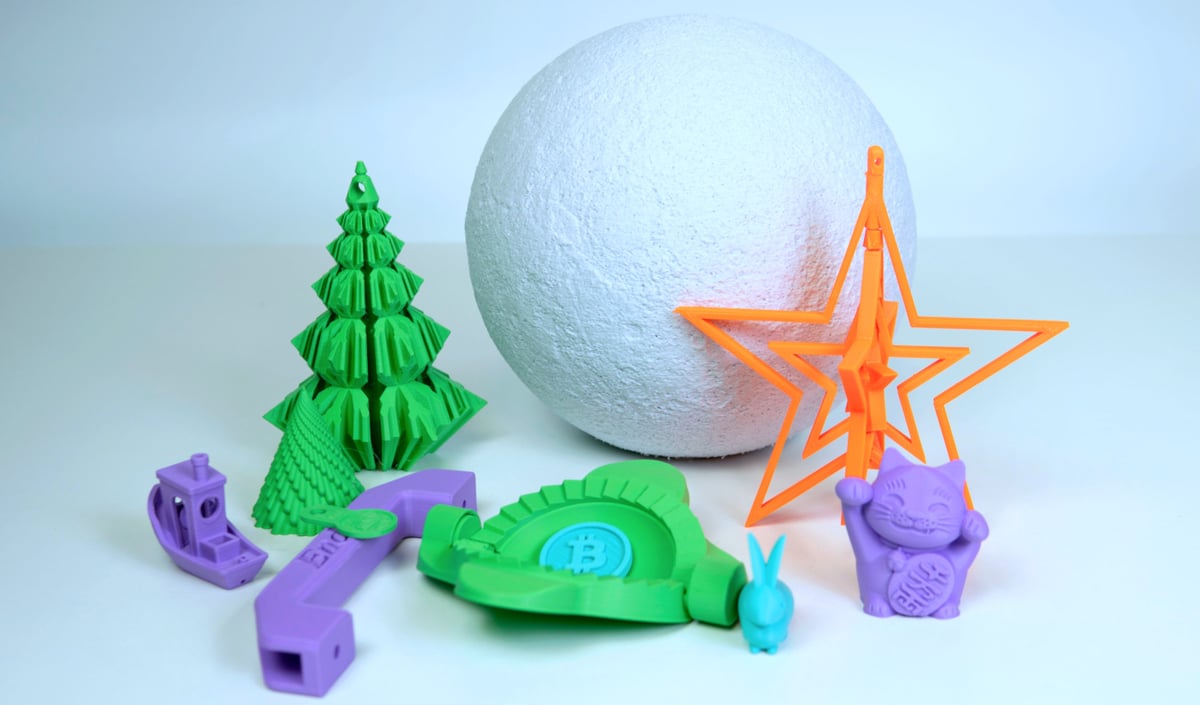
The Prints
Once set up properly, almost everything we threw at the Ender 3 S1 Pro printed well. We did have some problems printing ASA and Nylon, but that was more to do with the temperature in our enclosure.
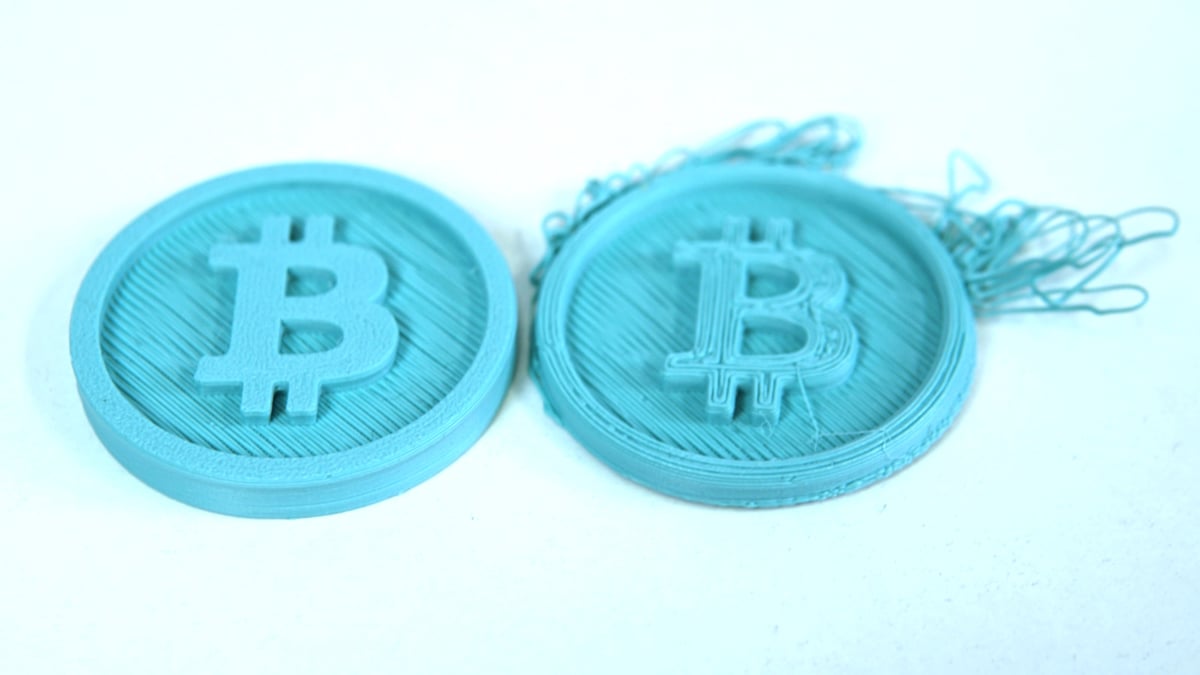
We started with the pre-sliced prints on the SD card that came with the machine, first 3D printing the Bitcoin. The coin was small, and it was the first time we encountered a nozzle distance issue with the printer. Our first successful print of the coin, if you can call it that, was not very good. However, after manually leveling the bed, we achieved an acceptable result.
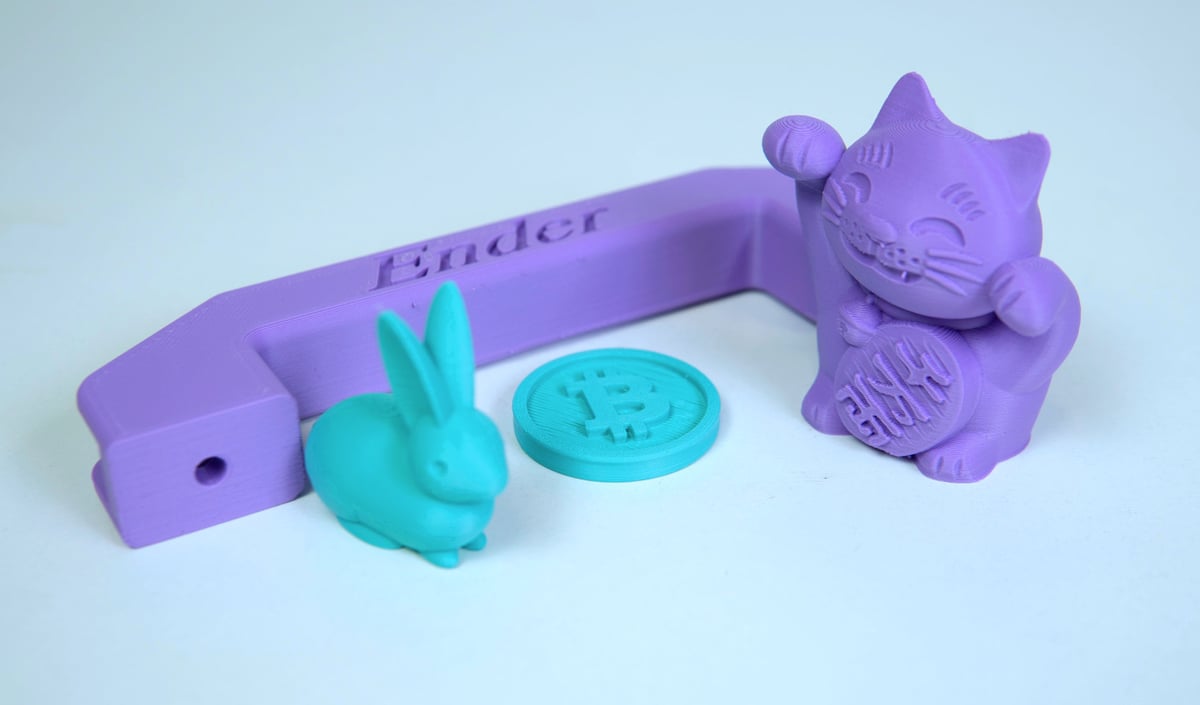
Including the Bitcoin, the SD card had four pre-sliced G-code files. Everything printed without any issues. Creality was nice enough to include a sliced file for a handle for the printer. We thought a brightly colored one might help us avoid lifting the printer using the light fixture.
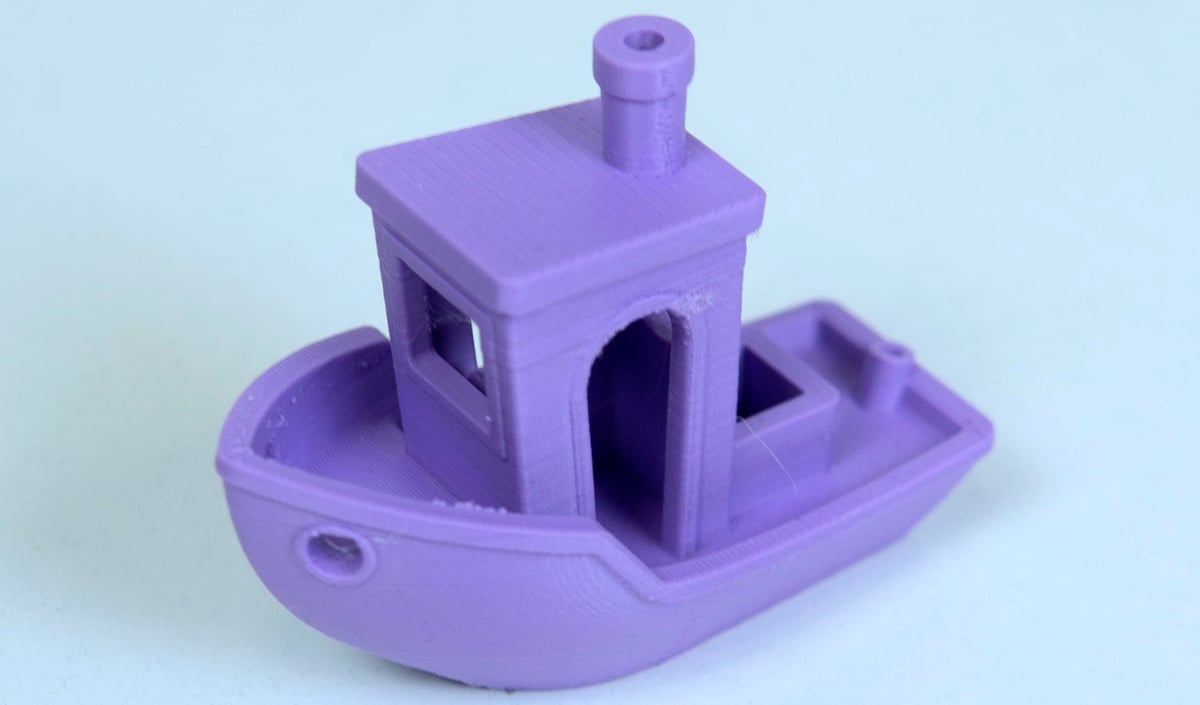
The first file we sliced ourselves was a Benchy, using Creality’s version of Cura for the task. The software has the S1 Pro’s profile preloaded, making it easy to prepare the Benchy for printing quickly.
The Benchy’s overall quality could have been better, with aberrations in a few places. The bottom layer was not perfect, you can see the individual strings of filament, which means there was room for improvement with leveling the bed. We figured out the procedure to level the print bed shortly after this Benchy was printed, and you can see the results in later prints.

We also decided to push the limits of how long the S1 Pro could print without causing an issue. For this, we chose a lithophane of the Moon. This print had to accurately recreate the craters on the Moon while remaining structurally sound. It was printed in one go without supports and took a total of 70 hours to print. The lack of support only created messy overhangs on the very top of the print, inside the model, and not visible from the outside. Unfortunately, it was a little hard to photograph it because of the color and location of the overhang.
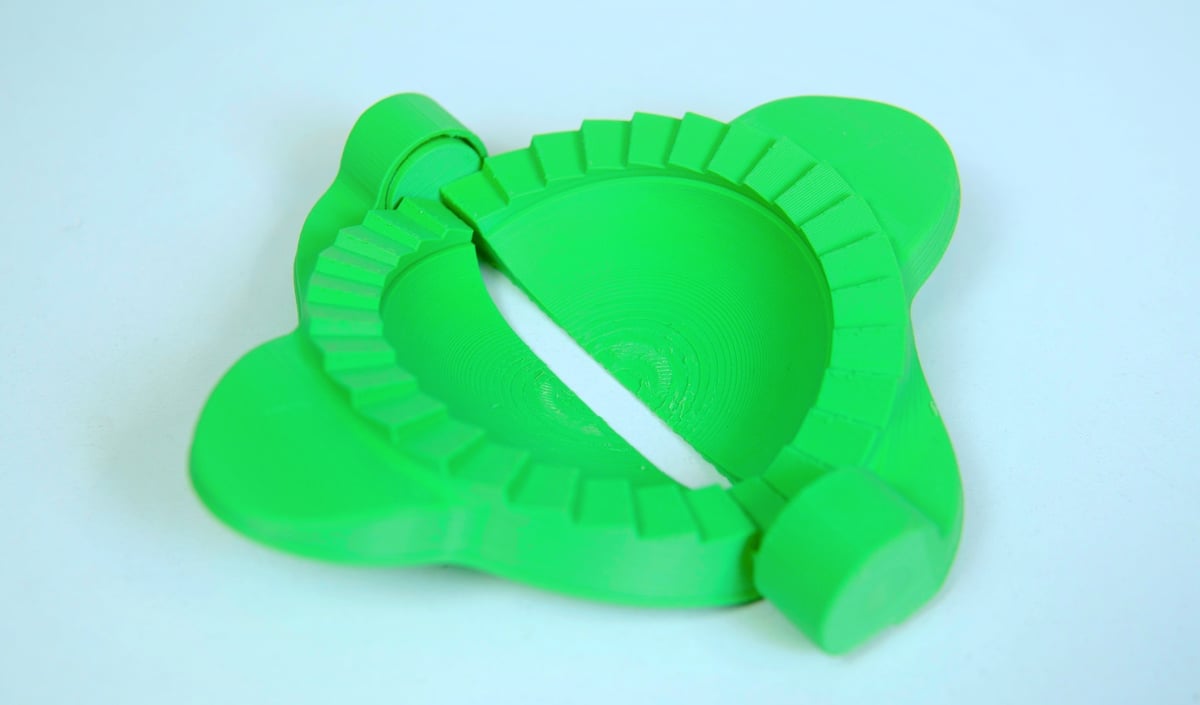
The Dumpling Press is one of the more challenging prints. We had dialed in the level on this one, and the bottom layer was perfect. However, it wasn’t reproducing the print-in-place joints correctly, and the entire thing was fused on more than one occasion. To fix it, we reduced the Z offset by 0.05, which did the trick. We were too close for the subsequent layers, causing the delicate gaps to fuse. This experience reiterated that the Ender 3 S1 Pro needed to be precisely tweaked to achieve the best results.

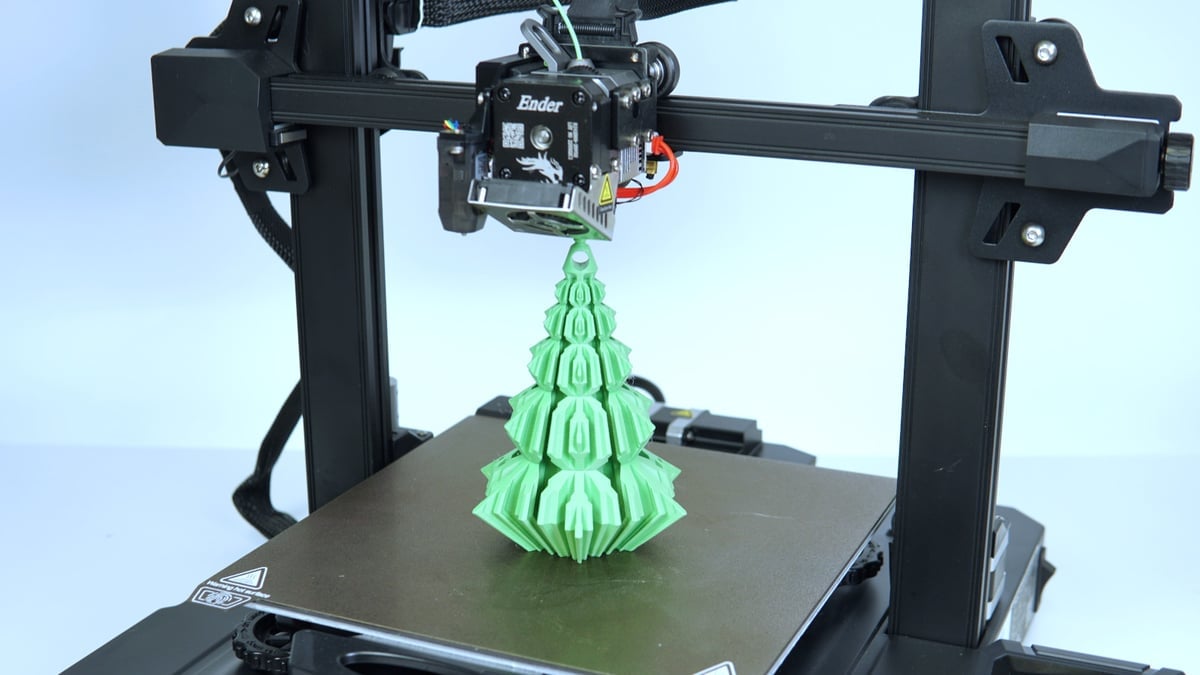
The spinning Christmas star in orange polycarbonate was the crowning achievement of the S1 Pro. Not only did it manage to print with a finicky substance like PC, but it managed to do it with perfect print-in-place joints. Each only moved freely after printing. This one ended up on the Christmas tree this year.

We also tested a flexible TPU filament to produce this flip-flop. The strap and the base printed without any supports and didn’t give much trouble. However, the toe pin of the flip-flop would not stick to the bed for too long, so we had to print it separately, adding bed adhesion so it wouldn’t move around. The output looks like a real child’s flip-flop, but the material isn’t the most comfortable, so the print has no real utility.
Printing on the Creality Ender 3 S1 Pro is definitely an adventure, and you will spend a lot of frustrating moments pulling out your already thinning hairline, hurtling yourself toward early baldness. However, once you fix all the issues and discover all its quirks, the resulting prints are actually good and consistent.
Is It Worth It?
The short answer is no. The Ender 3 S1 Pro at $479 is definitely an upgrade to the Ender 3 S1 in terms of specs and isn’t priced all that much over a standard S1 but, it isn’t without its issues.
We loved the Sprite Extruder Pro, and the exceptional PEI-coated print plate. The Pro extruder is capable of handling high-temperature material and does it exceptionally well. The PEI print plate makes it easy to print on and remove the prints when they are done.
The Ender 3 S1 Pro still managed to produce beautiful 3D prints, which is the end goal, but this was done by working around its issues with bed leveling and a clumsy touchscreen interface.
The market is also getting crowded, and it is time for Creality to step up and give its users a proper experience rather than another printer in a box. Consumers can get similar specs for a lot less, like in the case of the Sovol SV06, or pay more and get a proper consumer-driven experience like the Bambu Lab P1P.
Creality has already worked on refining its experience on its resin printers with its Halot One machines. The user experience on those is next level. We feel the lessons learned with the Halot One can easily be carried on to Creality’s FDM machines. Adding cloud slicing and remote printing could be game changers for the device.
When you buy a pro machine, you are not only forking out for better components but there also needs to be a thought process behind the experience, which is sorely missing here. If you are considering purchasing an S1 Pro, you might need to ask yourself how much you need that Sprite Extruder Pro and a touchscreen in your life over the reliability of a more affordable S1.
Features
Feeling Hot Hot Hot
The S1 Pro offers a significant increase in the maximum hot end temperature, up from 260 °C on the regular S1 to 300 °C for this Pro version. That means the filament door has been opened wider, and using a whole bunch of plastic strands like Nylon, PC, and ASA i now possible. It’ll take a little experimenting with the settings and a nozzle change to take full advantage of this.
Speaking of nozzles, the new S1 Pro comes equipped with a brass nozzle. Standard stuff. It would have been nicer to see it outfitted with something tougher and abrasion-resistant, like stainless steel. However, this is likely to be an easy first upgrade for many users.
Heavy Metal Sprite
As tested on the Ender 3 S1, the Sprite direct extruder was excellent and impressed us. The “standard” Sprite on the S1 has a featherlight weight of 210 g, but it piles on the pounds for the S1 Pro.
Creality states the S1 Pro’s Sprite Extruder Pro weighs in at 334 g, a 59% increase on the standard Sprite. The extra load isn’t good for print quality: extra mass means more inertia to overcome in changes of direction. Motion systems with too much give in them transfer this to the print as ringing (also known as ghosting).
In its defense, it’s now an all-metal hot end, so all that extra metal naturally adds grams. With a pushing force of 80 N, at the very least, it should prove a sturdy source of filament for melting — even with trickier materials.
CR Touch
The automatic bed leveling system in the S1 printers is Creality’s own CR Touch, which we found worked superbly well during our review of the base S1. Unfortunately, our experience with leveling the S1 Pro wasn’t exactly seamless, and we expect this is due to quality control at Creality.
Touch probes like the CR Touch jab the S1 Pro’s print bed with a metal probe in 16 pre-defined locations to account for any unevenness it discovers on its pokey little journey.
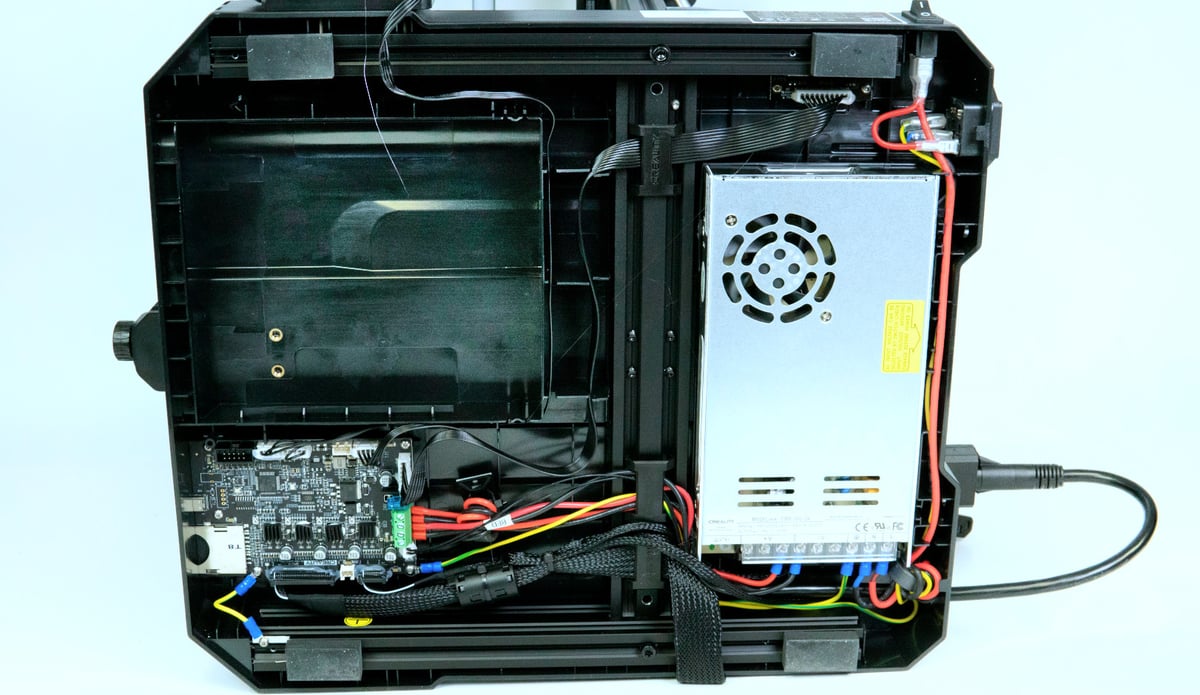
32-bit Mainboard
The 32-bit mainboard in the S1 Pro is “silent,” the same board as found in the standard S1. Its name? CR-FDM-v2.4.S1_v301. Beautiful.
Like all other “silent” Creality mainboards, the CR-FDM-v2.4.S1_v301 carries stepper motor drivers that manipulate the current through the motors, effectively silencing them. The Trinamic TMC2208 drivers from the S1 make an appearance here too.
A port is left open for an optional laser engraver attachment, something a few users may wish to use.
Spring Steel PEI Build Plate
It’s springy, it’s steely, and it’s the spring steel PEI build plate, everyone – yaaaaay! This little plate flaps down onto the print bed and can be removed by peeling it off. Give it a flex, and the prints peel off with relative ease. Maintenance in the form of a quick wipe down with some alcohol, and it is ready for more.
Something else worth noting about the print bed is the inclusion of insulation on the underside of the heated bed.
How Convenient
There are many convenience features to be found on the S1 Pro. An LED light bar at the top of the gantry lights up your print bed like a prison searchlight, and there’s a handle for pulling out the heated bed without losing your fingerprints. Plus, a sensibly-sized input for a full-size SD card helps you stay sane. Not to mention the slightly wider tool drawer gives you more space to stash snacks or tools.
A filament sensor and resume print function also serve as helpful safety nets.
The S1 Pro is also, according to Creality, 96% assembled, meaning putting it together doesn’t take long.
Future liquid cooling heatsink
Liquiiiiid! This is available for $80. However, we have yet to test it. It seems like a pointless, gimmicky accessory since the temperatures are relatively tame.
Further Features
- 4.3-inch touchscreen UI: Yeah, that’s alright, isn’t it? The S1 Pro gets upgraded to a touchscreen that the S1 did not have. So, no rotary knob here, just a big shiny screen you’ll poke, clean with an alcohol wipe, poke some more, clean, poke, clean, and so on. Also, nine different languages are now offered within it, not just the Chinese and English provided on the S1. Take your pick from the additional German, Spanish, French, Italian, Portuguese, Russian, or Turkish.
- Dual-Z-axis: Offering additional stability, a synchronized dual-driven Z-axis should help keep things looking pristine through the top of the print volume.
- Lighter base: Creality has done away with the metal base of the S1 and instead given us an all-plastic one-piece base. It is just as stable as before.
Featured Prints
Like what you see? Here’s a list of the 3D models we printed over the course of the review, as well as who designed them.
- Lithophane Moon Lamp by Frank Deschner, via Printables
- Spinning Christmas Star by muzz64, via Thingiverse
- Dumpling Press by Mark, via Printables
- Christmas tree, snowflake profile by Genapart, via Thingiverse
- Drippy Spiral Tree by Triple G Workshop, via Printables
- Shopping Cart Euro Coin Keychain by Mach0gr, via Thingiverse
- TPU flip-flops for 3-year old by mityok, via Thingiverse
- 3DBenchy by CreativeTools, via Thingiverse
Tech Specs
General Specifications
- Technology: Fused deposition modeling (FDM)
- Year: 2022
- Assembly: Semi-assembled
- Mechanical arrangement: Cartesian-XZ-head
- Manufacturer: Creality
3D Printer Properties
- Build volume: 220 x 220 x 270 mm
- Feeder system: Direct
- Print head: Single nozzle
- Nozzle size: 0.4 mm
- Max. hot end temperature: 300 °C
- Max. heated bed temperature: 110 °C
- Print bed material: PEI-coated spring steel sheet
- Frame: Aluminum
- Bed leveling: Automatic
- Connectivity: SD card, USB-C
- Print recovery: Yes
- Filament sensor: Yes
- Camera: No
Materials
- Filament diameter: 1.75 mm
- Third-party filament: Yes
- Filament materials: PLA, ABS, PETG, Flexibles, Carbon Fiber, Nylon, ASA
Software
- Recommended slicer: Creality Slicer, Cura, Simplify3D, Repetier-Host
- Operating system: Windows, Mac OSX, Linux
- File types: STL, OBJ, AMF
Dimensions and Weight
- Frame dimensions: 490 x 455 x 625 mm
- Weight: 8.6 kg
Similar Printers
You may also be interested in the following printers, and don’t forget to check out our Best Budget Printers Guide, too. There’s some real talent in that list.
Creality Ender 3 S1
Basically the same machine as the S1 Pro, but its hot end can’t climb quite so high without the Spite Pro. That means no exotic filaments like nylon and polycarbonate, but if you just need to print with PLA, ABS, PETG, and TPU, this printer will do it and do it very well indeed. So well, in fact, that we’ve named it our Best 3D Printer Under $500.
Sovol SV06
The Sovol SV06 is essentially an Original Prusa i3 MK3S+ clone that has a pretty robust hot end capable of reaching 300 °C. It has dual Z-axis lead screws making it as stable as the S1, and its bed is a PEI magnetic spring steel sheet. The price for all of this is staggeringly low at $239. At this price point, it also offers a similar build volume to the Ender 3 S1 Pro, just 20 mm short on the Z-axis, and instead of a fancy touchscreen, the Sovol has a knob-driven monochrome screen. For the price difference, the trade-off is acceptable.

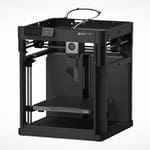
Bambu Lab P1P
The Creality Ender 3 S1 Pro is not cheap, but what if you had a little more money to spend? In that case, the Bambu Lab P1P at $659 might be right up your alley. The printer is fast, we have one at All3DP that’s being tested, and it is as fast as the Bambu Lab X1 Carbon. The printer is pretty precise and has vibration compensation out of the box. It has a direct extruder, and the nozzle can reach temperatures of up to 300 °C. The build volume is similar to the Creality Ender 3 S1 Pro. It can also connect to Wi-Fi and be operated remotely. If you invest in the AMS kit, you can use up to 16 colors in a single print. Just don’t look at the resulting filament poop.
License: The text of "Creality Ender 3 S1 Pro Review: Worth the Upgrade?" by All3DP is licensed under a Creative Commons Attribution 4.0 International License.
CERTAIN CONTENT THAT APPEARS ON THIS SITE COMES FROM AMAZON. THIS CONTENT IS PROVIDED ‘AS IS’ AND IS SUBJECT TO CHANGE OR REMOVAL AT ANY TIME.