Creality Ender 3 S1 Plus Review: Bigger & Better?
Rating

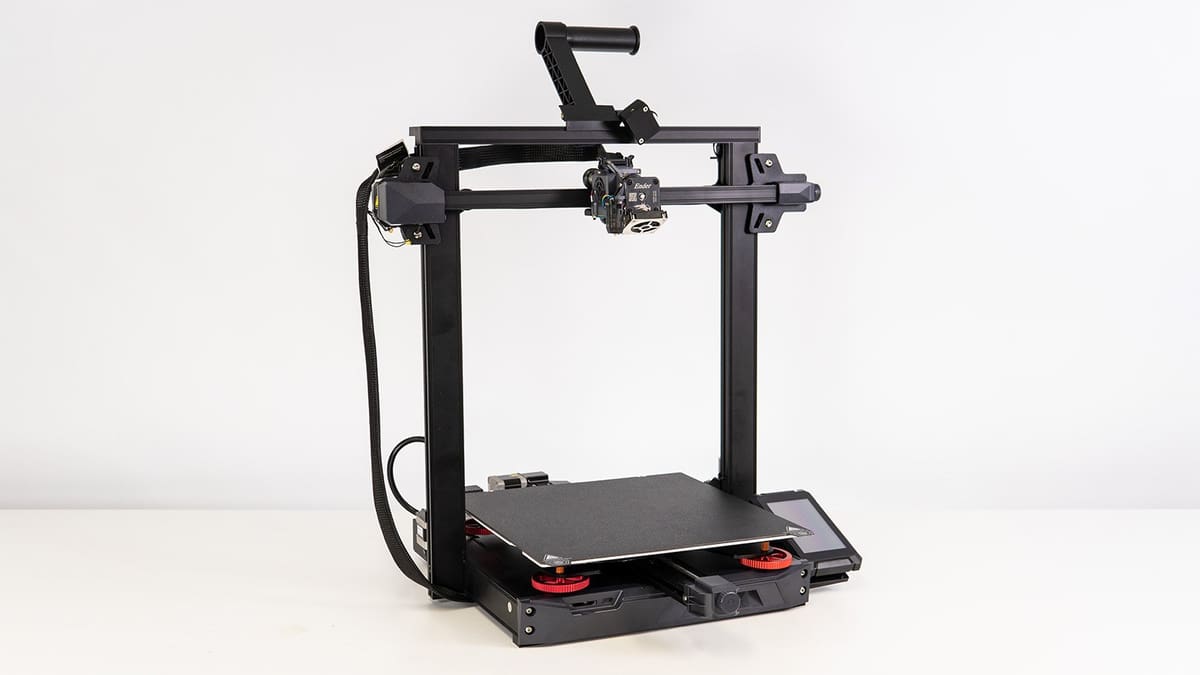
Creality's mid-sized Ender 3 S1 Plus is the largest of its Ender 3 S1 series, but is it the best? We've been printing to find out.
Were you getting worried about only having two Ender 3 S1 options to choose from? Was the lack of choice weighing on you? Don’t worry, because Creality has another Ender 3 S1 now, expanding that already expansive printer portfolio and giving the public a third option: the Ender 3 S1 Plus.
Creality’s S1 series follows a similar track to the original Ender 3s here – one “base” model, one modestly improved Pro version, and one mid-sized variant. Creality has the same thing going on with a few of its printers, including the Neo Ender 3s, but that’s a story for another day.
The “Plus” in the Ender 3 S1 Plus’ name denotes the mid-sized variant, which offers a spacious 300 x 300 x 300 mm build volume. In fact, the S1 Plus is essentially just a scaled-up version of the S1, but a few features from the S1 Pro are also tacked on to keep things interesting.
After having reviewed the standard Ender 3 S1 and thinking really rather highly of its performance, we decided it’s high time to put its plus-sized variant through the hoops.
So, should you make like the Plus and add one more Ender to your collection? Read on to find out.
Verdict
Pros
- High quality, reliable print results
- Automatic bed leveling
- Spacious print volume
Cons
- No all-metal hot end
- Convoluted touchscreen menu
- Pricey
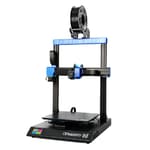
The Ender 3 S1 Plus continues the legacy of its series in being an easy-to-use, well thought out, and reliable machine that consistently achieves fine print quality with minimal user effort, all while providing a larger build volume of 300 x 300 x 300 mm.
Besides the uptick in print volume, you get Creality’s dual-geared direct Sprite extruder and an auto-bed leveling probe, as well as a PC-coated print bed. The bed is grippy, sturdy and can now be placed flush thanks to the added grooves, but we would have hoped for a PEI-coated version similar to the S1 Pro, as first layers can get baked in, and adherence is sometimes a little too good.
Also new is the UI and touchscreen, which does feel more natural than the control knob when used, but the user menu of the S1 Plus is not all that intuitive.
Print quality is, as we’ve found with past Ender 3 machines, characteristically great. Out of the box, the S1 Plus performed great throughout the material palette its 260 °C hot end can handle. No major tuning of the provided print settings was needed, and generally, very few print artifacts accompanied its prints. Our main gripe here is just that Creality did not provide an all-metal hot end for the printer to handle filaments up to 300 °C in temperature. That would have been a cheap but “Pro” upgrade that would live up to the printer’s asking price.
All in all, Ender 3 S1 Plus is hassle-free to use and produces great prints. But, at $529, you’ll have to splash out quite some copper. If you need the extra space the Plus offers, or just have the cash to spend, it’s a worthy consideration. Otherwise, the S1 is essentially just as good but at a more affordable price tag.

The Tech
Max-Like
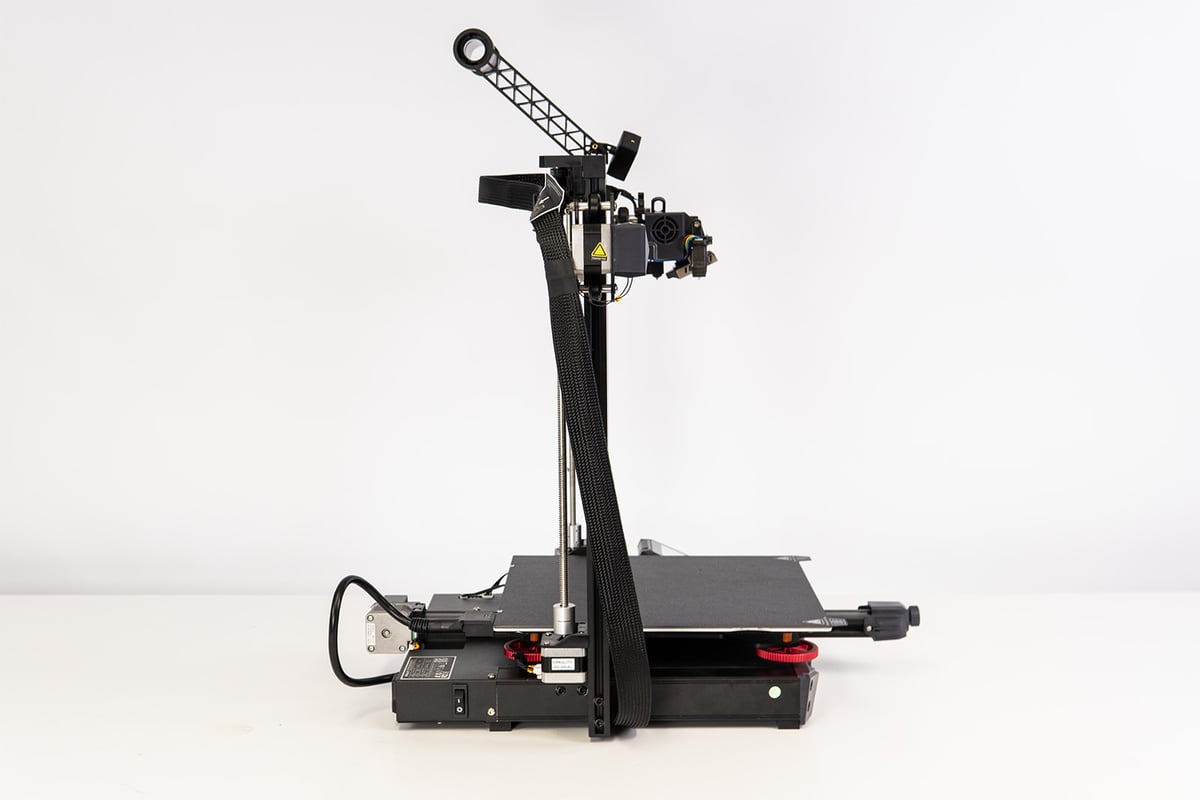
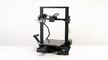
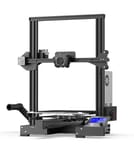
For the most part, the Ender 3 S1 Plus is an embiggened Ender 3 S1, offering the same classic design on a bigger stage sprinkled with a few neat improvements.
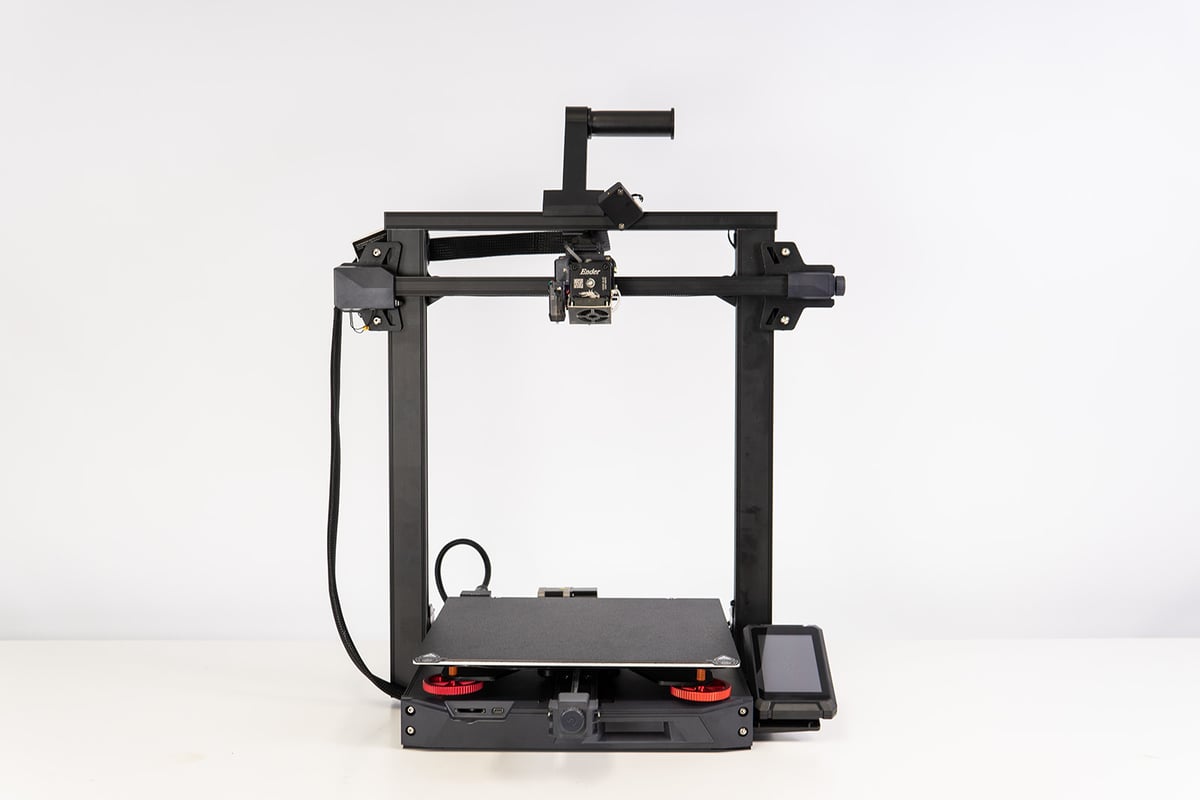
Let’s start from the ground up. As a matter of fact, the base unit is identical to the Ender 3 S1, but the gantry is mounted to the side of the bodywork (the Ender 3 S1’s was mounted on top), producing that little extra space left and right that allowed Creality to slap on the 300 x 300 mm sized print bed. Enlarge the Z-axis height to 300 mm too, and you’ve got yourself the Ender 3 S1 Plus. Similar to the Ender 3 Max (or Creality’s latest Ender 3 Max Neo), the Plus serves as somewhat of a middle ground between the compact-sized Ender 3 series and Creality’s large-sized CR-10 family, though the Max 3s offer slightly more room on the Z-axis.
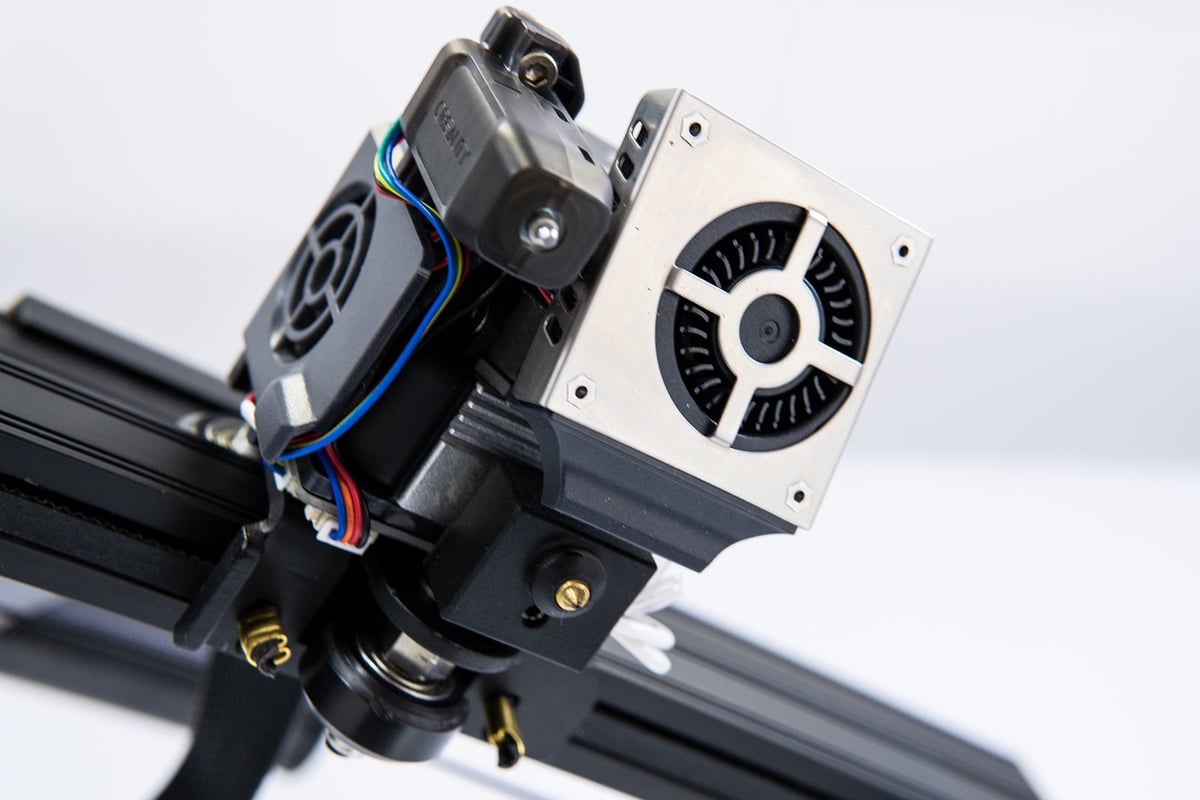
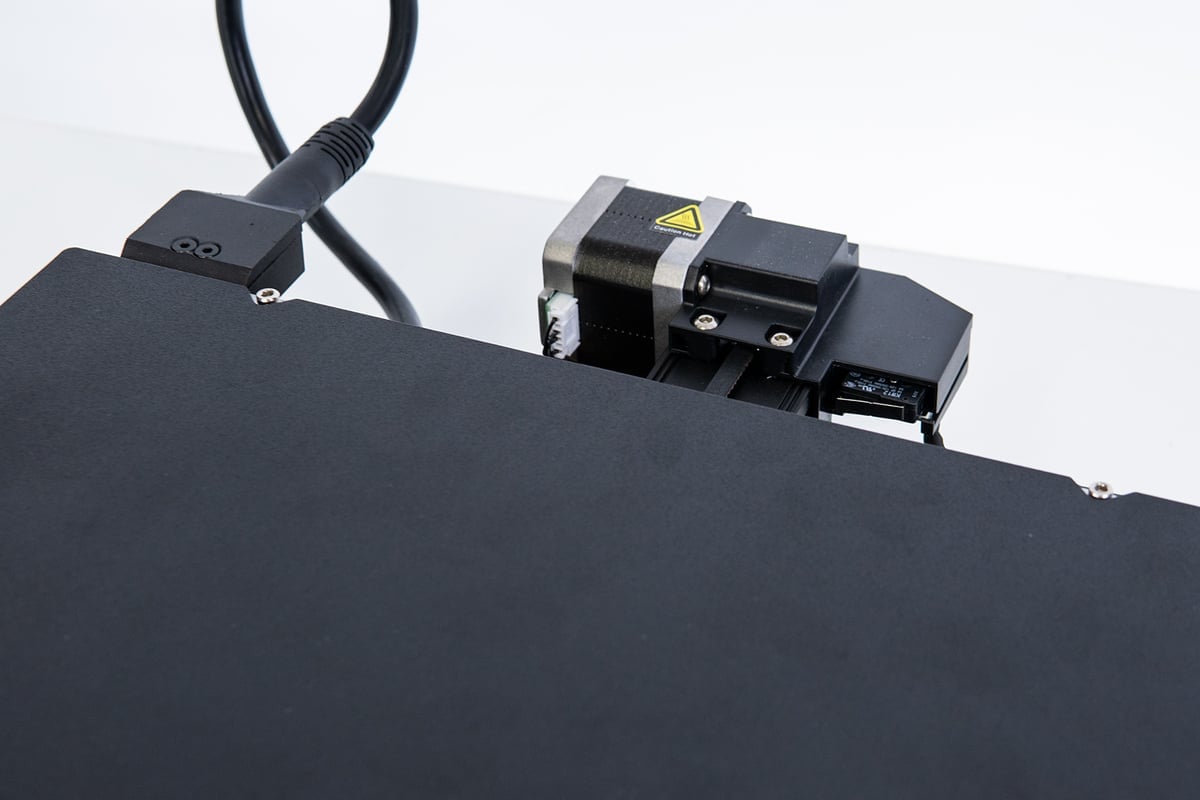
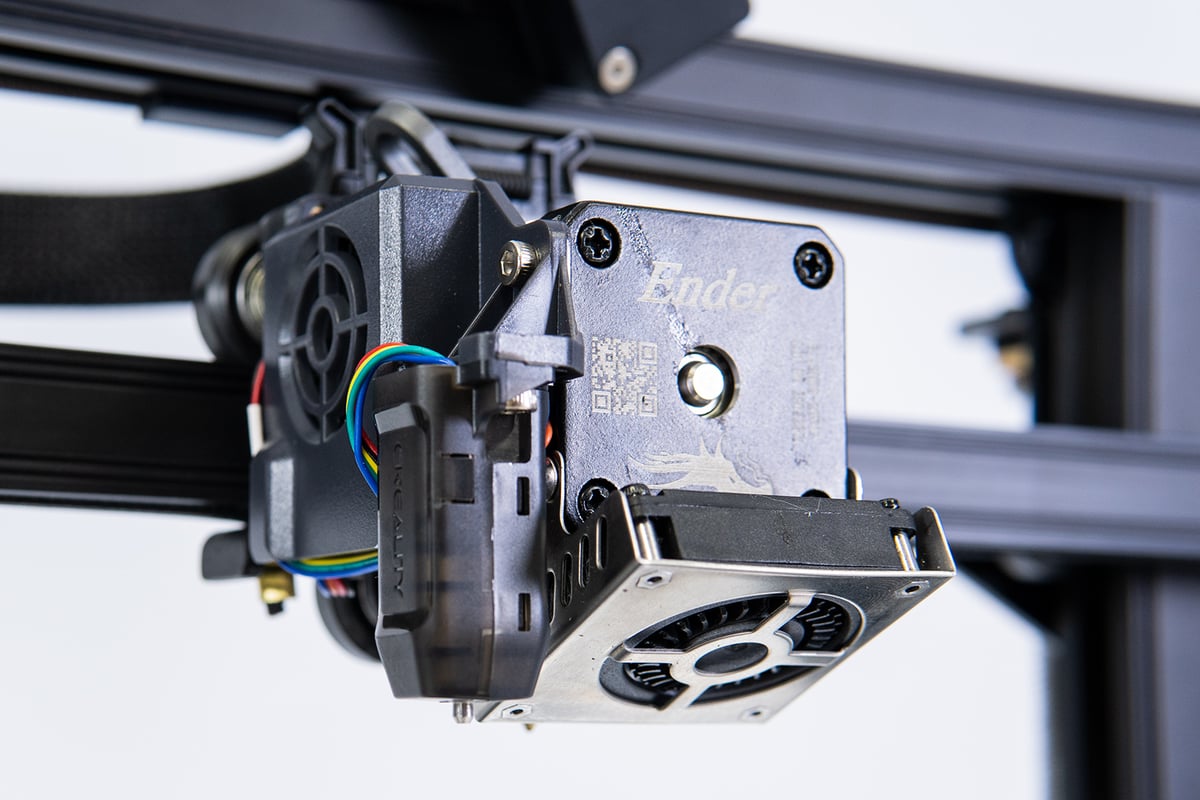
It stands to reason that Creality didn’t opt to go all out on Z-axis height for the Plus (besides the fact that it presumably has to distinguish between its many very similar 3D printers somehow) due to the fact that the Plus carries more over from the original S1 than just its base – namely Creality’s “Sprite” direct extruder.
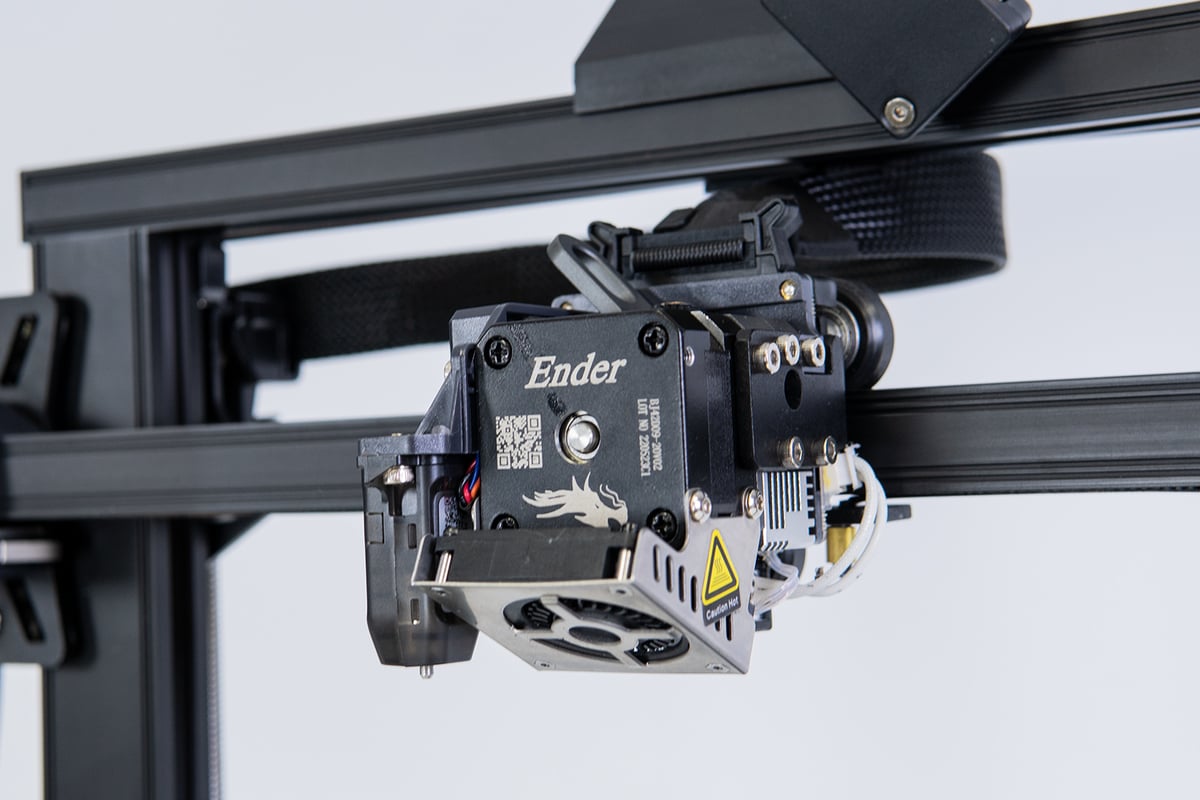
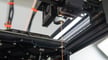
Unlike the “usual” Ender 3 sight with a sideways-mounted spool holder and Bowden drive, the S1 Plus keeps the filament on top of the gantry, feeding it directly into the print head. Having an extra high gantry and a spool holder on top might have mitigated the stability the Plus has, not least because of the new bracket mounting.
Be it as it may, the 300 x 300 x 300 mm build volume of the Ender 3 S1 Plus should provide you with enough space to print most day-to-day objects comfortably. It is a definite step up over the Ender 3 typical size of 220 x 220 x 250 mm, which almost seems a bit small nowadays.
Obey your thirst
Also carrying over from the S1 is Creality’s direct Sprite extruder, continuing to make a showing on new Creality printers such as the Sermoon V1 Pro or the CR-10 Smart Pro.
Thanks to our time with the original Ender 3 S1, we’ve already seen what the Sprite is capable of, meaning the dual-geared pancake stepper motors provide consistent feeding of filament, even the bendy ones such as TPU. The 3.5:1 reduction gearing ratio ensures the extruder has the right amount of torque to push material through without filament skips.
In fact, the Sprite version on the S1 Plus even got slightly buffed up, with the leaver and extruder housing now being metal instead of plastic. Seemingly, this has lead Creality to advertise the extruder as being “full metal.” That’s unfortunately not the case, however, for the one component that actually matters in terms of being metal or not: the heatbreak.
This means the hot end caps out at 260 °C due to the Teflon throat tube, making the S1 Plus cut out for PLA, ABS, PETG, TPU, and similar easily-handled consumer-level filaments. Upgrading the extruder with a bi-metal heat break can be done relatively quickly and costs only a handful of dollars. For the Plus’ asking price, we would have hoped to see it equipped with the Sprite Pro, a 300 °C extruder version as standard. We’re not taking bets on a Pro version of the S1 Plus appearing soon, by the way.
Even without the metal heat break, the direct extruder is heavier on the Z-axis than your typical Bowden approach, even if the Sprite is considered relatively lightweight for its class. Nevertheless, you want smooth movement all the way up and down the Z-axis if you want good print quality. As such, the Ender 3 S1 Plus features dual Z-axis leadscrews, dual motors, and a timing belt on top to synchronize movement further and promote stability.
If you aren’t in for engineering plastics, the Sprite leaves almost nothing to be desired, though. So far, all filaments we have thrown at it, from PLA to ABS, PETG, and TPU, have been fed smoothly and without issues.
Groovy Bed
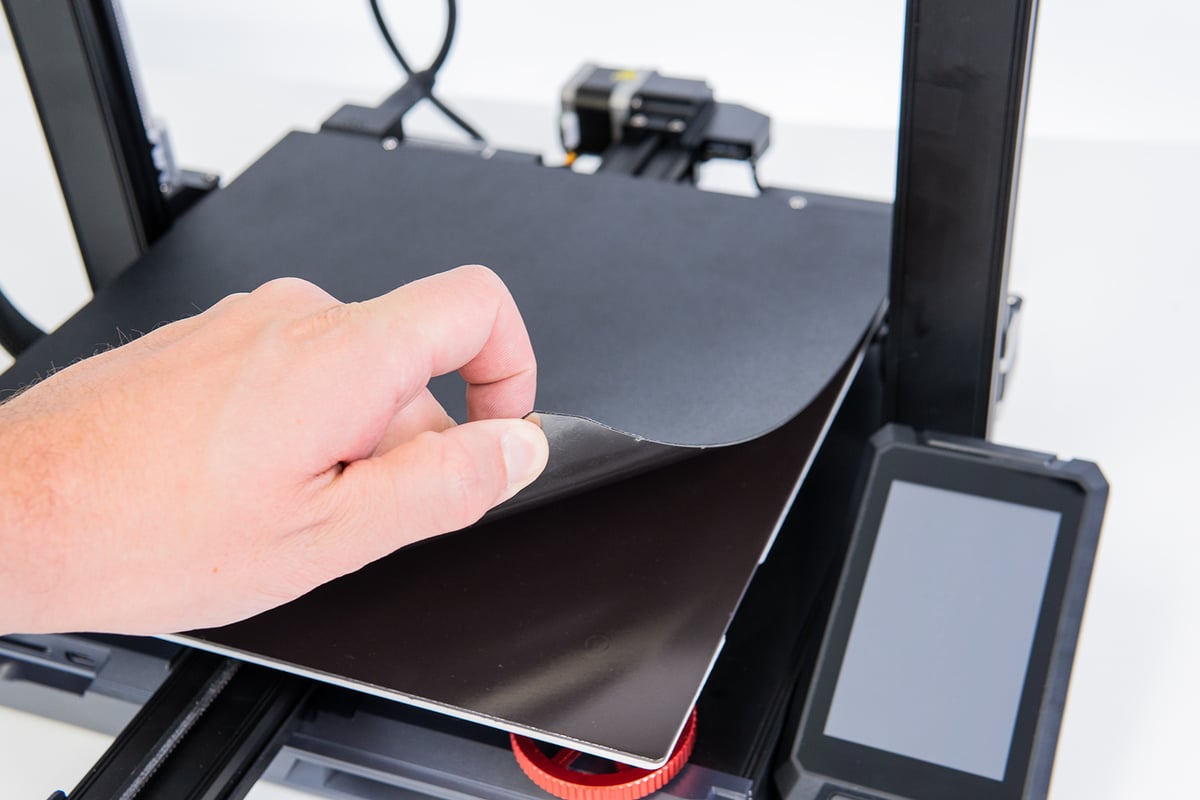
Another carry-over from the S1 Series is the flexible magnetic build plate. Providing good adhesion and the easiest way to remove prints – by simply taking it out, flexing it, and popping prints right off. This one helpfully comes with a little adaptation in the form of two nuts in the back of the print bed. In combination with the two grooves on the flex plate, it allows you to align the PC surface onto the print bed perfectly. That was something we had a bit of a harder time doing that on the original S1, as the magnetic bed would snap awkwardly into place and there were no guides to help it do so neatly.
However, even with the automatic bed leveling (more on that shortly), first layers can partly be grinded into the relatively soft build surface when not perfectly leveled, adding to quite a bit of wear over time. Plus, it almost bonds prints a little too well to the surface. Again, the Pro version of the S1 comes with a PEI-coated build surface, which mitigates potential nozzle grinding and fused-in layers – a potential upgrade down the road should you be willing to drop a couple of extra dollars.
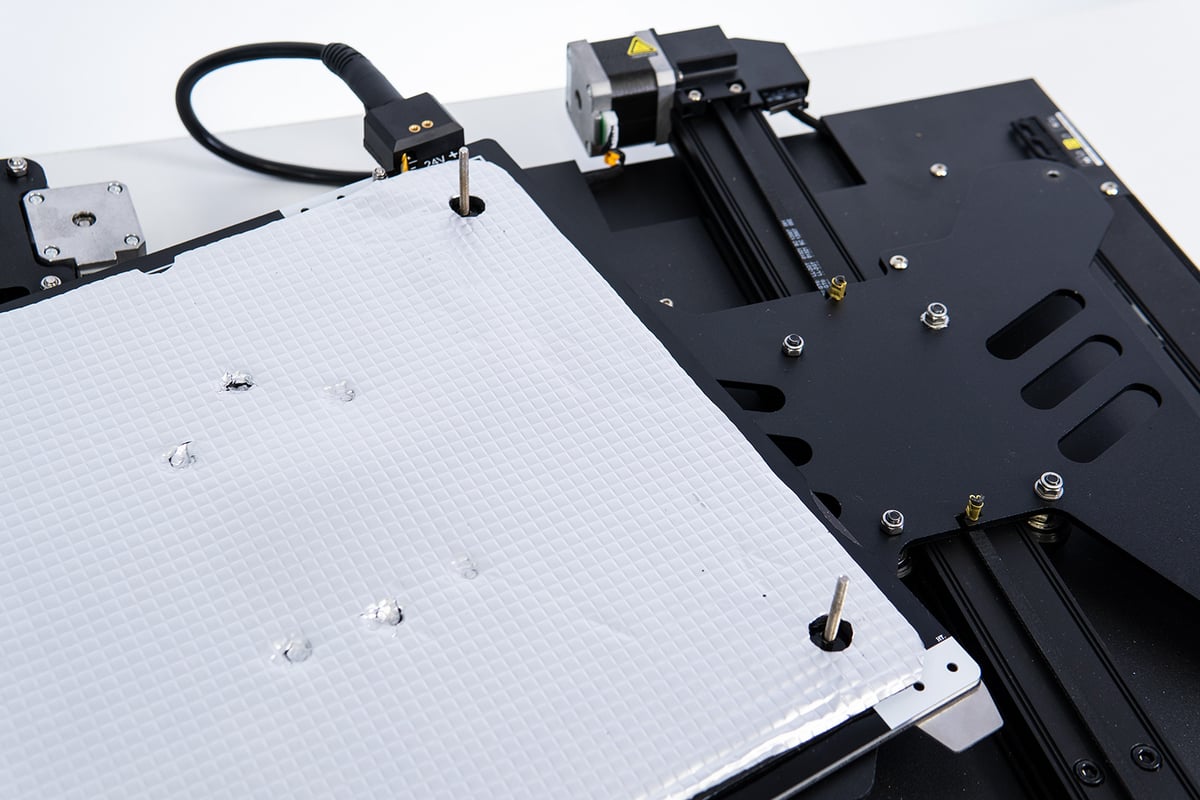
Nevertheless, the PC print surface is still an overall excellent print bed to work with. Its 100 °C maximum temperature is suitable for 3D printing ABS and other high-temperature filament materials (after potentially upgrading the extruder). To keep temperatures more constant and speed up the heating process, the print bed also has some added insulation – something that was not present on the S1.
Bed heating on the Plus is not going to be done in record-breaking time (60 °C takes about three to four minutes, 100 °C closer to 14 minutes), but heating uniformity is present throughout the build plate. We had no adhesion problems during day-long prints due to temperature fluctuations.
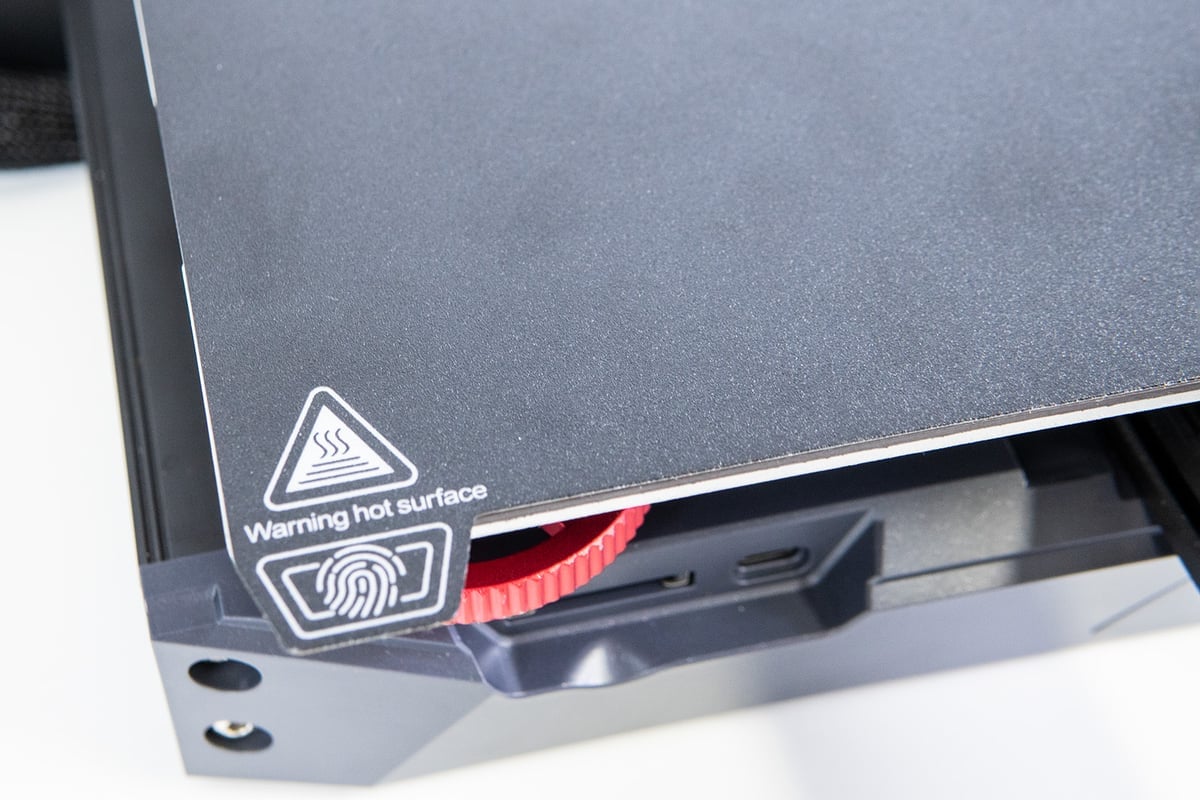
Red Rims & Automatic
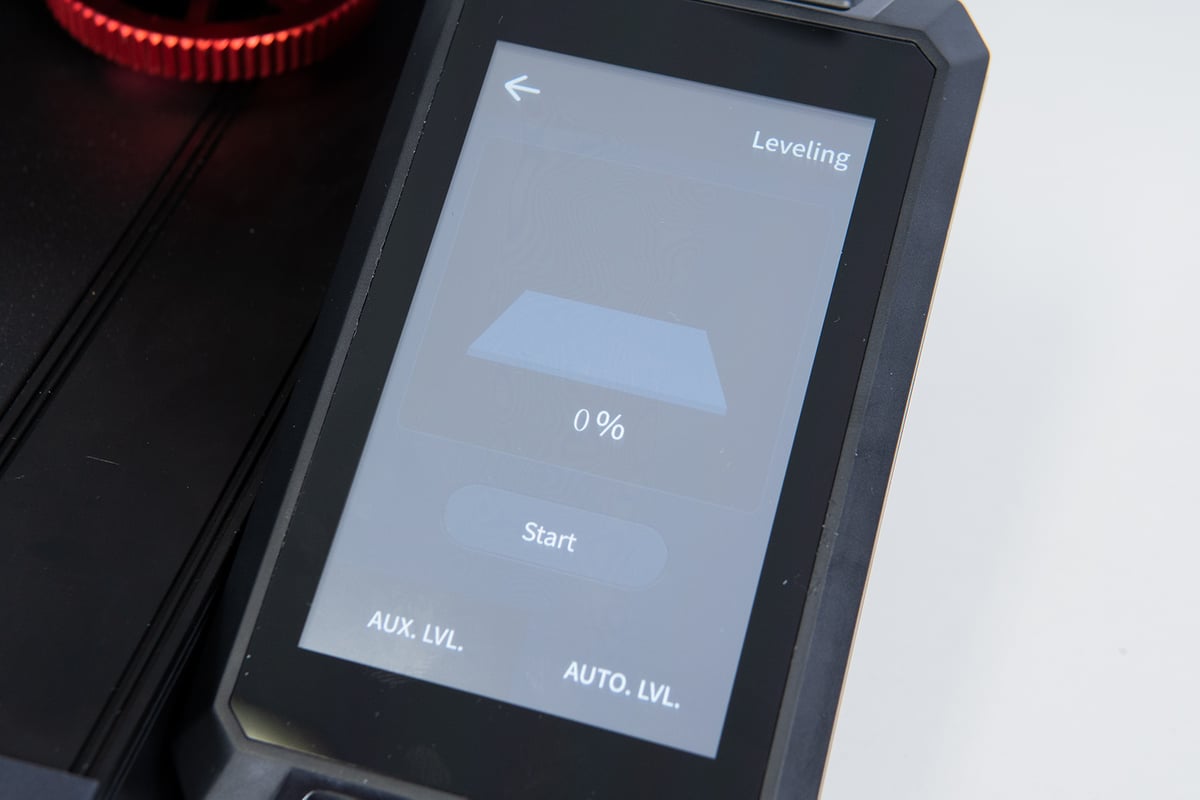
The Plus’ overall black attire gets broken up by the newly included red metallic leveling wheels that replace the dull and smaller plastic versions from the S1. Besides adding a colorful flavor, the larger knobs come in handy when manually leveling the bed. While the Ender 3 S1 Plus comes with automatic bed leveling using Creality’s CR Touch leveling probe, some manual labor is still required.
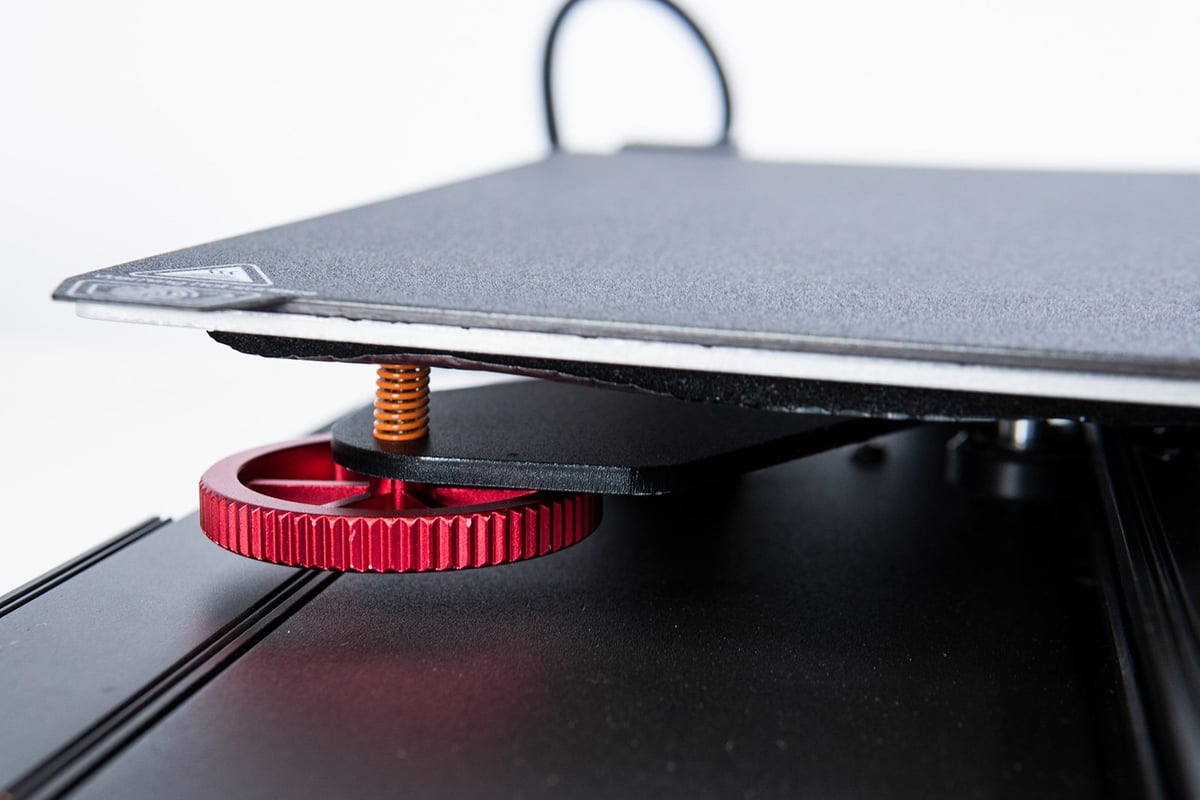
Bed leveling is done by homing the print head and setting a Z-offset via the software. Next is the manual part, where you move the print head across the plate to its corners and then adjust the plate with the leveling knobs until you get the desired slight drag of the nozzle on your leveling paper.
After a thorough check, you will probably have to readjust the Z-offset once over and only then do the “automatic” leveling process of having the CR Touch probe a 16-point mesh across the print bed. This will then adjust for any unevenness left. If you don’t get the Z-offset right the first time, you might run into the above-mentioned problem of first layers getting fused in, in which case you should redo the process.
It is undoubtedly a lot more hands-on than you would expect from the printer being marketed as “automatic,” but once leveled, we got clean first layers throughout our time with the printer. If done right, it really is a one-time thing, so we don’t mind putting up with the initial drudgery.
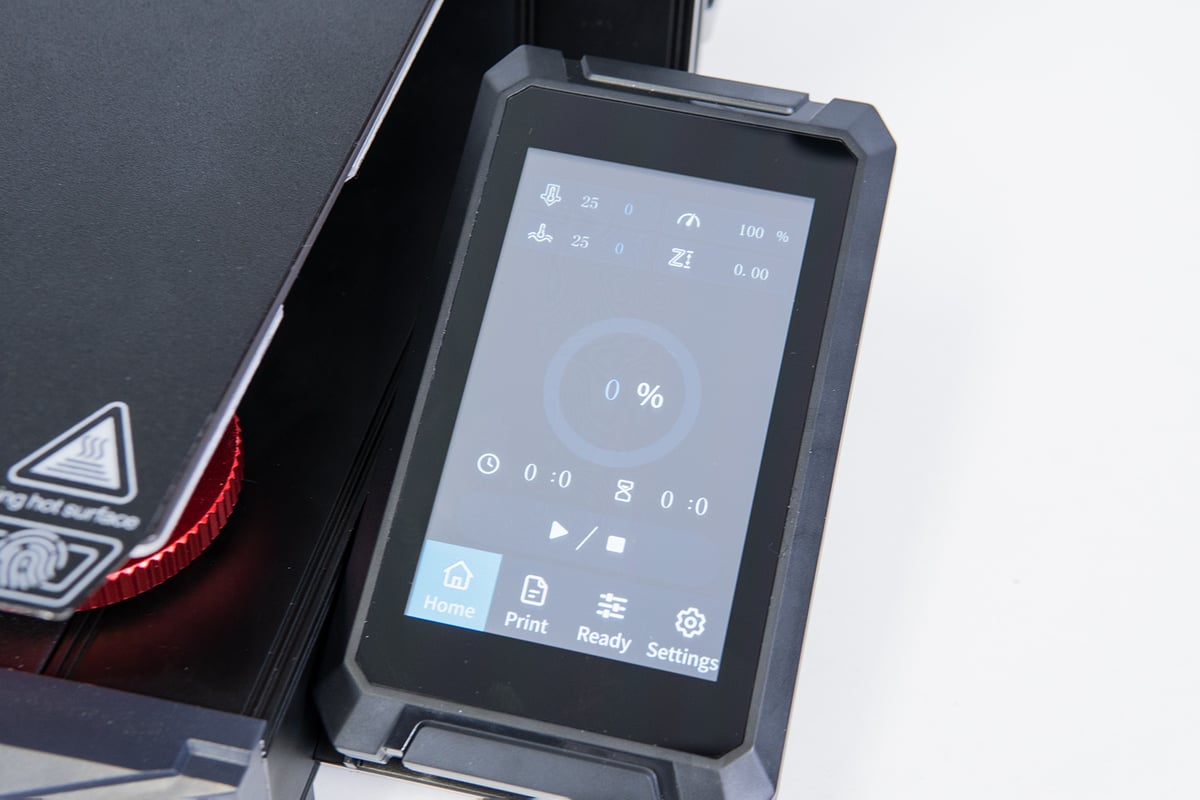
User Interface & Processing power

Slapped onto the printer’s right side, you’ll find the 4.3-inch LCD touchscreen allowing you to tap away at the user interface. Compared to the Ender-3 S1’s button screen, the touchscreen offers a better click-to-control experience. That being said, settings and controls are inconveniently stored away in the UI’s sub-menus.
Once you get used to the quirky pathing, controlling the printer get’s more accessible, but it could definitely be more intuitive, and we would have preferred the S1’s interface layout nonetheless. On the other hand, we don’t mind not having to use the control knob anymore, that’s for sure.
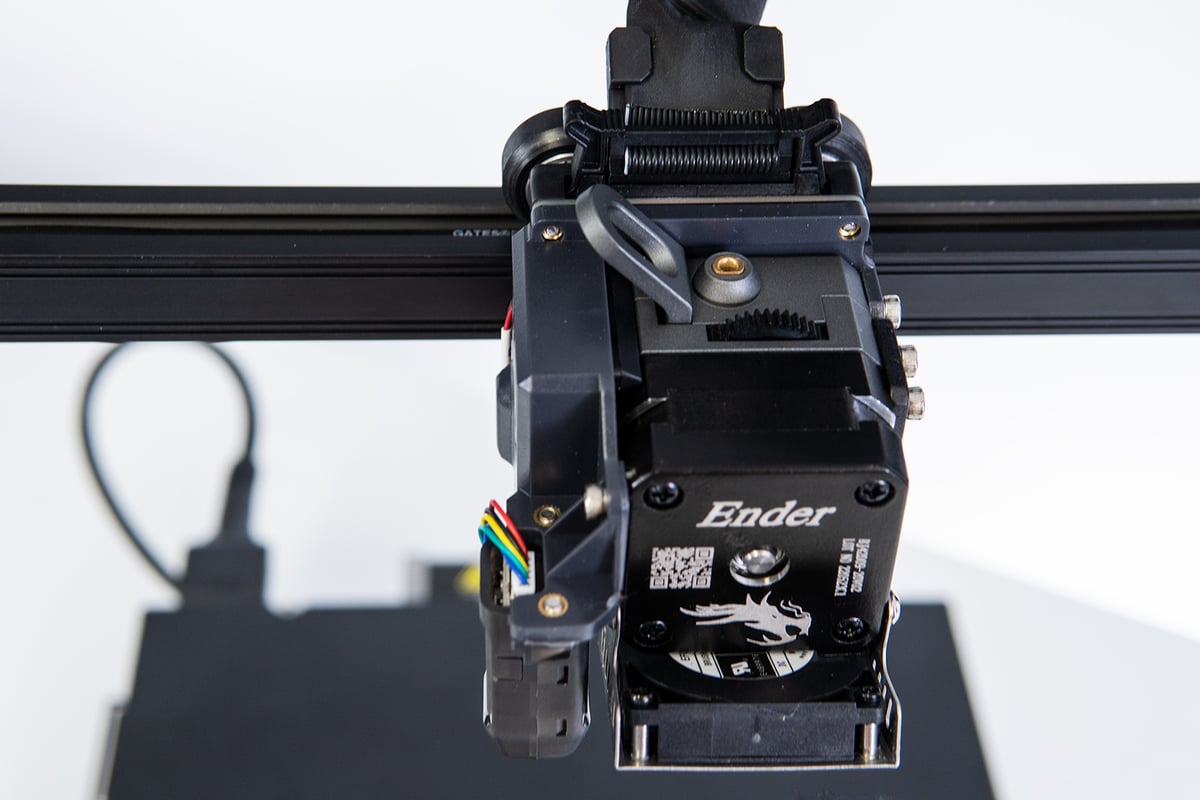
Deep in the innards, the Plus keeps things in line with its series. At its core is a 32-bit board running Marlin 2.0, an ARM STM32F401 chip, and silent stepper drivers. New on the S1 Plus is the use of crimped ferrules. Especially for high-current wiring, tinned wires (as present on the S1) can lead to shortages and electrical hazards over time, so the crimped ferrules upgrade gets a big fat plus in our books. It’s an easily overlooked feature, improving the long-term safety of the printer.
Transferring files to the printer is done by an SD card or by hooking the printer up to your computer with USB-C.
Printing & Usability
Assembly & Getting Ready
The Ender 3 S1 Plus comes semi-assembled and can be fully set up with a couple of easy steps.
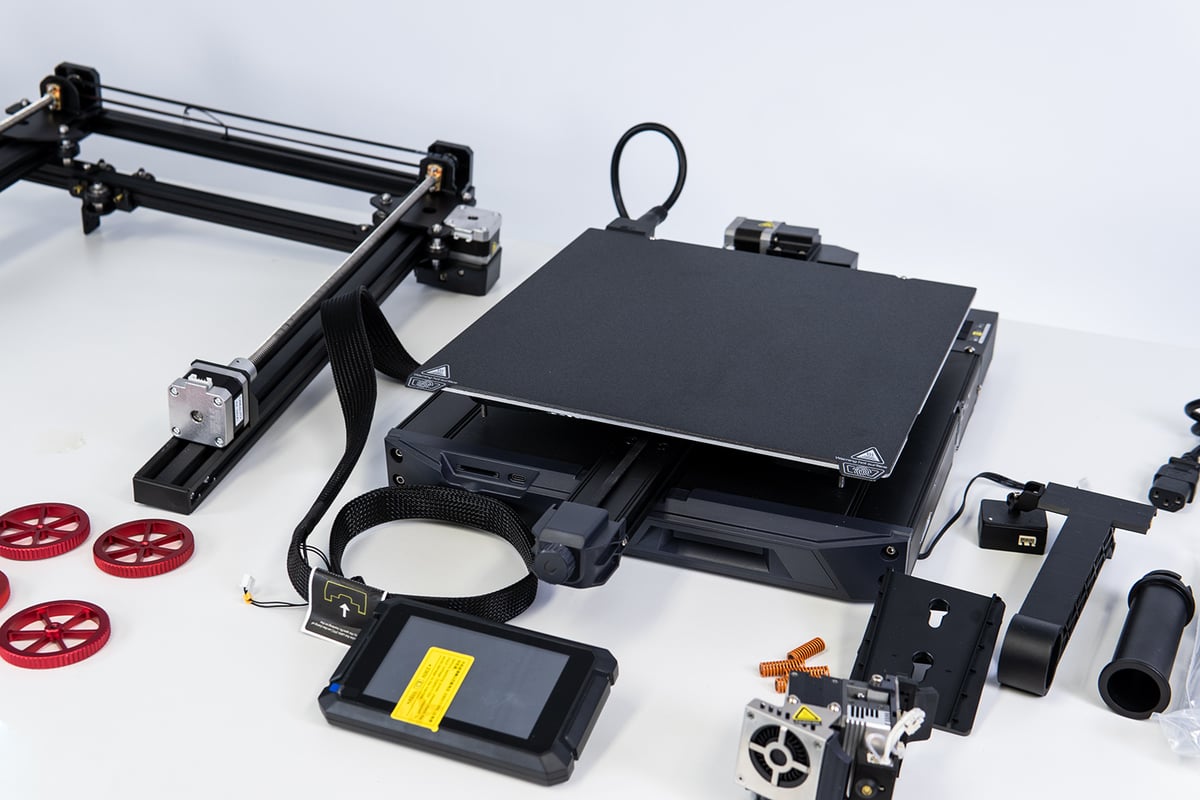
The side-mounted Z-axis gantry makes assembling this printer much easier than its non-Plus variant, as you don’t have to awkwardly flip over the printer to tighten the screws. The included documentation is – in typical Creality manner – not the most detailed nor comprehensive, but the video tutorial on the SD card should have you covered even if this is your first 3D printer rodeo. Nevertheless, helpful advice like ensuring the timing belts for the axes or the bed’s eccentric nuts are tightened adequately before printing is missing from the instructions, and can lead to undesirable first print experiences. Make sure everything is tight, is what we’re saying.
In general, assembly involves tightening several screws and plugging in some wires. Give yourself half an hour, and you’ll already be printing. Ensure you’ve got the current switch set right so as not to fry your printer first when powering it up.
Once put together, you want to start the leveling procedure. As outlined above, it is a mixture of manually turning the knobs, setting the Z-offsets via the UI, and letting the touch probe do its thing. You will need to jump back and forth in the menu; the software could be more indicative in guiding you through the process.
Also, the print head does not rise when preheating prior to the leveling process, so make sure you manually raise the Z-axis to avoid the nozzle damaging the bed. Minor grips, though, as it does the job, and once leveled, we got class-A adhesion across the whole print bed. A little too well at times, as if your leveling isn’t spot on, the soft surface of the bed is prone to permanent grind marks and baked-in first layers.
The Software
When it comes to printing with the Ender 3 S1 Plus, it’s just as convenient as its successors were. There really is little to do on the user end to get great prints of the print plate. In fact, we hardly touched any of the settings; the 3D printer and its print profile seem to be very well fine-tuned right out of the factory. (Note for the more tech-savvy: taking a look at flow rate and e-steps can never hurt, but, generally, the S1 Plus needs little fine-tuning of settings).
We used the included Creality Slicer during our time with the 3D printer, essentially a re-skin of Ultimaker’s popular open-source Cura slicing software, albeit a couple of versions behind. Users of the latest versions of Cura will notice some of the more expert settings missing, but it does the job of print preparation just fine. You can also use Prusa Slicer, for which there is a profile, or tweak one of the existing Ender 3 Profiles in Cura to fit the Plus’ specs.
Printing with It
Prints of the S1 Plus turned out neat and tidy, with little cause for complaint and few flaws. With the hot end temperature limit of 260 °C in mind, we mostly stuck to printing with PLA, PETG, and flexibles but even tried our hands on some of the more engineering-type filaments, such as ASA, with equally satisfactory results. Having tested essentially the same printer, albeit with a smaller build volume, the S1 Plus provided much of the same pleasant printing experience as its predecessor, the S1.
Especially PLA and PETG, the printer handles with ease. Retraction settings are accurate, which leads to very little stringing, and the printer handles fine details, bridging, and overhangs exceptionally well. Filament throughput is consistent even at larger layer heights and higher printing speeds. However, it should be noted that the Sprite extruder is not particularly set up for high throughput, so equipping the printer with 0.8 mm nozzles or anything above could lead to some print defects.
For your bread-and-butter prints, the S1 Plus delivers remarkable results that require (close to) no tinkering with the printer beforehand (we printed most prints with the vanilla settings).
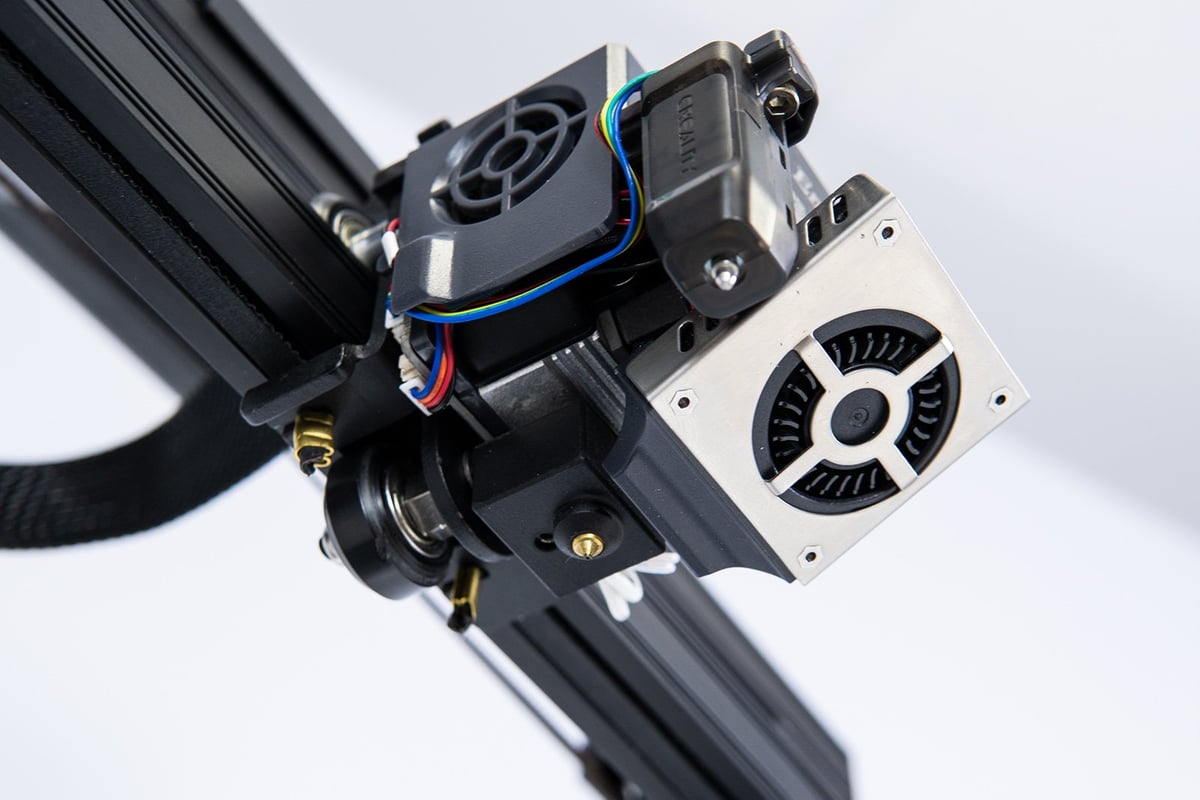
Flexibles were a bit of a mixed bag on the Plus, though. In general, printing flexibles is as straightforward on the Plus as it can get. The direct extruder grips and feeds the boiled-spaghetti-like filament firmly; no hiccups of that sort. Yet stringing is an issue, as well as overhangs on the fan’s leeward side.
The fact that the part cooling fan on the Sprite is pegged up on the print head’s front side means blowing of cool air onto the print is one-dimensional. We wonder if a circular fan duct would mitigate the problem, but we’ve gotten most of the artifacts under control with gentle altering of the settings here and there, mainly print speed. Printing TPU is always tricky, and it’s really first-world problems we’re complaining about here.
If you want a reliable printer with a top surface finish of prints, the S1 Plus is a solid recommendation.
Is it Worth it?

The Ender 3 S1 Plus is mostly a scaled-up version of the regular Ender 3 S1, but with a few improvements that generally add ease of use. With a build volume of 300 x 300 x 300 mm, the Plus aims to bridge the gap between the basic, Ender 3 style, and CR-10-sized build volumes, catering to those feeling boxed-in on its smaller predecessors.
Sporting the same base, the S1 Plus’s sideways-mounted gantry not only makes assembly less complicated but also adds to the overall rigidity of the printer. Also spilling over from the S1 is the automatic bed leveling, which actually does require more elbow grease than its name might suggest, but once the bed is manually leveled and Creality’s CR Touch probe did the tour, unevenness and first layer problems should be non-existent.
The added insulation to the print bed allows for faster heat times and saves up a bit on energy consumption. Throw in some grooves for the magnetically attached PC print bed and a new touchscreen UI and you’ve got yourself a handful of useful upgrades over its base version. Well, the UI maybe not so much: We’ve found the original S1’s interface more intuitive.
Creality’s in-house developed Sprite extruder is reliably churning through and laying down filament, whether it be PLA, PETG, and flexibles, but also semi-professional filaments such as ASA or nylon-enforced materials. However, with Creality cheaping out by not including an all-metal heat break (essentially a ~$10 upgrade, which constitutes Creality marketing its Sprite Pro version), you are tied to 260 °C, leaving you cast out from using any of the proper professional materials its 300 °C version could handle. This is an easy upgrade, though, should you wish to crank up the Plus’ capabilities. It’s just not one you should have to do, especially given Creality’s pricing.
High-temperature musing aside, the Ender 3 S1 Plus delivers astonishing print quality out of the box. Especially for newcomers, this means worry-free printing as little tinkering is required to get above-decent prints of the build plate. We would have liked a PEI-covered print plate (again, for this kind of money) as it makes removal of prints even easier but it takes little away from the great experience we had with the printer.
All in all, the Ender 3 S1 Plus is a solid machine that is capable of delivering a high-quality, reliable 3D printing experience. Its asking price could be its main stumbling block, though. Currently priced at $529, you are above and beyond true medium-format printers such as Artillery’s Sidewinder X2 and not all that far off from Ceality’s CR-10 Pro, which besides offering a larger build volume and a 300 °C-capable hot end also packs Wi-Fi compatibility, among other things. This shouldn’t take away from the great experience we had with the Plus, though, and if you are looking for a printer in that mid-size section that promises smooth sailing, the S1 Plus is a great choice. If you don’t need the actual print volume, we would recommend going for the base Ender 3 S1, though. It is essentially the same printer, albeit considerably cheaper.
Features
Plus Sized
The big feature on the Ender 3 S1 Plus is bigness, of course. Like the Ender 3 Max, the S1 Plus has a 300 x 300 mm print bed. It is a little shorter than the Max, though, capping out on the Z-axis at 300 mm. If you like the look of the S1 printers but need a little more room, this is the printer you’ll land on.
You’ll find that size on a PC-coated spring steel magnetic surface, like the standard S1. The PEI-coated S1 Pro-style print bed is, unfortunately, not available in the S1 Plus size.
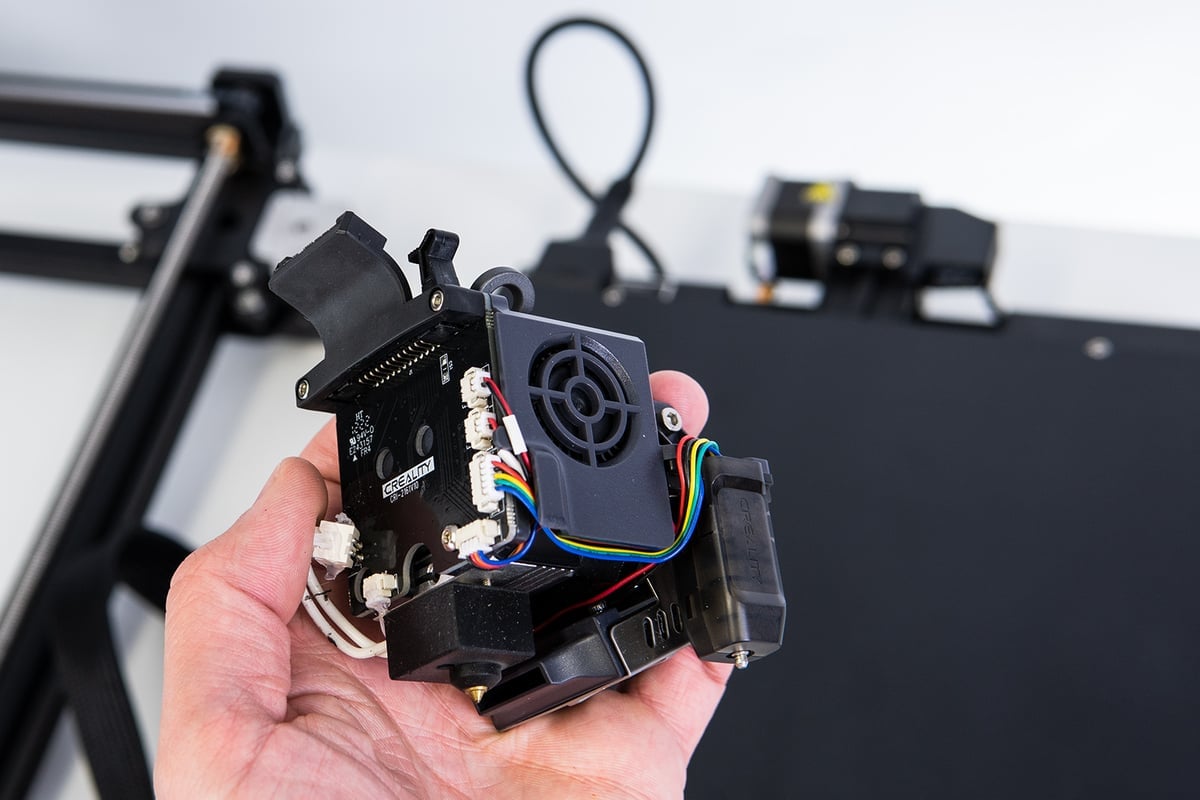
Metal Sprite Direct Extruder Body
With the Ender 3 S1 series came Creality’s impressive new Sprite direct extruder. In the standard S1, the Sprite has plastic housing, but the more premium S1 Pro is all-metal. The S1 Plus is somewhere in between; while its extruder housing is metal, the throat tube isn’t. This means the S1 Plus has a Teflon heat break and caps out at the same 260 °C hot end temperature as the standard S1.
Creality says the S1 Pro’s metal Sprite extruder is 334 grams, a whopping 59% heavier than the plastic variant. We speculated this added weight could be problematic for the S1 Pro, and that potential increases with the S1 Plus’ larger gantry. Without the added high-temperature abilities from a high-temperature heat break, that extra weight isn’t coming with any sort of gain. You could, presumably, just swap out the Plus’ throat tube for a compatible bi-metal heat break, which would be an improvement on even the S1 Pro’s titanium break, but that’s extra work.
It’s worth noting, Creality is referring to the S1 Plus as having a “full metal” extruder, which could be misleading. It makes clear in a blog article that the throat is not made for high temperatures, though.
4.3-inch Touchscreen
Also, like the S1 Pro, the S1 Plus comes with a 4.3-inch color touchscreen. Unlike the standard S1’s rotary knob controls. It’s a nice touch, but we’d have preferred a metal heat break and a rotary knob UI, honestly.
Synchronized Dual Lead Screws
This one is unanimous among the S1 series – and a major premium selling point. Two synchronized lead screws help the print head to be stable and accurate while moving along the Z-axis. Dual lead screws are a common upgrade for single lead screw budget 3D printers, like the original Ender 3s, so having this come stock is a major bonus.
The Ender 3 S1 Plus gets the most out of this feature, given its taller build volume. This essentially means smoother, more accurate results throughout taller prints.
Further Features
Additional features on the Ender 3 S1 Plus include:
- 32-bit Mainboard – Like all Ender 3 S1 variants, the S1 Plus comes with a 32-bit mainboard, the CR-FDM-v2.4.S1_v301 version. This shouldn’t come as a surprise anymore, as 8-bit boards seem to have largely gone the way of the dinosaur in 2022.
- CR Touch – Another shared feature among the S1s, Creality’s BL Touch clone, the CR Touch, is installed and provides the S1 Plus with automatic bed leveling out of the box. It worked great on the Standard S1 and continued to do so on the S1 Plus’ larger print area.
- Red Metal Levelling Nuts – Though the S1s are all auto-leveled, they don’t have fixed beds and so need leveling nuts. Unique to the S1 Plus is its red metal leveling nuts, so you can feel like you’re playing with the garden hose whenever you have to hone it in. Hot take: the metal would have been better used in its heatbreak, honestly.
Featured Prints
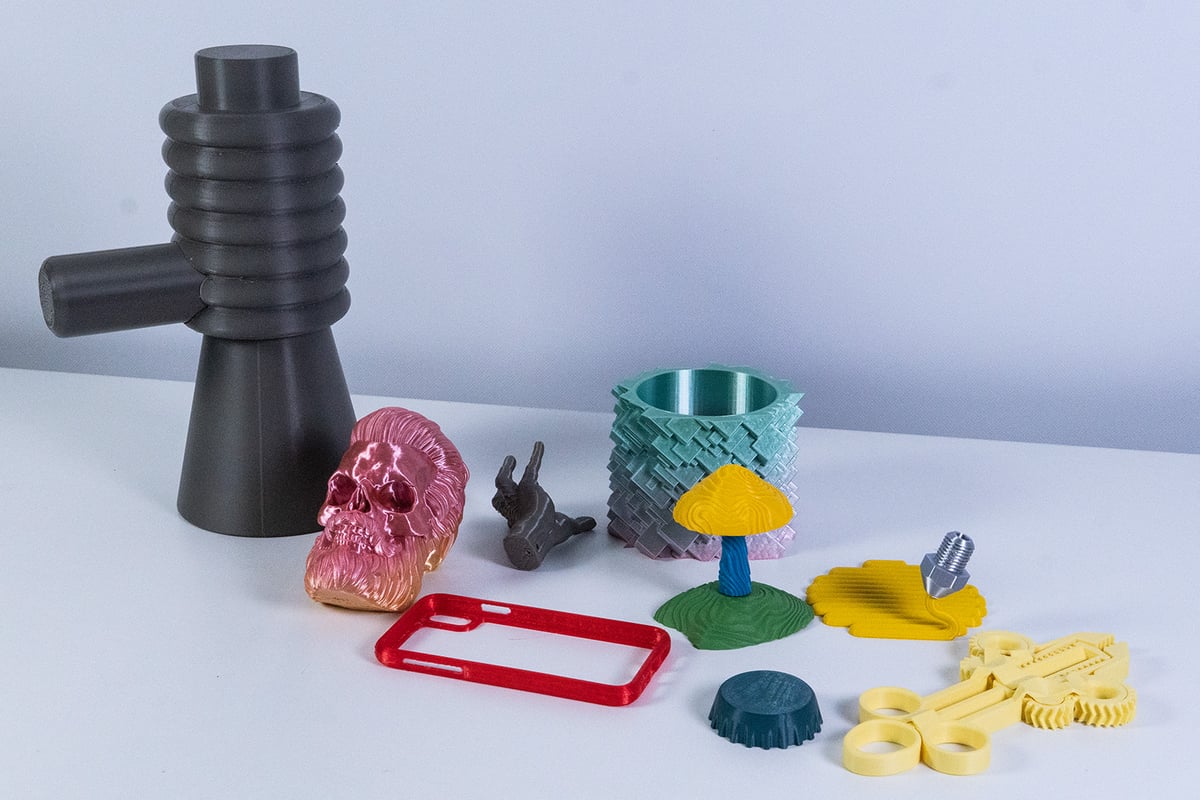
Like what you see? Here’s a list of the 3D models we printed over the course of the review, as well as who designed them.
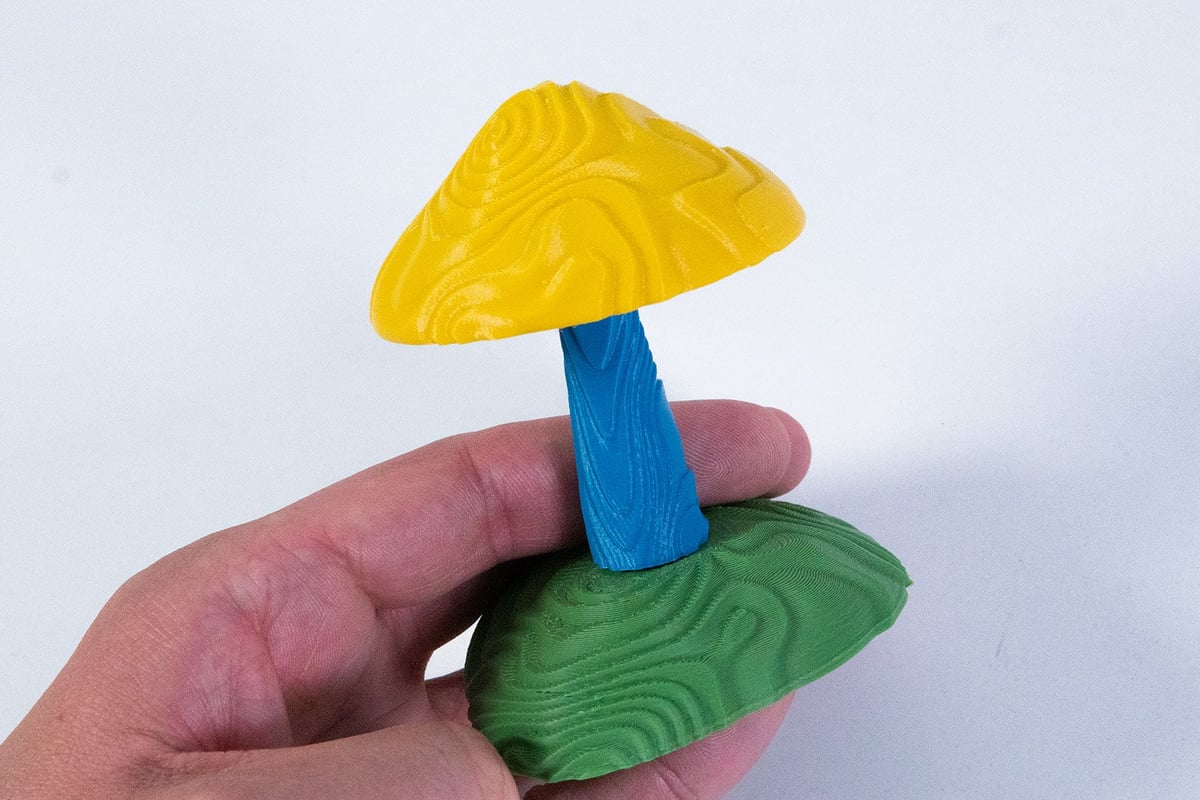
- Wavey Modular Mushrooms by DaveMakesStuff, via Thingiverse
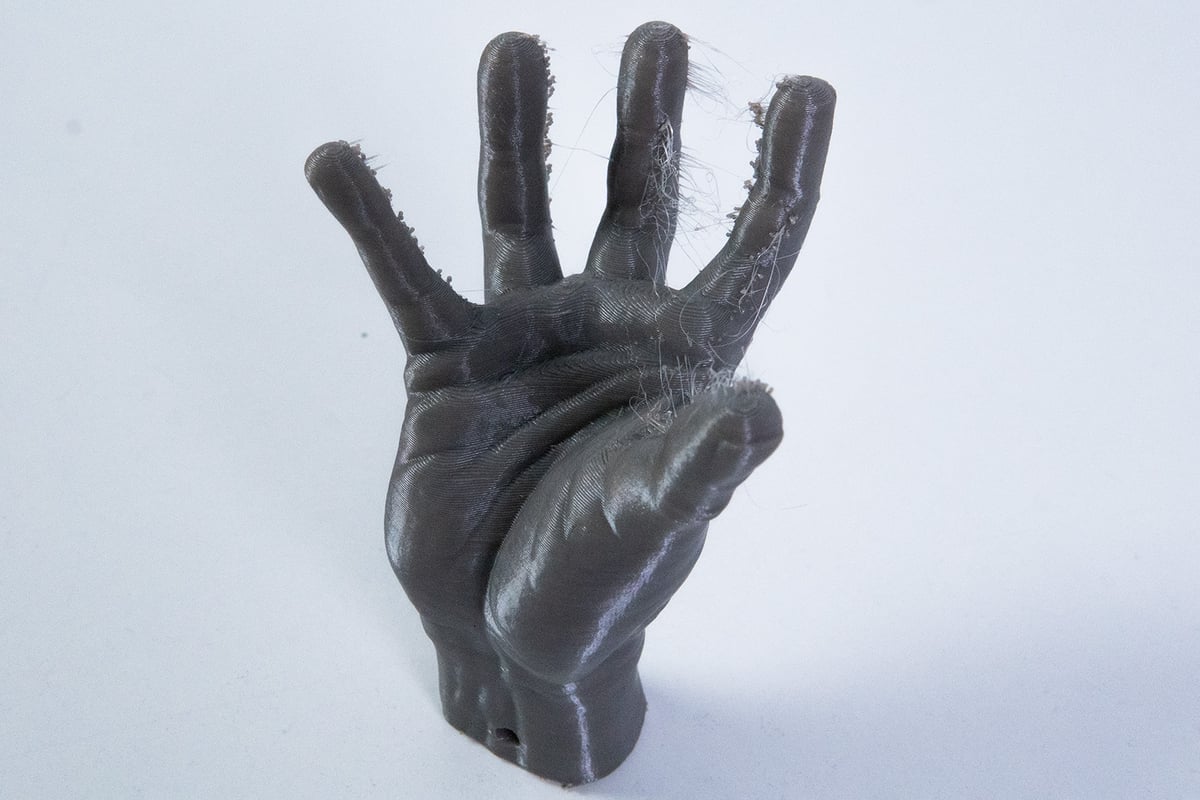
- Addams Crazy Fingers Halloween Key Chain by Impresoen3D, via Cults3D
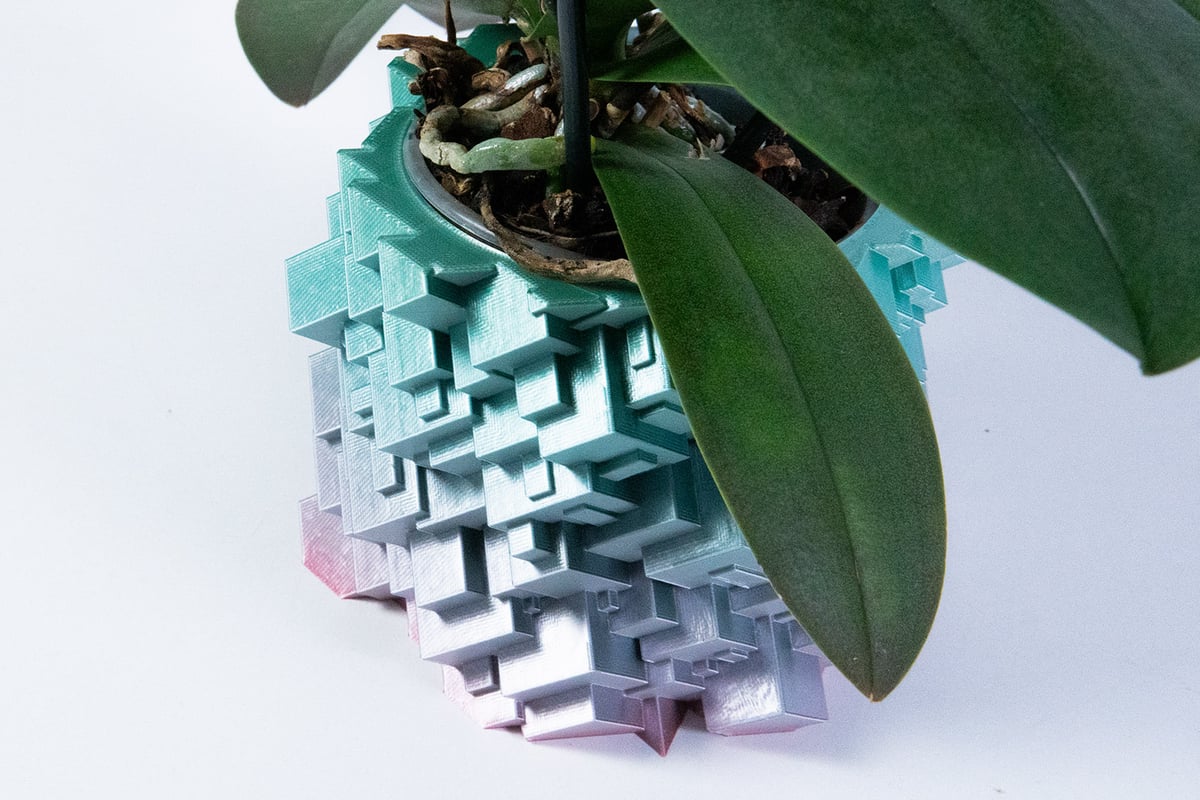
- Glitch Planter by vexanix, via Printables
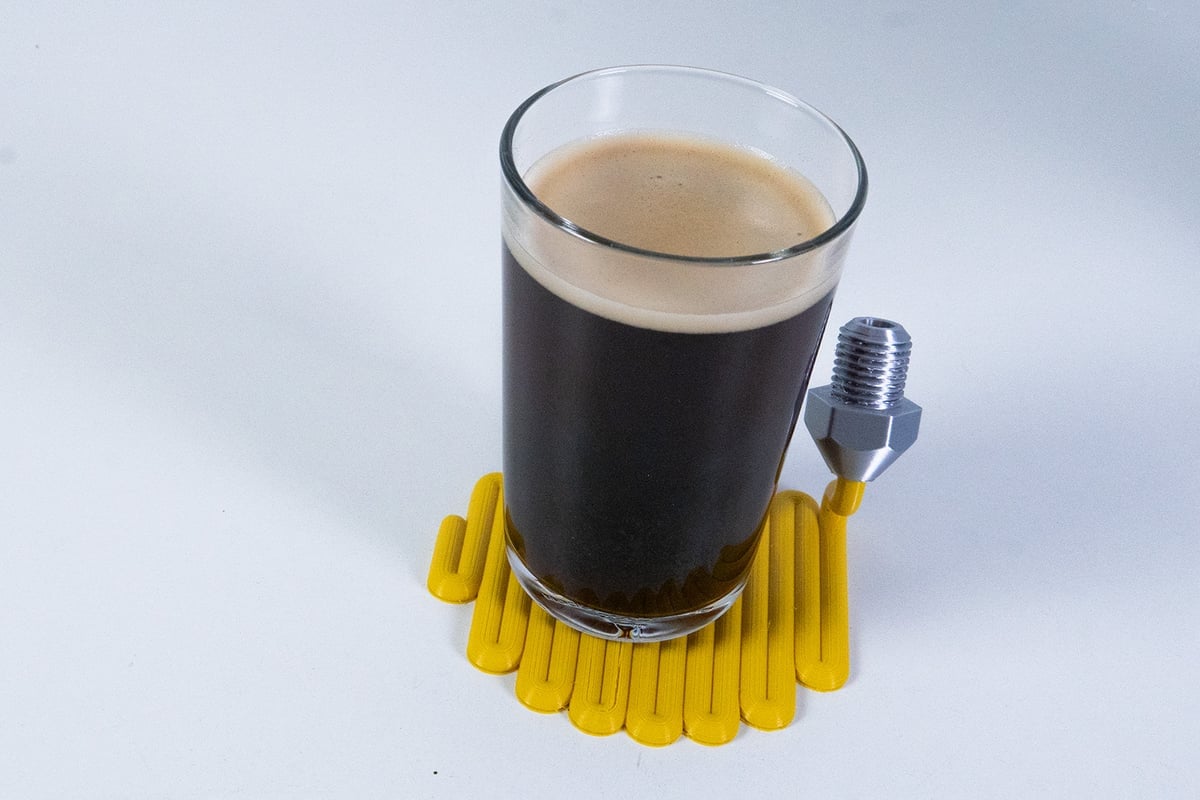
- Printing in Progress Coaster by Snasa, via Printables
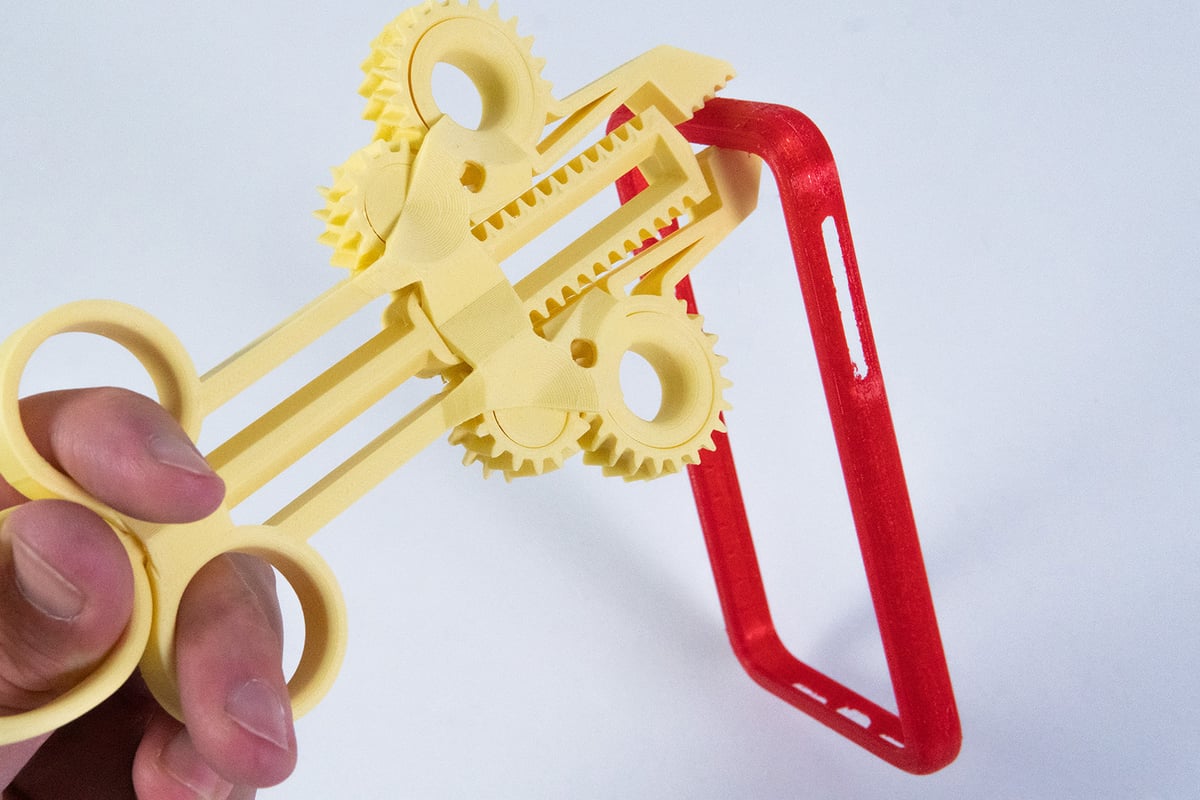
- Predator Action Pliers by Ecoiras, via Cults3D
- Lego Fig Blaster by Michael Pimentel, via MyMiniFactory
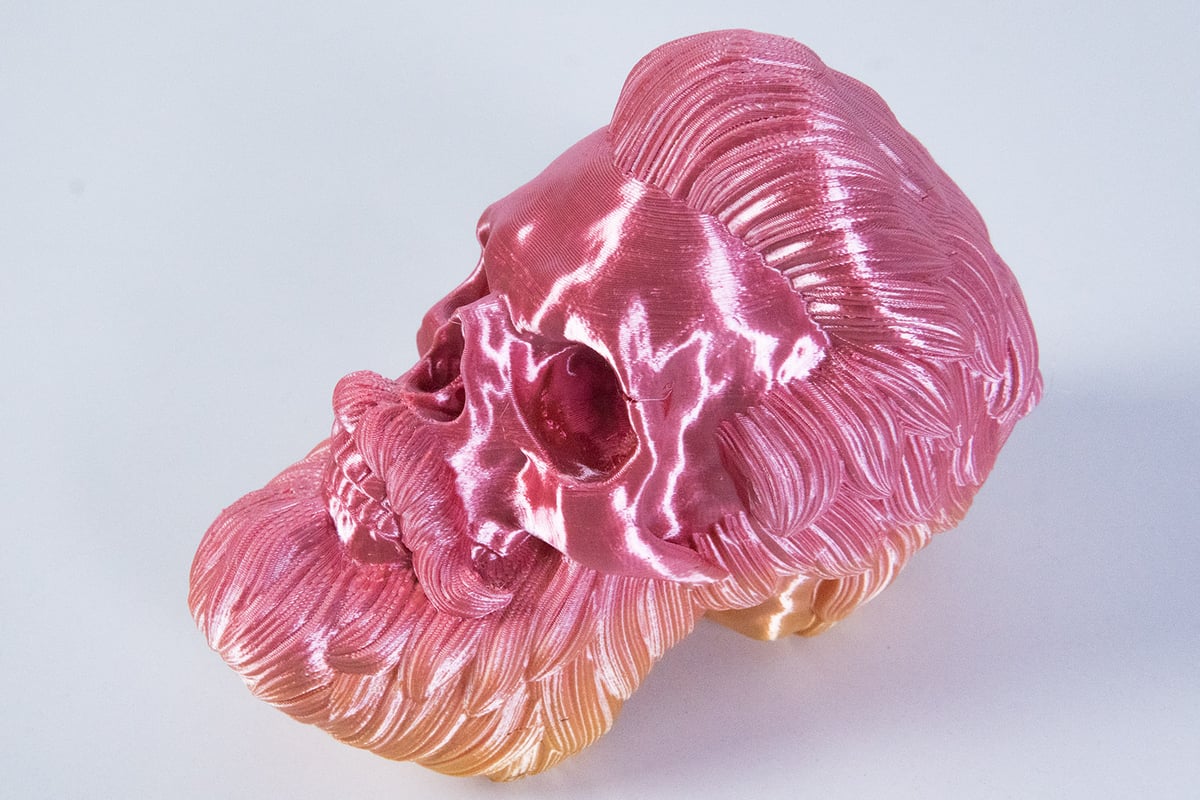
- Bearded Skull by Rogistudios, via Cults3D
- Cap Lifter by Paco, via Printables
Tech Specs
General Specifications
- Technology: Fused deposition modeling (FDM)
- Year: 2022
- Assembly: Partially assembled
- Mechanical arrangement: Cartesian-XY-Head
- Manufacturer: Creality
3D Printer Properties
- Build volume: 300 x 300 x 300 mm
- Feeder system: Direct
- Print head: Single nozzle
- Nozzle size: 0.4 mm
- Max. hot end temperature: 260 °C
- Max. heated bed temperature: 100 °C
- Print bed material: PC-coated spring steel sheet
- Frame: Aluminum
- Bed leveling: Automatic
- Connectivity: SD card, USB-C
- Print recovery: Yes
- Filament sensor: Yes
- Camera: No
Materials
- Filament diameter: 1.75 mm
- Third-party filament: Yes
- Filament materials: PLA, TPU, PETG, ABS
Dimensions and weight
- Frame dimensions: 557 x 535 x 655 mm
- Weight: 10.25 kg
Similar Printers
All this fancy-schmancy Ender 3 S1 stuff is all well and good, but maybe you want to save a buck on your Plus-sized 3D printer. There’s nothing wrong with that! And there are plenty of options floating around out there. We’ve listed a few of our favorites below.
Or, if these mid-sized machines aren’t enough for you, take a gander at our guide, Best Large 3D Printers 2026: Our Top Picks in 3 Categories, and find something that truly fits your big ideas.
Creality Ender 3 Max
If you like the ubiquity of Ender 3 printers and want something with a larger build volume but don’t want to shell out for the S1’s premium features, the Ender 3 Max is a tried-and-true mid-sized 3D printer that can be had for just ~$270. You’ll even snag an extra 40 mm build volume on the Z-axis for it.
The Ender 3 Max doesn’t have all the bells and whistles the Plus does. It’s a classic Marlin UI with a rotary knob that’s rarely seen on new 3D printers these days, and hosts an older Creality hot end with a Bowden extruder – but it’s still a great printer with a generous build volume that can be had affordably.
Artillery Sidewinder X2
If you don’t quite want to drop all the creature comforts found on the Ender 3 S1 Plus, Artillery’s Sidewinder X2 offers a lot of the same features. It has a direct extruder, auto bed leveling, up-to-date touchscreen controls, and even a fast-heating AC print bed for its 300 x 300 x 400 mm build volume. It even boasts appealing ribbon cables, much like the one connecting the S1 Plus’ print head.
We did find the gantry to be overly shaky in our review, reducing the quality of the models dramatically, you can jimmy-rig a solution. If you do, you’ll save some money for your trouble; the Sidewinder X2 is only ~$470.

Anycubic Kobra Plus
Here’s one more plus for your equation, the Anycubic Kobra Plus. At ~$500, it doesn’t present huge savings compared to the Ender 3 S1 Plus, but you get a somewhat taller Z-axis from its 300 x 300 x 350 mm build volume and get a 3D printer similarly kitted out with auto bed leveling, a touchscreen UI, and handy belt tensioners.
The big tradeoff here is it’s missing a direct extruder. The Kobra Plus uses a Bowden-style extruder instead – which could be another plus if you’re worried about the Ender 3 S1 Plus’ metal Sprite extruder adding too much weight.

License: The text of "Creality Ender 3 S1 Plus Review: Bigger & Better?" by All3DP is licensed under a Creative Commons Attribution 4.0 International License.
CERTAIN CONTENT THAT APPEARS ON THIS SITE COMES FROM AMAZON. THIS CONTENT IS PROVIDED ‘AS IS’ AND IS SUBJECT TO CHANGE OR REMOVAL AT ANY TIME.