Creality Ender 3 Review: Best 3D Printer Under $200
Rating

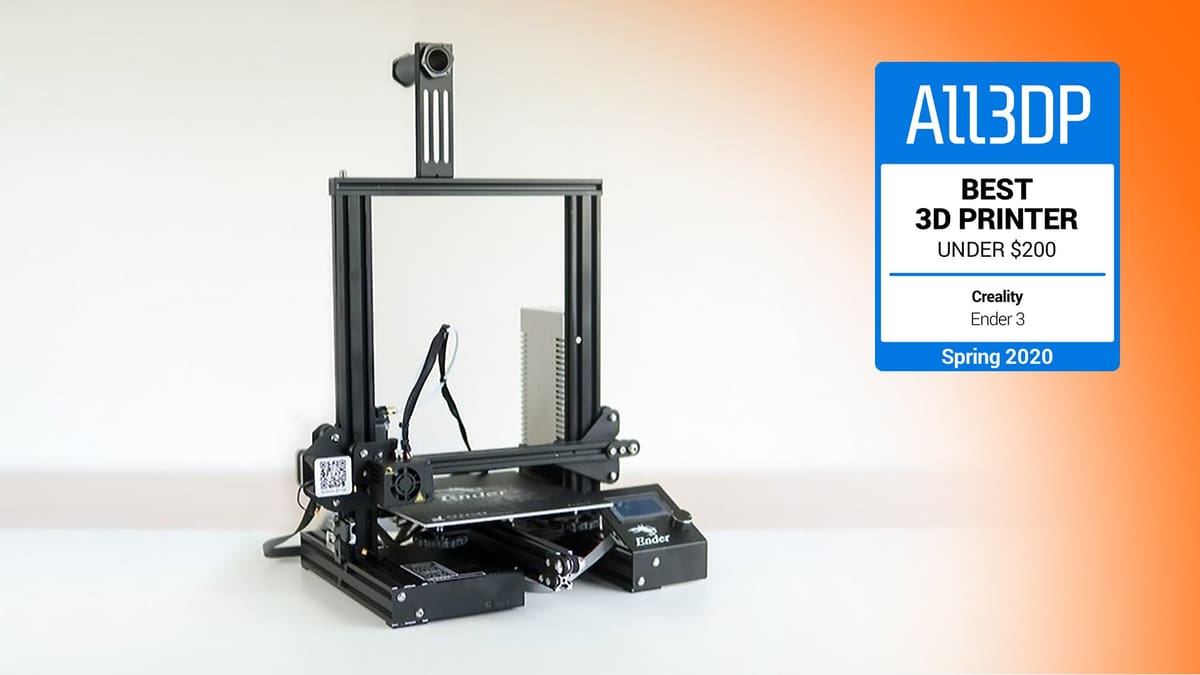
It's official. The Creality Ender 3 is (once again) the Best 3D Printer Under $200. Check out our review to find out why. Includes a video of the unboxing, assembly, and first impressions.
The Ender 3 is a phenomenon: Never have so many people shown interest in a low-cost 3D printer – and rightly so! In this review, we’ll show you why.
The pre-assembled kit sits beneath the popular Creality CR-10 in terms of Creality’s 3D printer lineup. There’s also the Ender 3 Pro, which irons out some of the minor flaws of the Ender 3.
Read also:
Pros & Cons
Pros
- Incredibly affordable
- Decent print volume
- High quality prints are achievable
- Open source
- Tight filament path improves compatibility with flexible filament
- Easy assembly
- Compact design
- Increasing number of upgrades available to 3D print
Cons
- Slight wobble from uneven base, making it difficult to level
- Adhesion sometimes needed to get prints to stick to bed
- Manual calibration required
- Flimsy bed needs to be re-leveled from time to time
Verdict
After spending a couple of weeks tweaking and printing on the Creality Ender 3, our impression seemed to grow fonder the more time we spent with this 3D printer. The experience did include a few speed bumps along the way, but none of the issues we had were insurmountable. All in all, the Creality Ender 3 is an extraordinary 3D printer when you take the sub-$200 price tag into consideration.
There are a number of features that make the Creality Ender 3 one of the most popular machines currently on the market. It has a build volume of 220 x 220 x 250mm, a BuildTak-like heated build plate, power recovery mode and a tight filament pathway that makes it easier to print with flexible materials. These are attributes that are difficult to find in even more expensive printers…
As for printing performance, the Creality Ender 3 exceeded our initial expectations. We experimented with PLA, PETG, ABS, flexible and exotic filaments, and while there were some adhesion and warping issues with ABS, along with some wood filament difficulties, we managed to print successfully with all of the materials at the end of the day.
The 3D printer is easy to assemble and–although it requires manual calibration–the enlarged bed leveling knobs make the process convenient. Once calibration is perfected (it might take a few attempts), the Creality Ender 3 ultimately became indistinguishable from printers that are closer to the $1000 range.
The most glaring issue presented by the Creality Ender 3 is the uneven base, which causes a slight wobble to the entire 3D printer. We were able to solve this by placing a wedge under one corner, but still, this initial problem was definitely a cause for concern as stability is a critical part to a quality 3D printer.
Otherwise, we didn’t have many other qualms with the Creality Ender 3. There were some bed adhesion issues with certain materials, such as ABS, but adding some adhesive solution to the build plate solved this rather quickly.
The Creality Ender 3 is an excellent option for beginners or makers on a budget. While this 3D printer does have its flaws, the affordability makes it a worthwhile investment. Unlike other budget options in this price range, like the Anet A8, the Creality Ender 3 is prepared for high-quality 3D printing right out of the box. On top of that, the growing community surrounding this 3D printer has led to more and more upgrades.
Creality also offers an “Ender 3 Pro”, which has a detachable magnetic heated bed and improvements to the Y-axis to achieve a better print quality. This makes the Ender 3 Pro more expensive. You can read more about it here: Creality Ender 3 Pro Review: Great 3D Printer Under $300.
There are certainly better 3D printers available on the market, but none seem to fuse quality and affordable quite like the Creality Ender 3. It might require a bit of tweaking and patience to achieve the ideal print quality, but the high potential that this budget 3D printer offers makes well worth the battle.
Features
Let’s not beat around the bush here. One of the most appealing features of the Creality Ender 3 is its incredibly low price point. While the cost slightly varies depending on the provider you purchase it from, this 3D printer can currently be found for under $199. At the moment, in some online stores, the Creality Ender 3 is cheaper than its predecessor, aptly named the Ender 2.
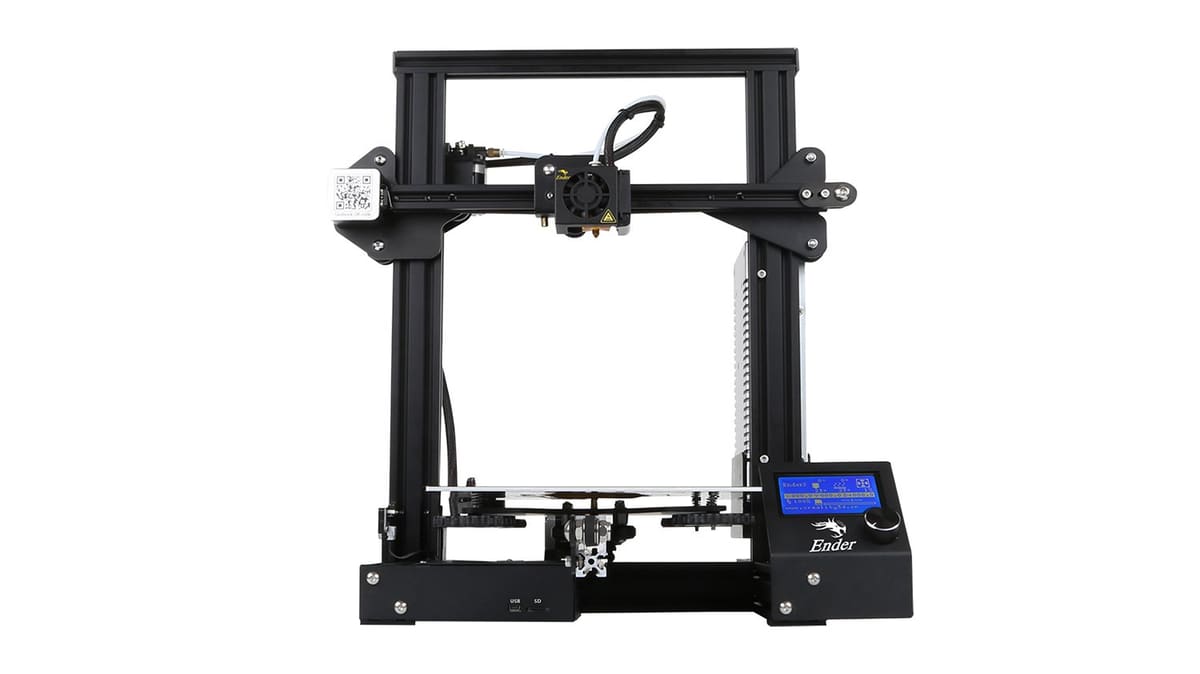
The differences in design between the Creality Ender 3 and Ender 2 are slight, but still worth mentioning. The latest iteration still retains its CR-10 vibe, with aluminum extrusions comprising the frame and a single leadscrew driving the Z-axis from the left hand side of the frame. However, unlike its forebear, which featured a cantilever style that left the X-axis rail projecting into thin air, the Creality Ender 3 completes the loop and closes the frame out.
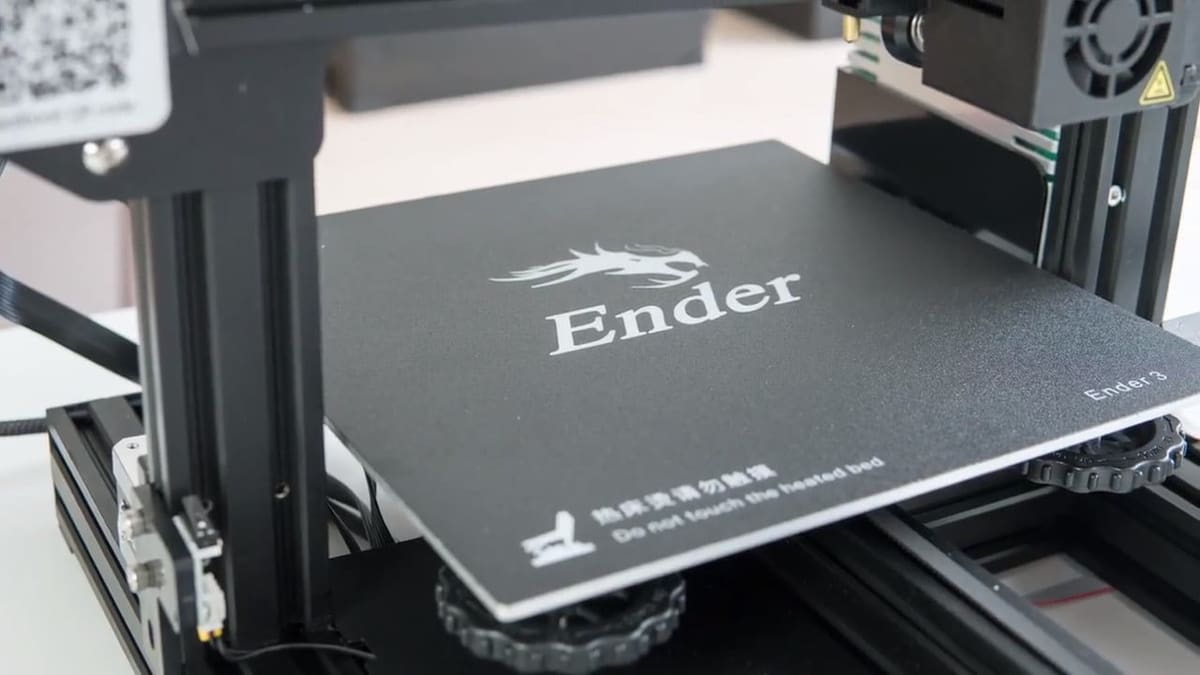
The Creality Ender 3 features a modestly sized heated print bed that measures 220 x 220 x 250mm, which is nearly double that of the Ender 2. Atop the platform is a BuildTak-like print bed sticker, which should mean fewer prints coming unstuck from the bed mid-print.
Another impressive feature of the Creality Ender 3 is its ability to fully recover and resume a print after losing power or getting disconnected. This is a feat made popular by the Prusa i3 MK3 3D printer, but the fact that it was implemented into a sub-$200 3D printer makes it worthy of mentioning.
On the right hand side of the Creality Ender 3 frame is an LCD display with control wheel. Your typical interface setup for Creality’s machines, if you’ve used one of the company’s previous printers, this will no doubt be familiar territory. Still, unlike the CR-10, this control panel is attached to 3D printer rather than included as a standalone component, making the full package more compact and portable.
Creality recently made the Ender 3 completely open source – a first for a Chinese 3D printer manufacturer.
All of the features make the Creality Ender 3 sound pretty compelling, but printing speaks louder than words. So, we decided to put this 3D printer to the test by building it and taking it out for a test drive.
Unboxing
As noted, the Creality Ender 3 is quite a compact 3D printer, and the packaging follows suit. We were quite astonished at how small the box was for a semi-assembled machine that had a modest build volume. Our unboxing experience started with a bit of light humor, as the shipping notice on the side of the box had a strange demand on the side: “Beat the British rules”.
Perhaps Creality was simply stating that the Creality Ender 3 complies with British custom checks, or perhaps they’re trying to undermine the age-old kingdom. Either way, we’ll chalk it up to a translation blunder, but a chuckle-inducing one nonetheless. Upon unboxing the Creality Ender 3, we found every part and tool neatly tucked away in packaging foam.
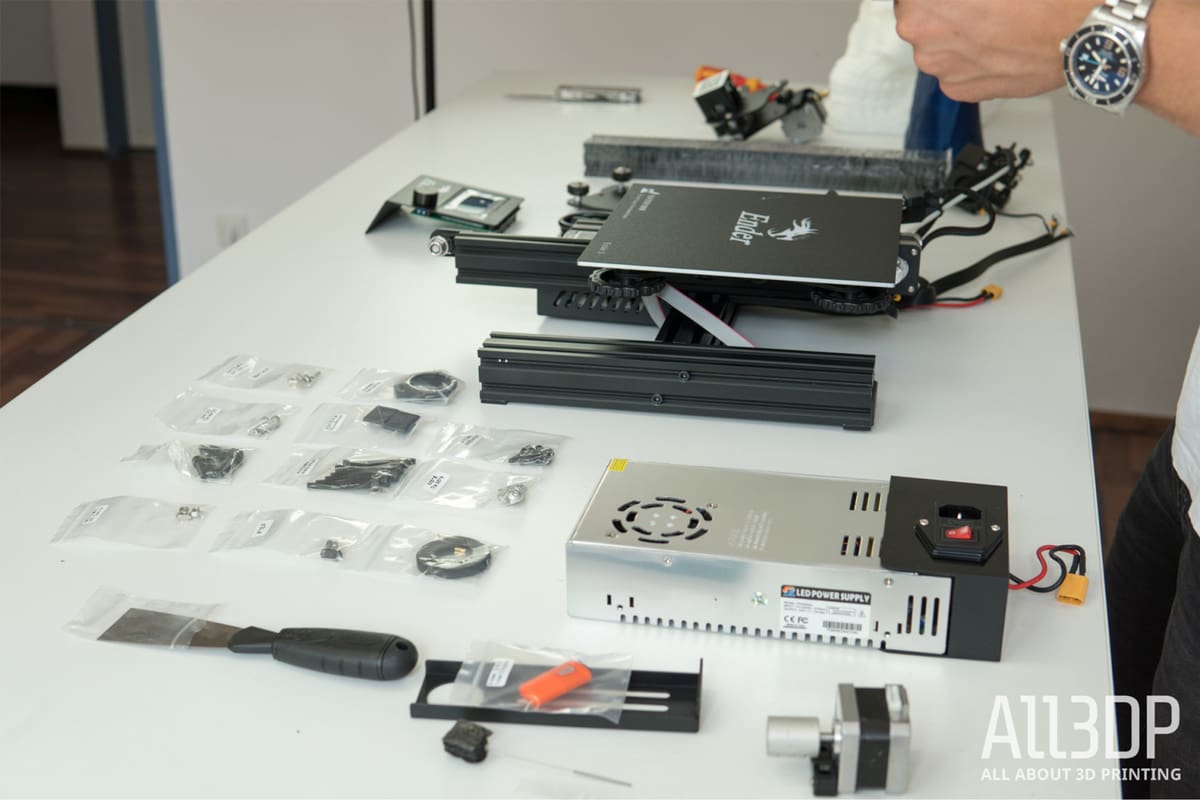
Aside from the parts of the 3D printer, which we’ll get into in the following section on assembly, here’s what else the Creality team provided in the box:
- USB stick (equipped with manual, test models and more)
- Various tools like wrenches, hex keys, and a small screwdriver
- A sample of White PLA filament
- Nozzle cleaner
- Wire cutters
- Zip ties
- Assortment of nozzles
- Spatula
For a 3D printer that is priced at under $200, we were pleased to see accessories like extra nozzles and a nozzle cleaner included in the packaging. Once we unearthed every last part from the cardboard box, it was time to start the long-awaited build process.
Check out our extensive video on the unboxing and assembly process below. And keep scrolling to see how our first prints on the Creality Ender 3 came out.
Assembly
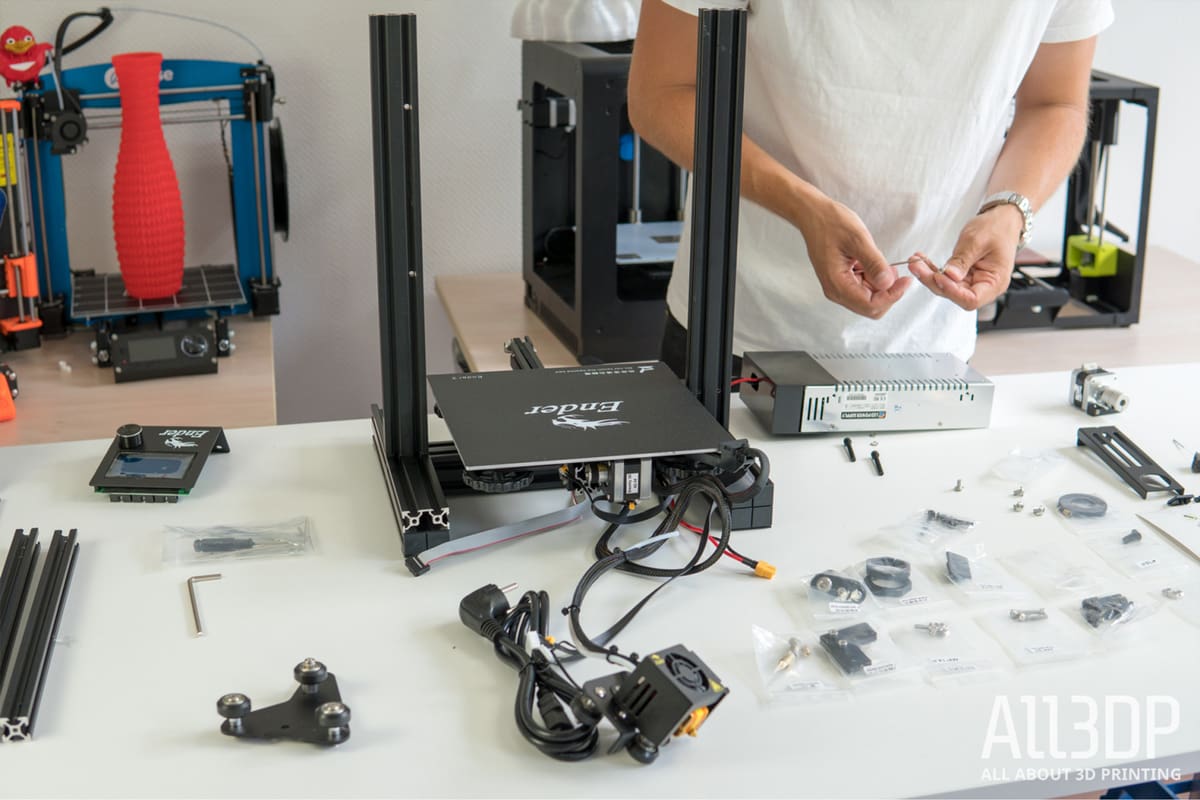
The Creality Ender 3 is considered to be pre-assembled 3D printer kit, but don’t be fooled, this machine requires a fair amount of tinkering before you’ll have it up and running. Compared to the Creality CR-10, which is also known as a pre-assembled, this 3D printer takes longer to put together. In fact, we’d prefer to label the Creality Ender 3 as a semi-assembled machine.
The assembly process is detailed in a small pamphlet that comes with the 3D printer, listing just 12 steps. Seems simple enough, but there were some steps that lacked detail and explanation, making the build time a bit longer than it should have been. If you account for both the assembly and bed-leveling, the entire affair will take the novice 3D printing expert around 1-2 hours to complete.
To simplify things, we can break down the assembly process into the following sections: frame assembly, X-axis assembly, belt installation, machine assembly, and wiring.
The first step is to put the frame together with the pair of 20×40 aluminum extrusion pieces, which will be fastened to the frame using two screws on each side. We found that turning the base of the print on its side made this easier to accomplish. There are pre-drilled holes in the base to mount the Creality Ender 3’s aluminum extrusions.
Following that, Step 2 is to attach the power supply box and LCD screen to the base. Again, this was an uncomplicated act that the Creality Ender 3 instruction manual laid out well enough. However, in the following steps, things get a bit more difficult, particularly if you’re a first-time 3D printer builder.
Once the LCD display and power supply are added to the base, the next move is to install the Z-Limit switch and Z motor to the left side of the frame, we must install two more components, the Z-Limit Switch and the Z Motor. The Z-Limit switch must be mounted to the side of the vertical beam precisely 32mm from the bottom of the Creality Ender 3 base. This is a critical step, as we discovered later on, because attaching the limit switch to high or low will mess up the entire calibration process. So, we highly recommend pulling out a ruler for this part, as accuracy is the key to success later on.
The Z-axis Motor is attached directly to a pre-installed bracket on the back of the left vertical beam. The lead screw is lubricated with grease, so we had to be careful not to remove any of it during the installation. Also be sure to loosen the bearings when installing the Z-axis motor, as the rail will not properly function if these are too tight.
The next step is the X-axis assembly, which can also be tricky for some. Why? Well, there are two beams in the kit that have the same exact dimensions, but only one has six pre-drilled holes in it. This is the one you’ll need for the X-axis, otherwise you’ll find yourself scratching your head and going backwards through the instructions. The left mount includes both the X-axis motor and extruder motor, as well as a strange Facebook QR code that seems slightly out of place on the Creality Ender 3’s frame.
Starting at the open side of the X-axis beam, you’ll have to slide the gantry into place by positioning the wheels at the top and bottom. The wheels should be smoothly sliding back and forth on the rail. If this is not the case, and the wheels are not properly situated, you’ll need to tinker with the eccentric nut behind the bottom wheel until it settles into place. Next comes the assembly of the mounting bracket and belt tensioner, both of which are installed on the right side of the beam.
At this point, it’s starting to look like we have a real 3D printer on our hands, but not before installing the GT2 belt on the X-axis. Each end of the pre-measured belt has a gold clamp, which will be positioned into slots below the extruder carriage.
To install the belt onto the Creality Ender 3, you’ll need to carefully roll the extruder carriage over the belt, which will slide the belt under the wheel and into the empty space. Do the same procedure for the second wheel, positioning the other end of the belt beneath the carriage. There is a pully on each end of the X-axis to wrap the belt around, which will ensure smooth motion of the extruder.
As we’ll expand upon in the following section, we ran into some issues with the length of the belt, but we won’t get into off of that now. The final step is to put all of the pieces together, as well as mounting the filament holder to the top of the frame.
The Creality Ender 3 manual is sufficient enough to complete the build process, but finding a good YouTube assembly video will also speed up the process and reduce mistakes. In the following section, we’ll go over the design of the Creality Ender 3 and bed leveling process.
Design
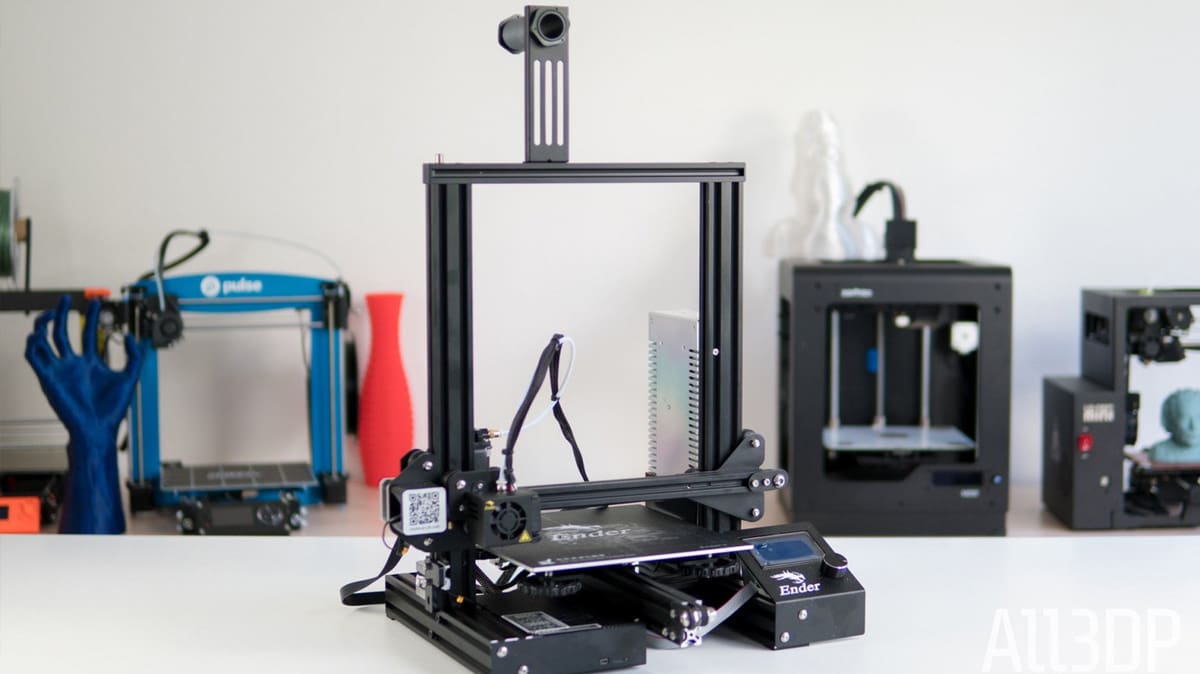
As we briefly mentioned above, the Creality Ender 3 shares the minimalistic design made popular by the company’s crowned jewel: the CR-10. However, the Chinese manufacturer’s latest has a smaller build volume and is more compact–particularly due to the control panel being attached to the 3D printer.
This build platform of the Creality Ender 3 is placed upon an integrated base unit that contains both the mainboard and power supply unit. This adds a great degree of stability to the machine, provided this is sufficiently fixed to the frame along the X- and Y-axis. Additionally, having the mainboard tucked underneath the printer also helps to prevent wire spaghetti and gives the finished product a sleek look.
The Creality Ender 3 is also equipped with V-slot wheels that run along the aluminum extrusions, providing smooth motion during the printing process. For the most part, we were exceedingly impressed with the sturdy and compact design, but there were a few pitfalls in this regard as well.
The most glaring issue we came across with the Creality Ender 3 design was the slight wobble that the base had. It seems like this problem might have been unique to the kit we received, but after spending some time adjusting the base of the printer, we continued to experience a bit of instability. Solving this dilemma was quite simple, only requiring a small paper wedge to even things out. Nonetheless, a flaw is a flaw, and stability is undoubtedly a critical part of the 3D printer’s design.
Such a frame style means it’s a piece of cake to attach extras, mods and upgrades to the Creality Ender 3 without necessarily affecting its core printing locomotion and performance.
We also found that the X-axis belt, which is pre-measured by Creality, ended up being a tad bit too lengthy, which ultimately resulted in the belt being loose. As stated in the assembly section, the toothed belt comes with gold fittings on each end, which is convenient for mounting it, but not for reducing the amount of slack. Still, we persevered by adding a zip tie above the fitting, which strengthened the tension of the belt by a considerable amount. In fact, if you look at the Benchy’s in our First Prints section, you can see the difference that tightening the belt made in print quality.
The Creality Ender 3 also has a surprisingly well-designed extruder system, using a Bowden style with a tight path to help with flexible filaments. The filament feed system is efficient, but we found it difficult to insert materials into the narrow route. At times, we found momentarily unscrewing the filament feeding tube from the Bowden made the process easier.
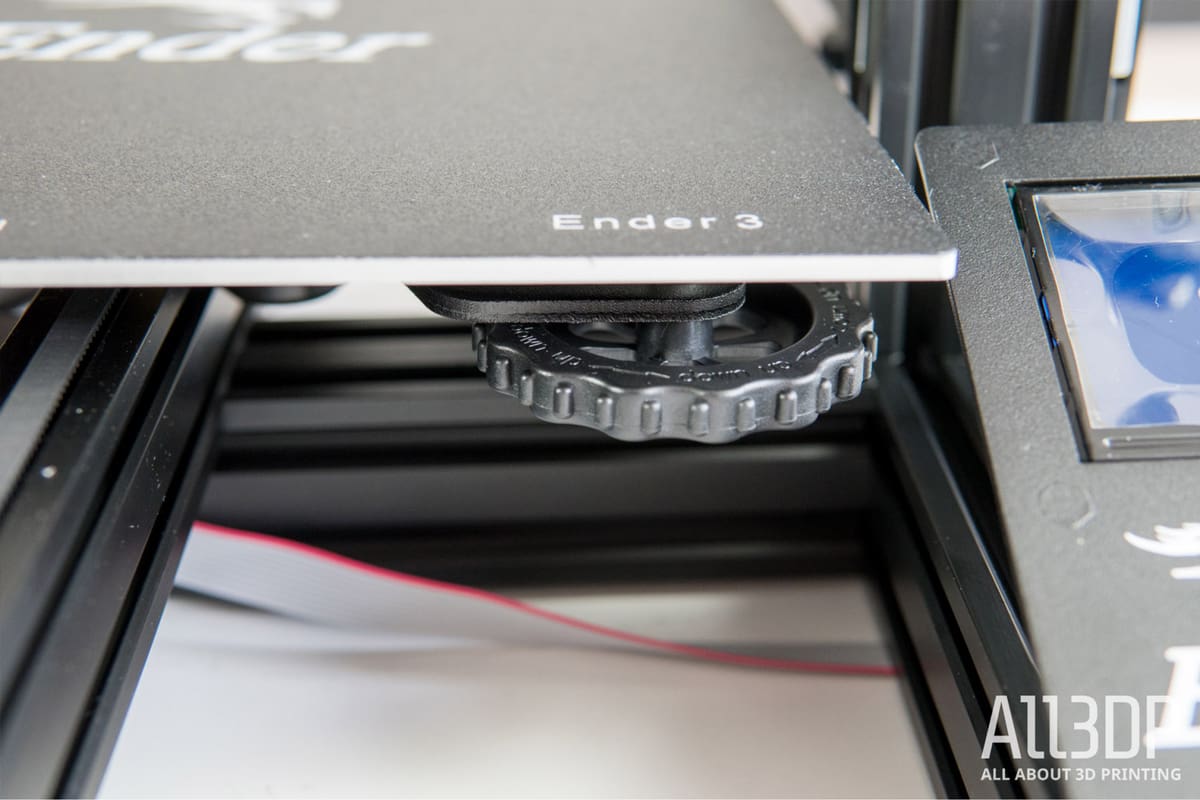
The bed leveling process (which is manual, by the way) also uses a unique twist to it: gigantic knobs. Underneath each corner of the Creality Ender 3’s build platform has sizable and easy to turn knobs to make calibration as easy as manual calibration can be. These dials protrude from below the bed, and are labeled with what direction to turn to raise or lower the bed.
Using the LCD panel, you can move the X and Y-axis to each corner, using a sheet of A4 paper to gauge whether you need to raise of lower the print bed. Placing the paper underneath the nozzle, it should lightly scratch the paper, but not so much resistance where the sheet is stuck below the nozzle.
The control panel of the Creality Ender 3 offers a wide range of settings, but is a bit wonky at times. We found that the dial used to choose settings sometimes skips around and clicks on other options, and the control panel itself sometimes has a slight freezes or delays. Otherwise, the LCD display is a welcome addition to the Creality Ender family, and is easy to navigate.
There are still a few features we feel are missing, the primary one being an option to extrude filament. When changing filaments, there’s no efficient way to clear out the previous material from the nozzle, and an option to extrude filament straight from the control panel would alleviate this issue.
Last but not least, just a minor note on the sound of the Creality Ender 3. Compared to other 3D printers we’ve tested here at All3DP, we found this 3D printer to be a bit loud, but nothing that will cause your house to rumble. The mechanical purrs of this 3D printer are definitely something that you’ll hear if you leave the printer room’s door open, so we thought it worth mentioning in our review.
First Prints
Alright, time to get to the fun part: 3D printing on the Creality Ender 3!
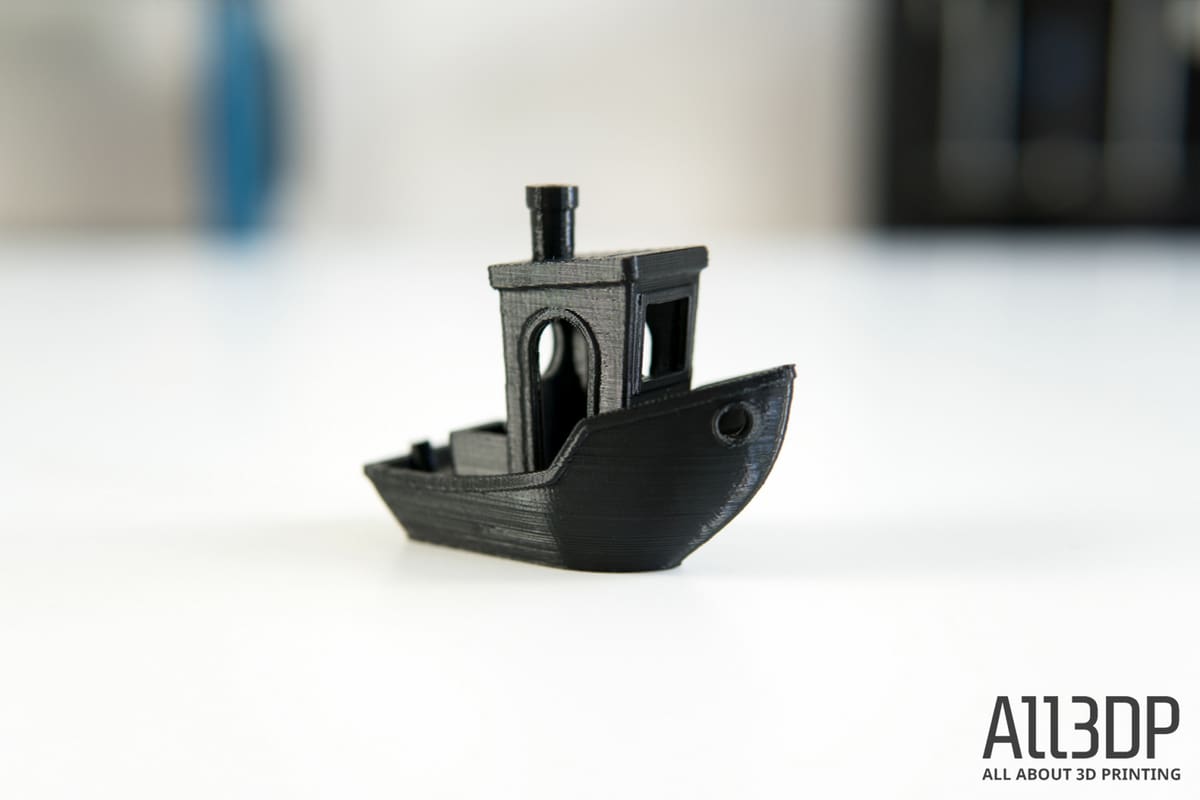
We won’t sugar coat things, there were a few failed prints and adjustments that had to be made before we got this 3D printer running pristinely. In order to get everything into tip-top share, we used the Benchy, everyone’s favorite 3D printing torture test. We used Matterhackers Black PLA to perform this first test.
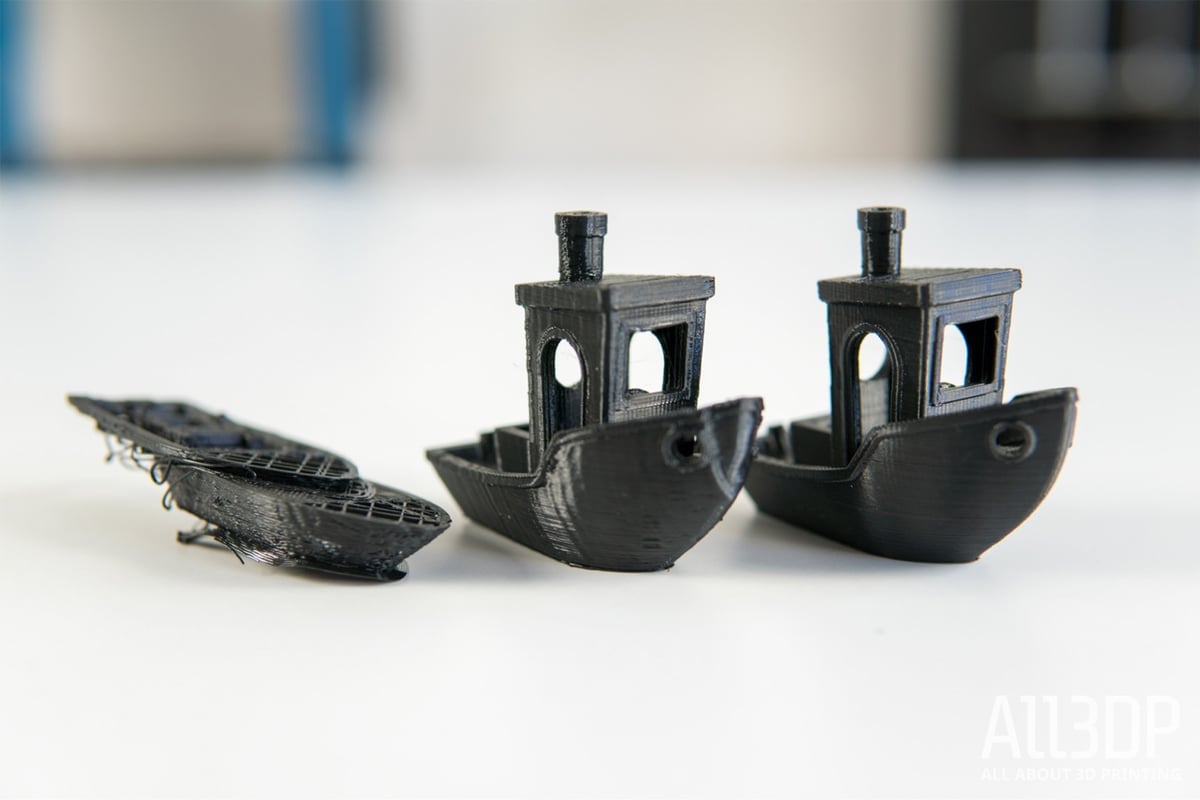
As you can see below, the first attempt was…well… interesting to say the least. After a rocky start on the surface quality, the extruder of the Creality Ender 3 suddenly shifted and displaced the build process. This resulted in some strange Benchy-on-Benchy action, so we stopped the print and went to try again.
The second attempt resulted in complete and uniform Benchy. It handled overhangs and bridging quite well, but the surface has a subtle wave pattern embedded in it. After some head-scratching it finally it dawned on us: the X-axis belt was a bit too loose. As explained earlier, we added a zip tie to add tension and went for one more boat ride.
The final Benchy came out nearly flawless, even at a .15mm layer height. Our third try yielded tremendous quality, and passed nearly all of the benchmarks that the 3DBenchy sets forth. There was a bit of an elephant foot at the first layer, but we attributed this to a slight calibration discrepancy.
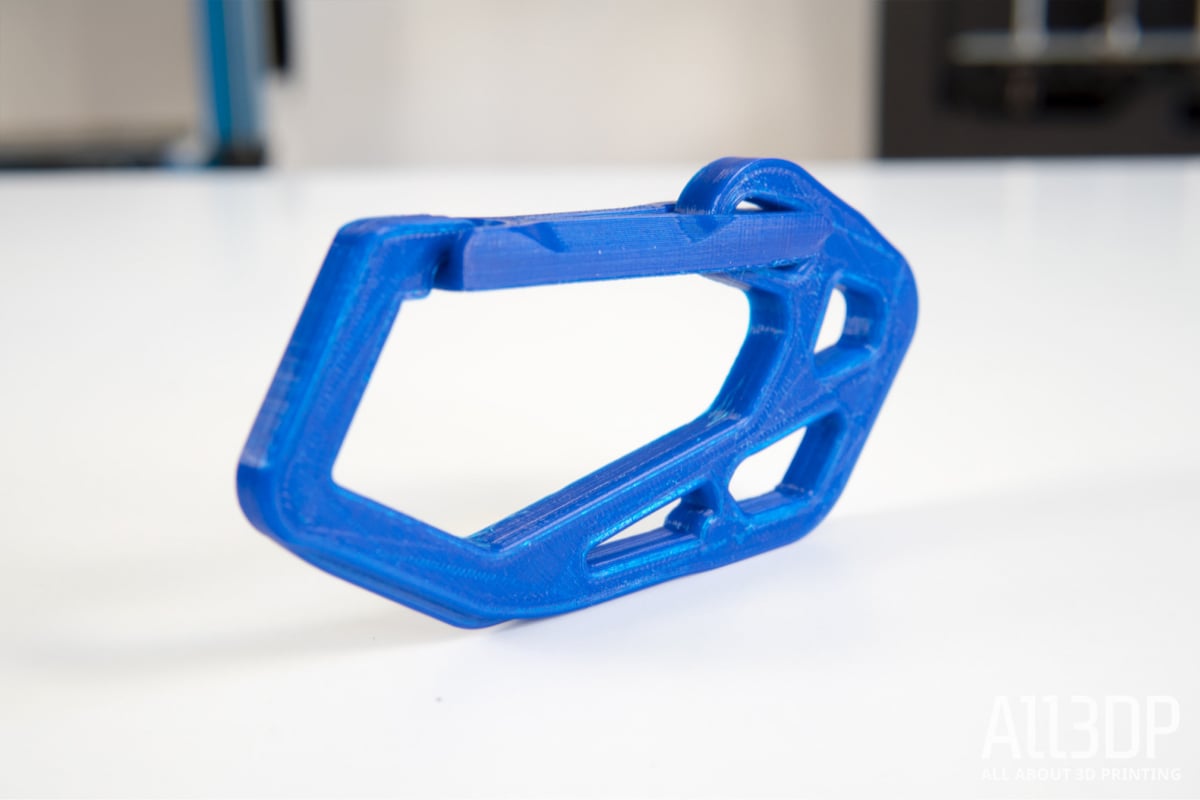
Wanting to bring a bit of vibrance to our first print collection, we switched over the Matterhackers Blue PLA to print a more functional item that we’re quite familiar with: a carabiner. Strangely enough, we suddenly faced some adhesion problems. After toying around with the bed temperature and leveling, we settled on adding a touch of 3DLAC adhesive spray, which completely solved the issue.
Moving on from PLA, we also wanted to try out a high-temperature material like ABS. Using Green ABS from CCTREE, we printed the Flexi Rex, a quick and flexible dinosaur that is printed with multiple joints. For the most part, the ABS printing went off with a roar, but there was a small crack in between the layers on the dinosaur’s head, which raised questions about either the material or the Creality Ender 3’s ability to handle it.

Once we perfected the calibration and settings of the Creality Ender 3, we were quite amazed by how well our prints were coming out. There was one more thing we attempted to ambitiously print a Waving Groot model with colorFabb Corkfill. We left the larger-scale model running overnight, and when we returned in the morning, discovered that it had failed in the waning stages of the print. Although Groot was partially decapitated, the surface of the remaining print was actually amazing, especially for a difficult-to-print material like wood fill.

We will definitely continue to experiment with more speciality materials like wood filament, TPU and PETG as we get more time with the Creality Ender 3.
More Printing
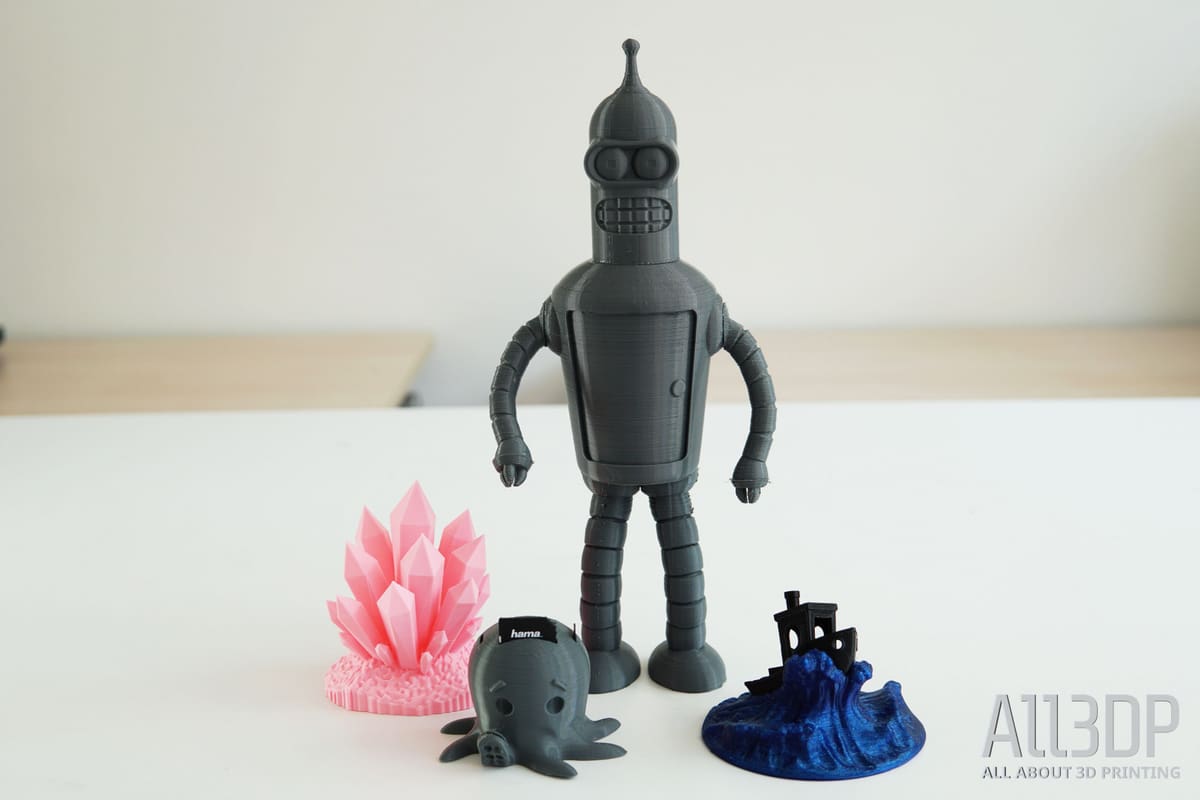
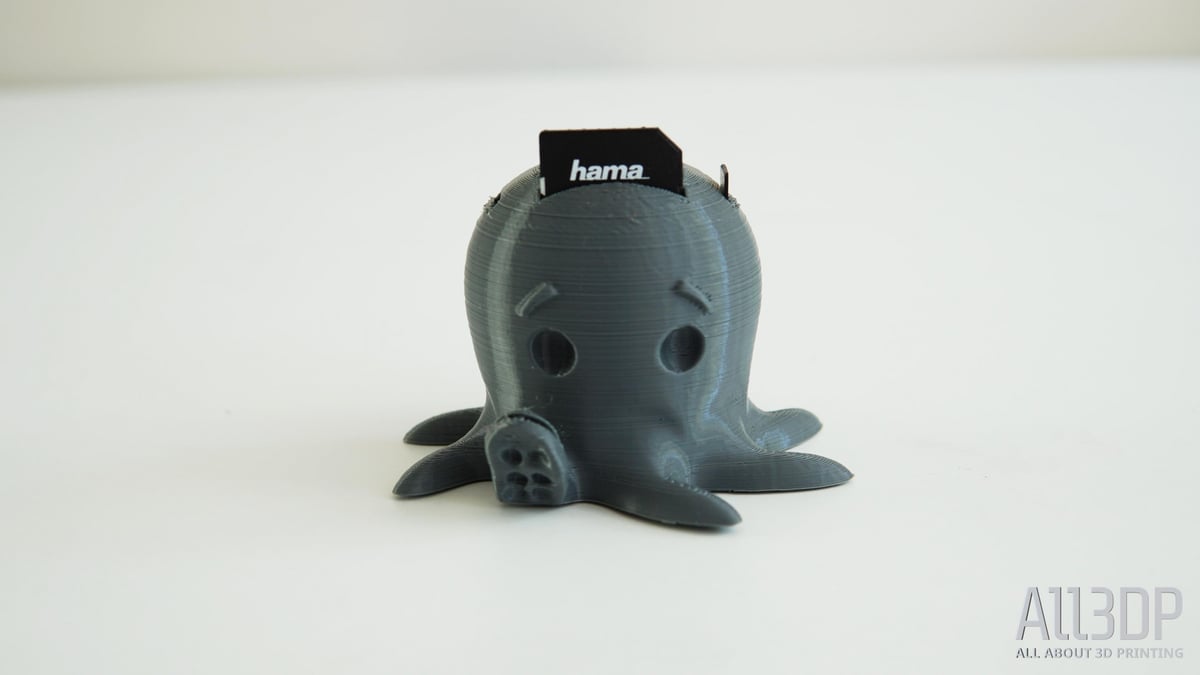
After having success printing with PLA material (despite our Groot print that was interrupted by Thanos), we decided to turn things up a notch and print with some more advanced materials. We kicked off round two of printing with colorFabb nGen Flex, a semi-flexible material developed in collaboration with Eastman Chemical Company.
The first print we created with this gray flexible material was the Cute Octopus SD Card Holder by designer alpokemon, a useful little model that can house six SD cards and two MicroSD cards. We expected a bit more difficulty with the semi-flexible material, but ended up being pleasantly surprised with the quality we achieved right off of the bat. The model had a bit of stringiness (which is to be expected with flexible filament) and struggled slightly with the card slots at the top, but the print came out nicely nonetheless.
Next, we decided to up the ante and print something a little bigger and bolder, and what better test print in a gun metal gray than the conniving and beer-belching robot Bender from the revered animated series Futurama. While browsing Thingiverse, we found an amazing Bender kit by designer cerberus333, printed in six different parts and glued together. Not only was the size more challenging for the Creality Ender 3, but it had to print eight different parts in flexible filament on one print bed. It sounded like an adequate way to test the gumption of this 3D printer, and again it exceeded our initial expectations.
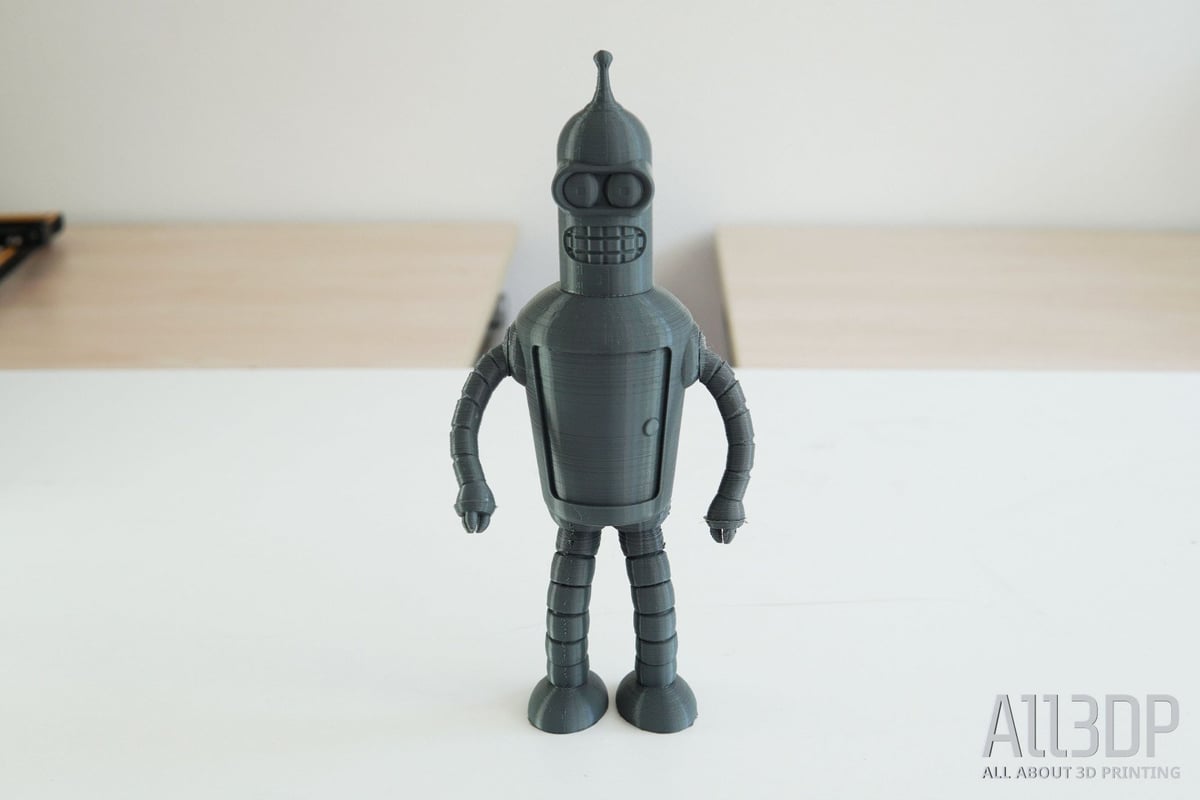
With no supports, we were able to print each part of the Bender model without error. Again, there was a bit of stringiness, and some minor layering issues on the right leg and antenna on top of his head. But as a whole, the print came out nicely, and once we glued it all together we had a fantastic Bender model on display.
Moving on from flexible filament, the next test we performed was with Pink ABS filament manufactured by CCTree. Thinking of what would be fitting for this light pink filament, we ultimately settled on a majestic Crystal Cluster model by designer SenseiRalph. With ABS, the Creality Ender 3 struggled at first.
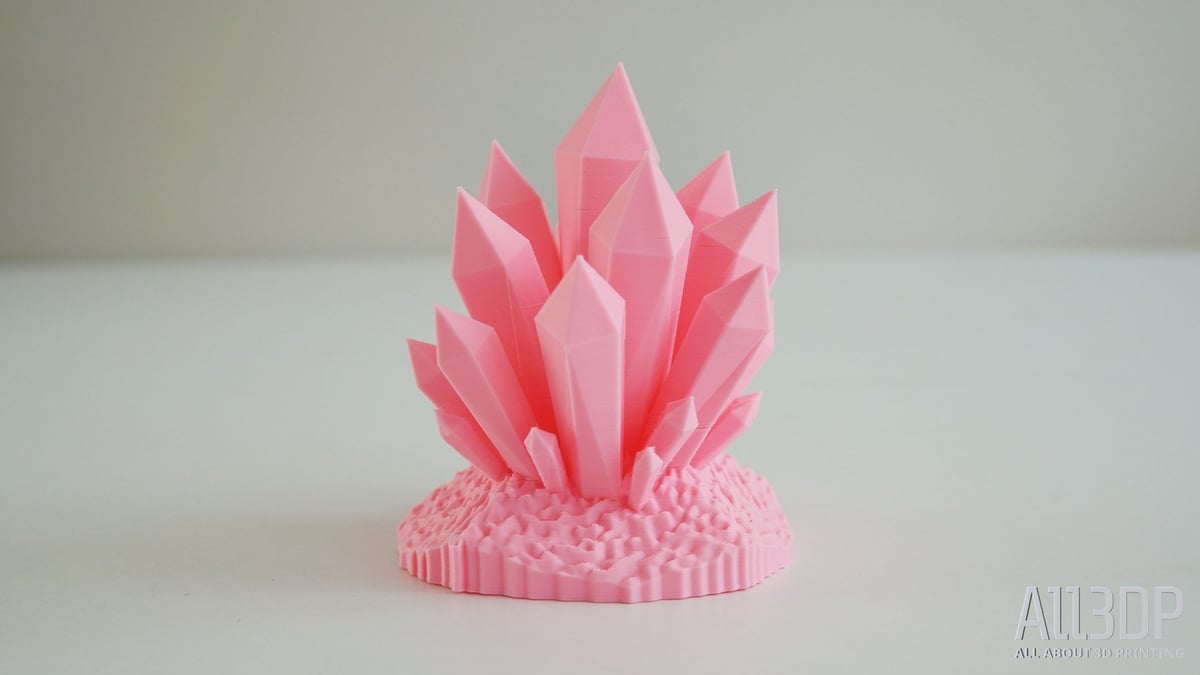
It took about five or six tries to get the filament to stick to the bed and not warp, but after applying some adhesive, all of those initial issues were thrown out of the window. The resulting print was truly magnificent, one of our favorite 3D prints we created with the Creality Ender 3. Despite some complex angles, the surface quality of these crystals was nearly flawless.
Everybody plugged into the 3D printing community knows the beloved 3D printer torture test: the 3DBenchy. We printed one for our Creality Ender 3 review, but wanted to rock the boat a bit. What better way to do that then with a Benchy stand that looks like a stormy sea.
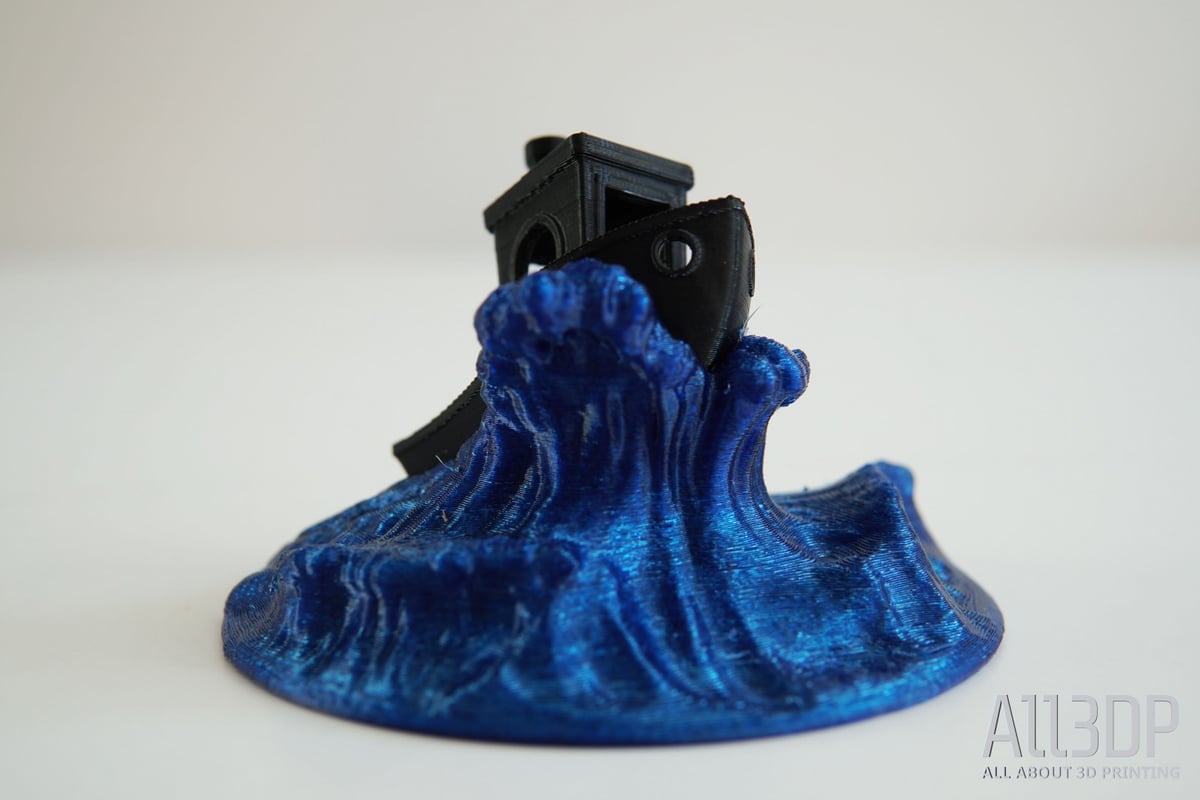
When we came across the Benchy at Sea | Wave Display model by nexnox, we knew we had to give it a go. And it just so happened that this model matched perfectly with our next material, transparent blue PETG from Rigid.ink. The Creality Ender 3 handled this PETG material masterfully, and the resulting 3D printed wave is one of the coolest prints we’ve seen in awhile!
Finally, we decided to give wood filament one more go with another Waving Groot model. This time around, the Creality Ender 3 made it all of the way to the top of the character’s head before clogging occurred, marking another disappointing failure with the colorFabb Corkfill.

When it comes down to it, we suspect that a better quality nozzle is needed to accomplish prints with speciality materials like wood filament. The inability to print with this filament was definitely a downside to the Creality Ender 3, but again, it’s hard to complain when the you consider that this printer is priced below $200.
Tech Specs
Here’s a brief overview of the specifications for Creality Ender 3:
- Technology: FDM
- Print Area: 220 x 220 x 250mm
- Nozzle: 0.4mm
- Filament: 1.75mm PLA, ABS, TPU
- Max. Print Speed: 200mm/s
- Max. Layer Resolution: 0.1mm
- Print Precision: +/-0.1mm
- Heated Bed: Yes
- Connectivity: SD Card, USB
- LCD Screen: Yes
Software
Before we wrap up our first impressions review of the Creality Ender 3, we wanted to touch on the topic of software, particularly regarding slicer settings. After scouring through Google to find pre-defined slicer settings for Ultimaker Cura, there wasn’t any printer profile to upload into the slicer software.
Additionally, the USB provided with the Creality Ender 3 included a download for Cura, but only for Windows. Therefore, as the reviewer was operating on a Mac OS, there was no way to download the slicing software from the resources provided by the manufacturer. An annoyance? Sort of. But it’s also the kind of problem we found an easy solution for.
Thankfully, the Creality Ender 3 has been gaining enough of a presence among the 3D printing community, that we found pretty promising slicer settings on YouTube from user KNOWLEDGE INFINITY. After inputting the entire list of print settings, which can be found in the video description, we set off to experiment with the recommended data to see how well it worked.
Some important notes to keep in mind when adding the Creality Ender 3 as a custom FDM 3D printer to Cura. First and foremost, make sure you change the nozzle diameter in the main menu from 2.85mm (the default number) to 1.75mm. This small step is easy to skip over, and doing so will result in an under-extruded and overall disappointing print.
We found that, for the most part, these Cura settings worked exceptionally well. But don’t be afraid to experiment a bit until you find the most satisfying results for your own printing goals.
Where to Buy
Despite being a sturdy and relatively capable 3D printer, the Creality Ender 3 is available for a retail price of under $200. While the 3D printer certainly has its flaws, this bargain price makes us a little more willing to overlook these for the sake of saving.
After spending some time assembling and printing on the Creality Ender 3, we feel confident recommending this machine to makers on a strict budget or even motivated beginners that want to gain experience assembling a FDM 3D printer without breaking the bank.
While there are many other options out there that offer higher quality prints and a more user-friendly experience, such as the Creality CR-10 or Original Prusa i3 MK3, few 3D printers on the market meet the low price point of the Creality Ender 3.
If you’re interested in picking this 3D printer up for yourself, check out the shopping links on the right side.
License: The text of "Creality Ender 3 Review: Best 3D Printer Under $200" by All3DP is licensed under a Creative Commons Attribution 4.0 International License.