Continuous Fiber Reinforced 3D Printing: Mind-Blowing!

"Stronger than metal" polymer parts are easier to 3D print than you might think. Here's an introduction to the tech and the business case for continuous fiber 3D printing on a Markforged Mark Two.
Okay, cards on the table, perhaps it’s a little fanciful to say “stronger than metal”. There’s a kernel of truth to the claim – continuous-fiber reinforced prints can indeed be stronger than aluminum. This may be why the technology has become so popular with machine shops and manufacturers for jigs, fixtures, spare parts, and tools. But this strength depends on how and with what you reinforce your print.
Really, continuous fiber 3D printing can make incredibly strong and durable parts that are still, by the majority of their composition, plastic. The trick lies in how they are reinforced and the stresses they’re subjected to. But we’ll get to that. First, a primer.
Fused deposition modeling has its place as a tool for product iteration and prototyping, even end-use production, depending on the part and quantities required. You slice your model, and the 3D printer will heat some plastic and deposit it into the shape of your desired model. Simple.
But there’s a way to take the limited durability of plastic parts and have them compete with milled aluminum: continuous fiber reinforcement. This printing process gives an extra cost-saving benefit on top of the agility of iteration and local manufacture – crazy strength-weight ratios.
We explore the hows and the why of continuous fiber 3D printing, through the lens of hands-on experience with the Markforged Mark Two. (Full disclosure: Markforged loaned All3DP a Mark Two and more materials than we know what to do with to learn the process and better understand the tech. The base cost of the Mark Two is $19,900.)
What Is Continuous Fiber 3D Printing?
Continuous fiber reinforcement takes the versatility of fused deposition modeling – tracing out a model layer by layer from molten thermoplastic – and bolstering the part in various ways and directions with a separate deposition of reinforcement material thread.
Plenty of companies offer some form of fiber reinforcement technology – a 2020 article in CompositesWorld provides a handy overview of the main players and the scale of solutions they offer.
Among this cabal of fiber-reinforcement-centric companies, there are a handful of different technologies and processes for how and where the fiber is utilized. It’s an area of much study, with published research and organizations dedicated to the subject.
An article in the May 2022 International Journal of Material Forming describes three main technologies: towpreg, whereby the reinforcement thread is already embedded in the polymer matrix before processing; in-situ impregnation, which sees the fiber thread embedded into the polymer matrix at the point of extrusion; and finally co-extrusion with towpreg, where the fiber reinforcement material is embedded in already-extruded thermoplastic matrix.
The principal uses between these different approaches are, largely, the same. For the purposes of this article we’ll focus on co-extrusion with towpreg, since it best fits the Mark Two, which is the machine we’ve familiarized ourselves with for this dive into the process.
Fiber Reinforcement Parallels
The use of fiber reinforcement to imbue lesser materials with strength and stiffness is ancient. One easy-to-picture example is in construction, where the inclusion of steel rebar into concrete produces composite structures that are stronger and more economical than those made from the individual materials alone. So too, can precisely positioned threads of carbon fiber (and other fibers) in a filament-based 3D print.
This is the basic principle behind continuous fiber composite 3D printing.
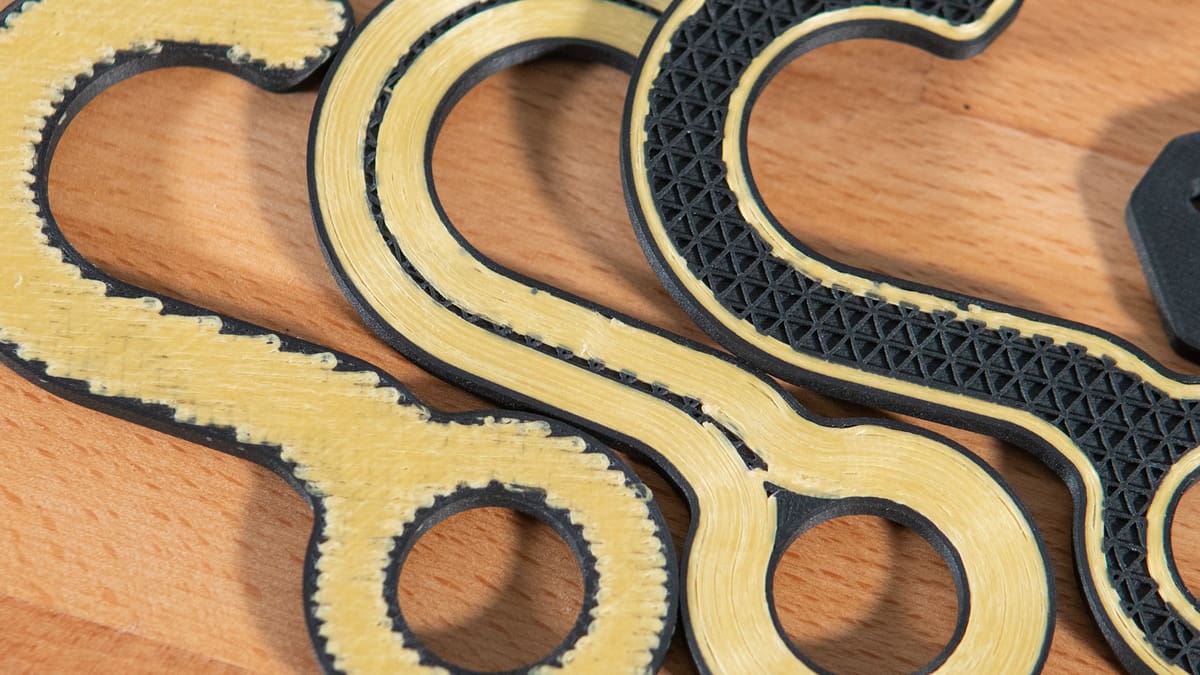
One distinction to note is that being an agile, computer numerical controlled production method, continuous fiber 3D printing offers discerning control over the placement of the reinforcement material. It’s not just isotropic – reinforcement can be applied to outer and inner walls to varying densities and thicknesses.
As is typical of fused deposition modeling 3D printing, the greatest strength on offer is parallel to the direction of the deposition – the strength is transverse isotropic. While individual fibers offer the most significant strength benefit under tension, you can position them in different ways when printing.
Depending on your fiber strategy, you can boost characteristics like wall strength and resistance against deformation in threads and cavities, not to mention resistance against bending in the X- and Y- axes, without significantly increasing the weight of the initial polymer part.
What Is Continuous Fiber 3D Printing Not?
There’s a distinction to keep in mind with continuous fiber reinforcement. It’s easy to conflate the process with carbon-fiber-filled materials, which instead use a percentage of chopped carbon fibers suspended in the thermoplastic to impart additional strength.
The two are distinct. Fiber-filled materials give improved strength, and chemical and heat resistance over the base thermoplastic filament. A continuous fiber embedded in a print (even a print of fiber-filled material, such as Markforged’s Onyx base material) provides specific reinforcement and strength benefits to some geometries.
For example, it is correct to say that the Markforged Mark Two is a carbon fiber 3D printer – the Onyx base material it uses is stuffed with chopped carbon fibers and is, alone, a strong and versatile material. However, the Mark Two is also a continuous fiber reinforcement 3D printer, capable of embedding a scaffold of continuous fiber (that could be carbon fiber – other materials are available) to reinforce a print.
If you’re interested in general carbon-fiber 3D printers, our guide to desktop carbon fiber 3D printers covers the tech and top printers, including the Mark Two we’re toying with in this article. If you’ve bigger needs, our guide to professional carbon fiber 3D printers is also the place for the scoop on large-format machines of similar capability.
How Does It Work? (Feat. Markforged Mark Two)
Our frame of reference for walking through the process of producing a fiber-reinforced 3D print is the Mark Two, so the following passages are quite specific to that machine, but we expect the principles to be pretty similar between different companies and their own different takes on the tech.
The Mark Two is, arguably, the first name in desktop fiber-reinforced 3D printing. Currently on its second generation, it’s proven its salt as a desktop workhorse 3D printer and paved the way for a host of similar but specialized and scaled-up options from the company. The machine’s clear production benefit and simplicity are possibly the reasons why.
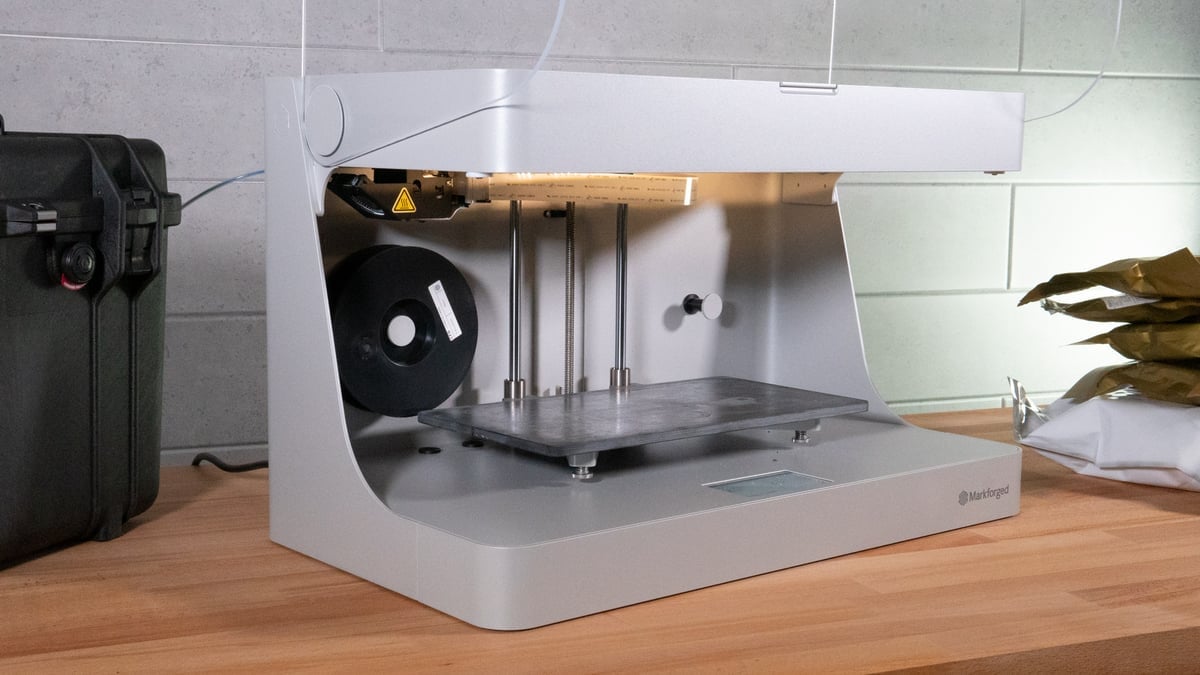
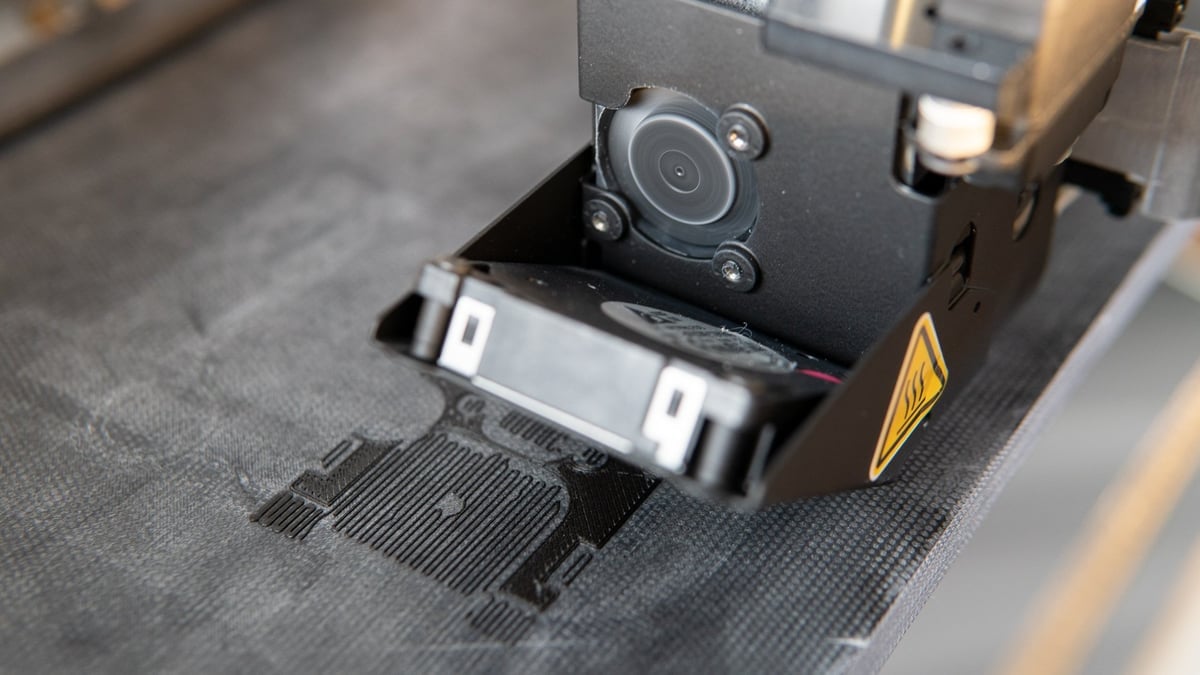
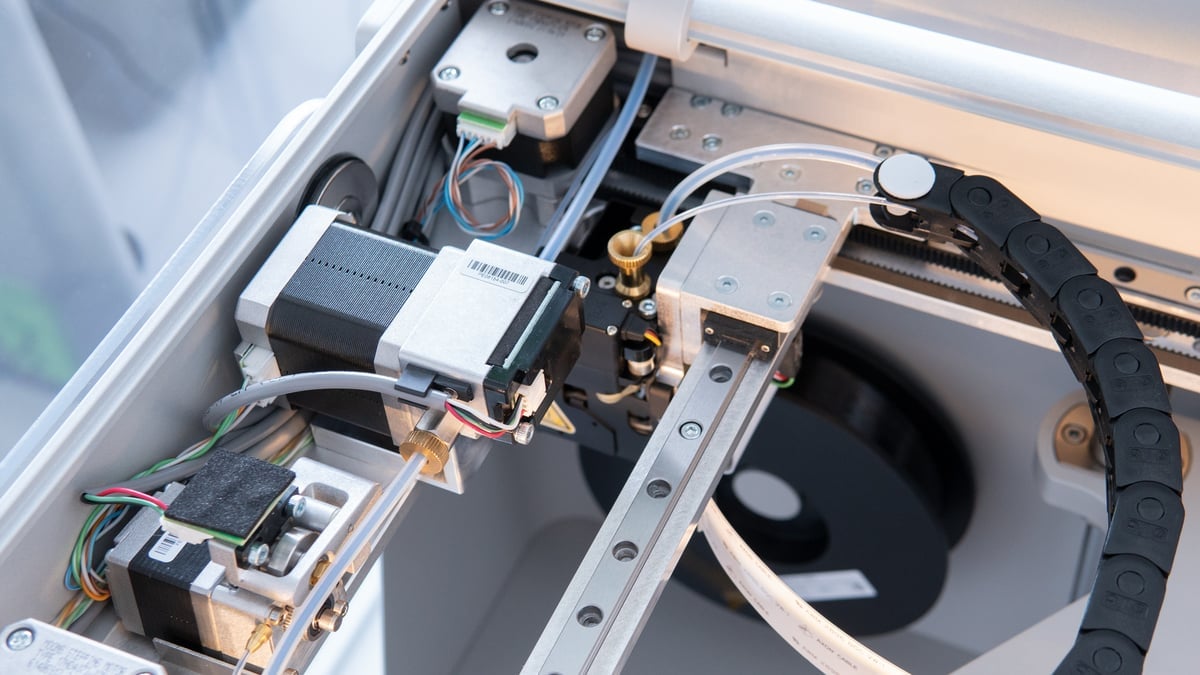
Being a co-extrusion with towpreg machine means the Mark Two is what would otherwise be considered a dual-extrusion 3D printer. Beneath a spartan sheet metal exterior (that pops its lid like the trunk of a car – mighty satisfying) is said dual-extrusion system.
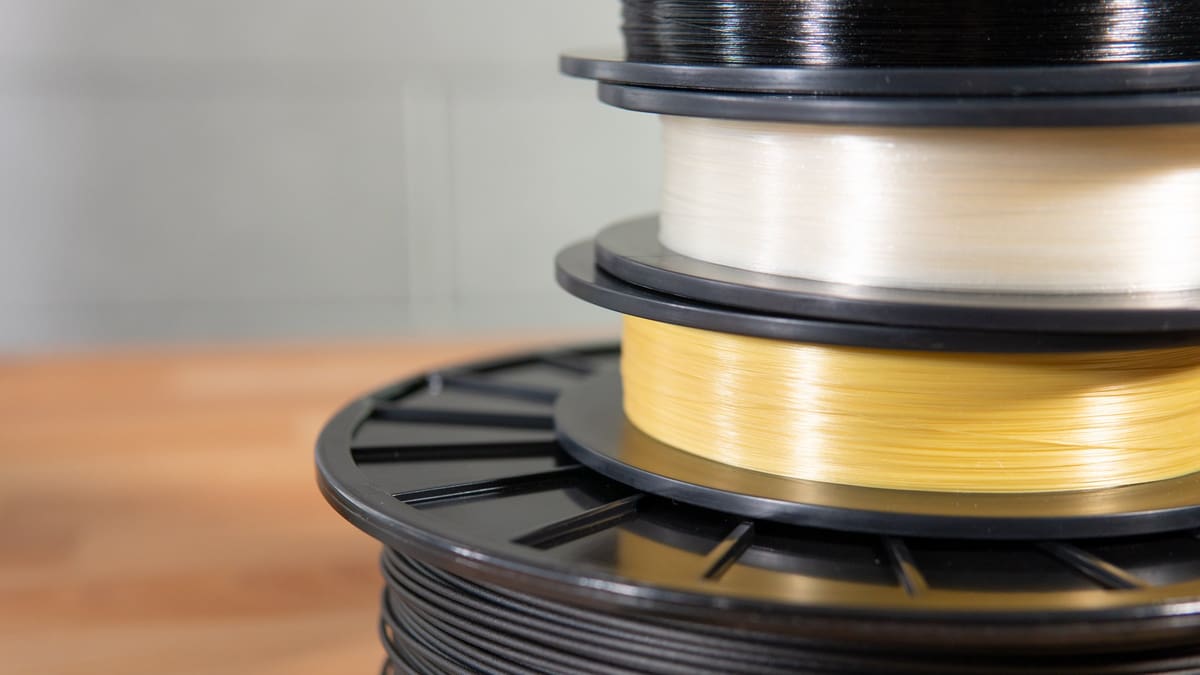
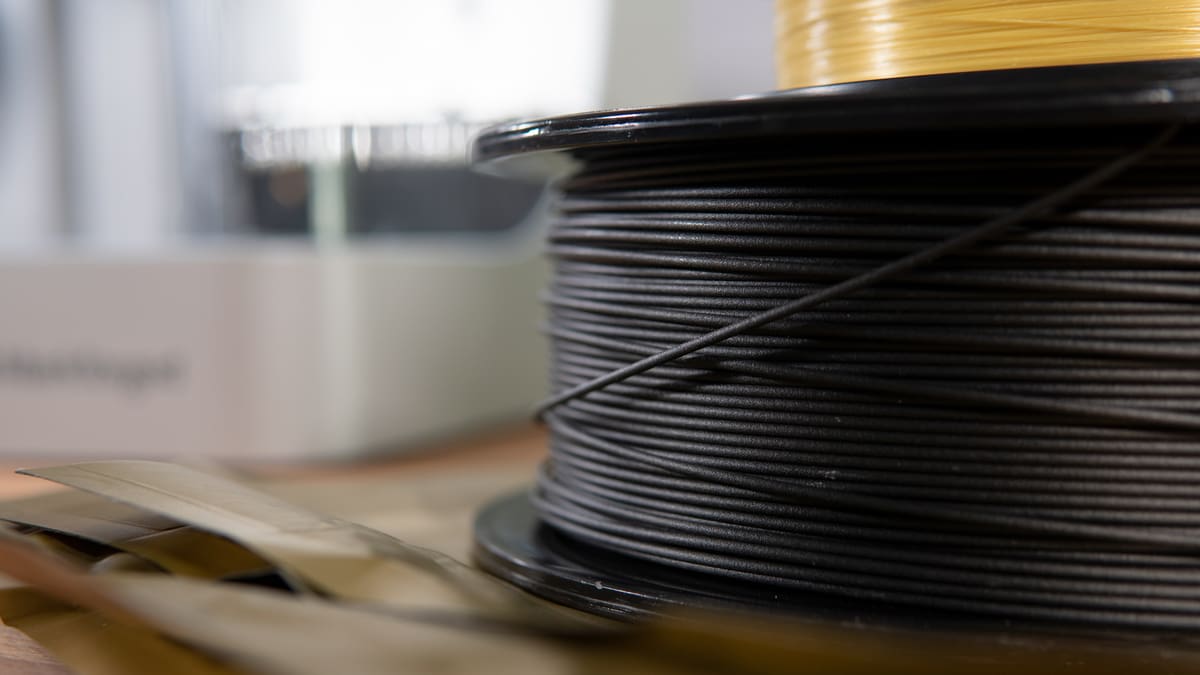
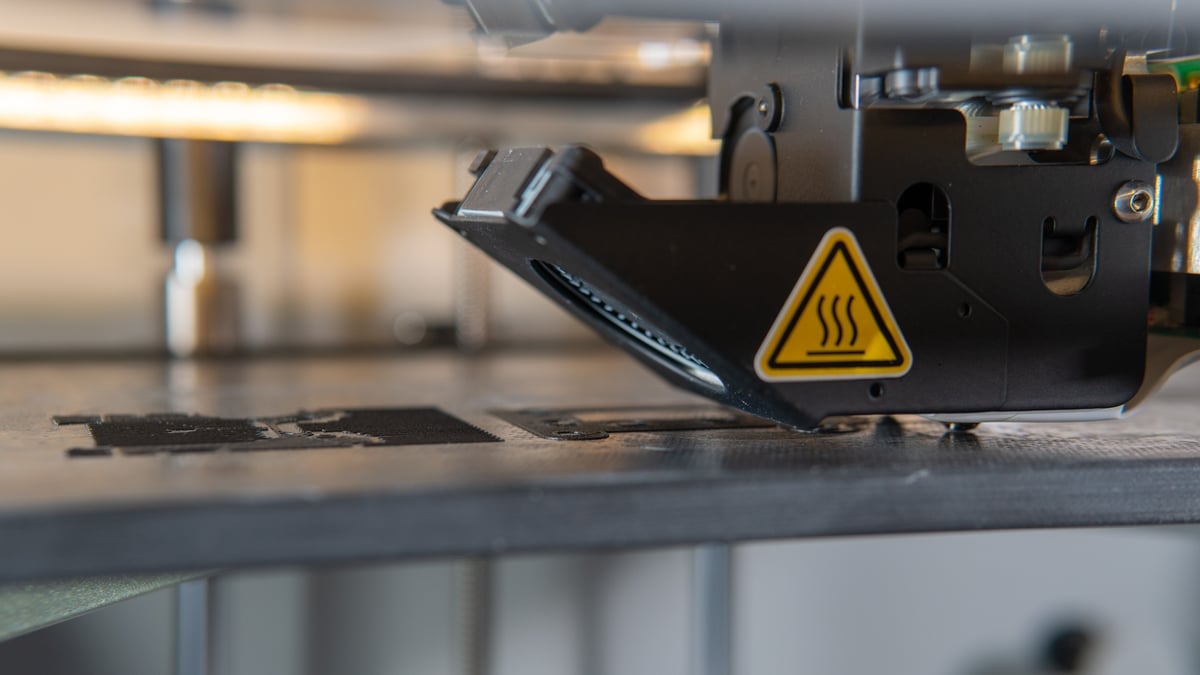
Each extrusion path is novel. One is strictly for Markforged’s 1.75 mm thermoplastic filaments, including the Onyx chopped carbon-fiber-filled polyamide base material. Other application-specific materials are available, but we didn’t try any. The other extrusion path handles the near-gossamer-like thread of reinforcement material, which sits on a magnetic spool holder within the printer’s print chamber.
While the Mark Two hardware is the blunt tool rendering the models into real, tangible parts, the craft of fiber reinforcement lies in the software, where printing and reinforcement strategies meet.
Always Online, Cloud Slicing
In the case of the Mark Two, this software is Eiger, Markforged’s cloud-based print preparation and production tool. A desktop app is also available for organizations that balk at online-connected processes, but it’s recommended to avoid that and use the online app where possible.
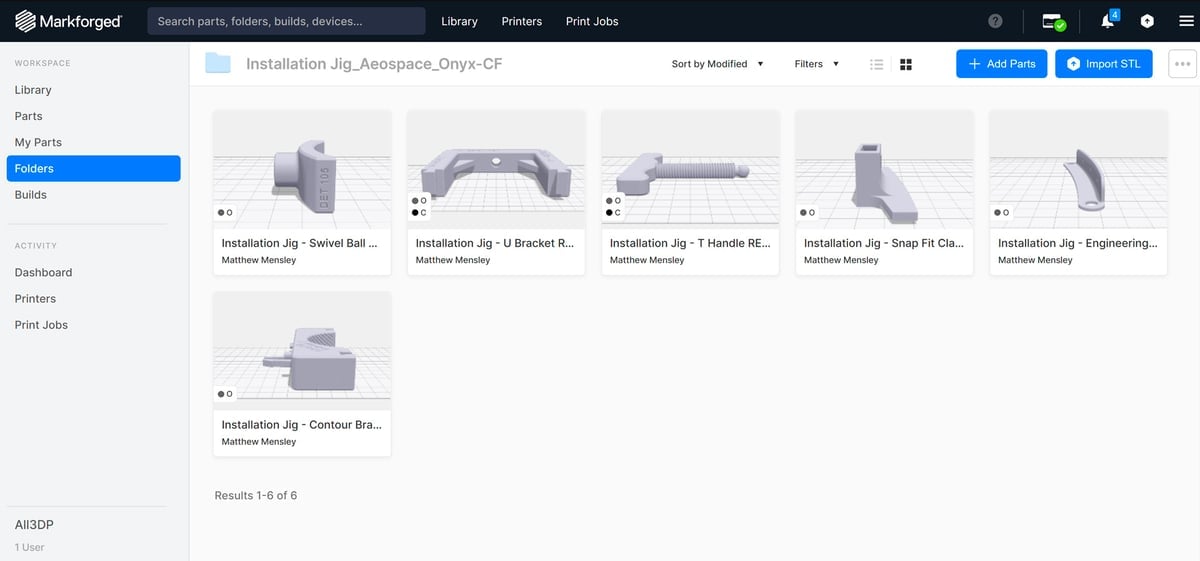
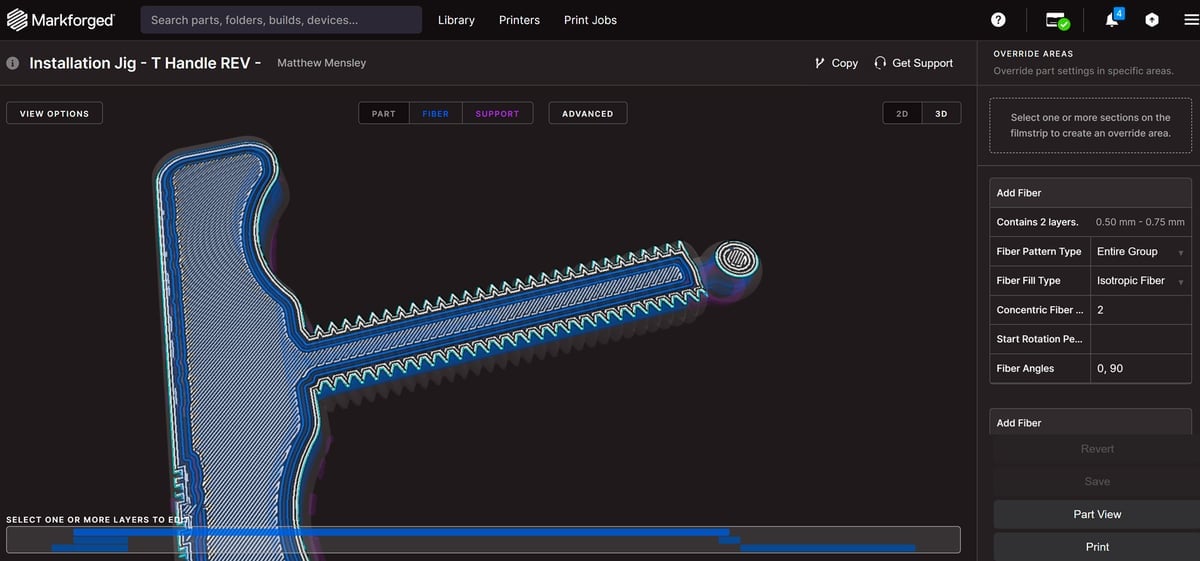
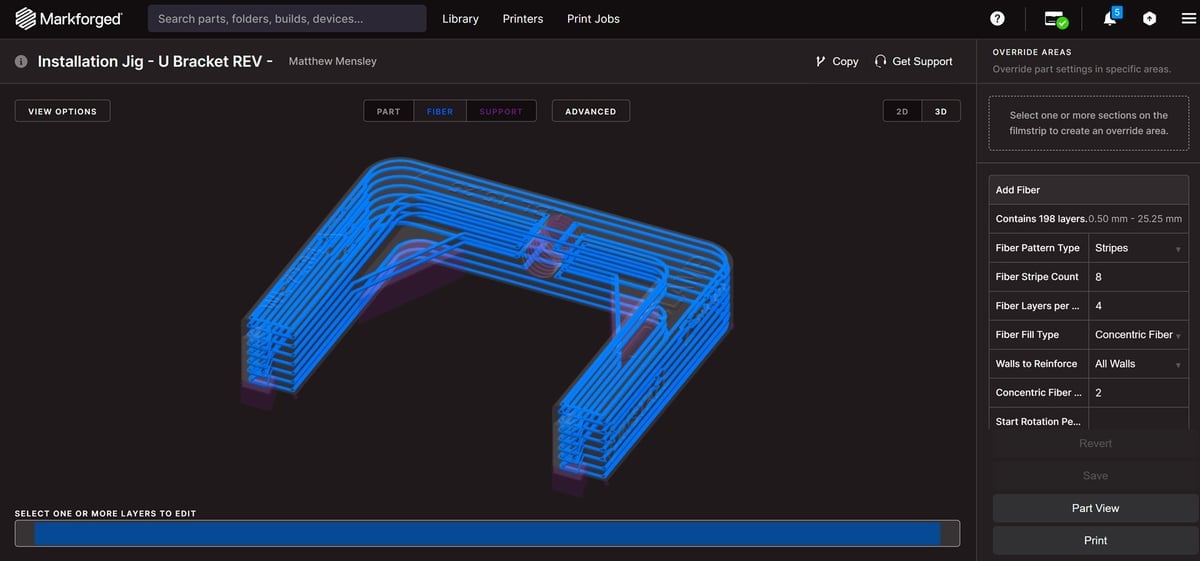
Eiger can host a library of parts and builds (clusters of parts) you upload for printing. From the parts you upload, there’s a dyad of preparation processes for you to walk through to configure: one for the regular polymer print settings, the other for setting the reinforcement material.
In the reinforcement view, you can configure the print’s fiber content on a per-layer basis, with a shortcut to distribute multiple isotropic areas of reinforcement evenly throughout specified ranges. You also control concentric areas of reinforcement, choosing to blanket the inner, outer, or all walls with fiber.
Strength Two Ways
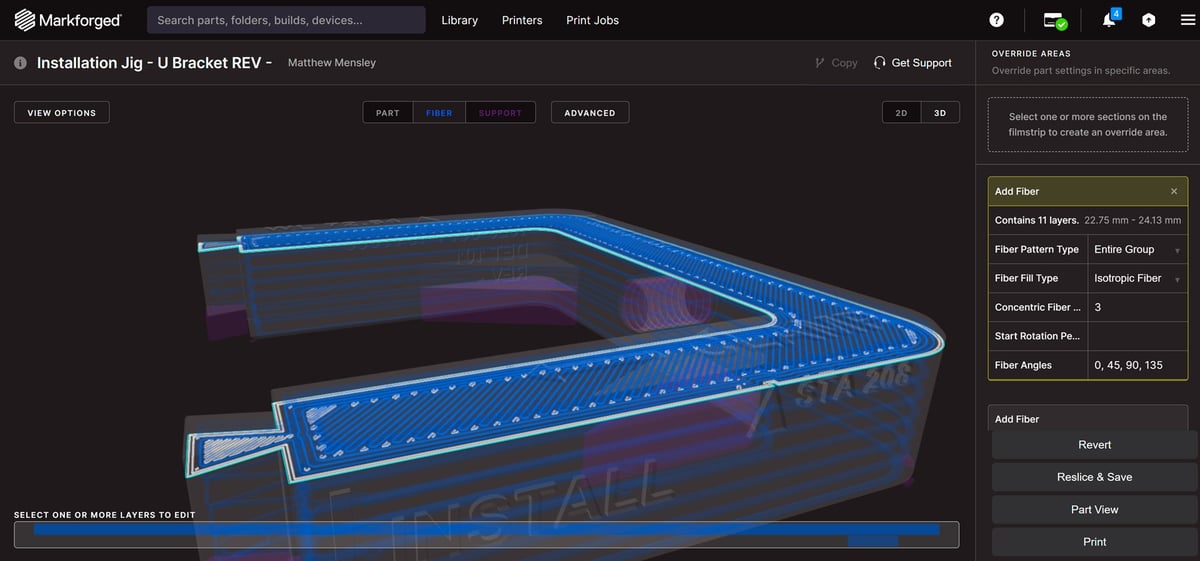
These options – concentric and isotropic – are the two sole options for reinforcing a print. Between them though, you have greater flexibility through the densities, angles, and alignment to the surfaces of your model.
- Isotropic fiber routes through a layer in tightly-packed parallel lines, alternating between angles across several layers to give uniformity (typically 0, 45, 90, 135 degrees by default, but this can be customized).
- Concentric fiber follows the perimeters of features in your print. You have some flexibility here in choosing to reinforce only the outer walls, inner holes, or all.
Who Uses Continuous Fiber 3D Printing?
Generally speaking, continuous fiber 3D printing is suitable for applications involving a part that’s required to survive repeated loading, exhibit high stiffness, or survive high stresses without catastrophic failure. The desired property comes from the reinforcement material used – such is the versatility.
Of course, “stronger-than-metal” is the claim that sticks in most folks’ minds when thinking of continuous fiber 3D printing, and that’s undoubtedly true of prints reinforced with carbon fiber. That is precisely how you can produce 3D prints that match and exceed aluminum for strength.
Aside from the material characteristics, there are process advantages, too. Parts are lighter than their metal counterparts and can benefit from fast iteration and production. The typical benefits of 3D printing as an agile production method apply.
The uses can extend beyond development, too. Identifying spares and replacement parts to make onsite instead of external sources can be a justification. A fiber-reinforced 3D printer only raises the bar for stronger and more durable replacements.
Use Cases
So, there are myriad ways to employ continuous fiber 3D printing. We can’t say where exactly you can and can’t use it, but there are plenty of published use cases we can turn to for inspiration.
Robotic systems maker ERM Automatismes uses Markforged continuous fiber 3D printers to manufacture custom end-of-arm tooling (EOAT) for its robotic arms, with the fiber-reinforced composites producing parts tough enough to endure industrial use.
Metal fabrication shop Lean Machine CNC tackles custom machining with continuous fiber 3D printing. For one particular job, instead of producing a metal vise that would have cost the company $6,000 using its typical processes, it instead developed a carbon fiber reinforced vise and soft jaw that combined printed parts with additional off-the-shelf elements for $1,500 and taking only a third of the time to make.
Product development studio Arc34 uses continuous fiber 3D printing to produce durable body-worn GoPro mounts. Reinforced with fiberglass, the mounts are exemplary of fast, end-use production using fiber-reinforced 3D printing, finding cost-benefit in a strong but cheap fiber that gives more extraordinary characteristics to prints.
Which Materials Can You Use To Reinforce a 3D Print?
Looking at the notable names in continuous fiber 3D printing, it appears that the common base material for reinforcement is polyamide. Markforged’s base thermoplastic material is a chopped carbon-fiber-filled blend called Onyx. It’s a strong general-purpose material that offers enhanced strength and stiffness over regular 3D printing polymers such as polyamide and ABS.
When the pathing of a print job reaches the point of laying down fiber reinforcement material, the second nozzle – a larger, flatter apparatus – effectively “irons” the fiber into the base material.
Material Options
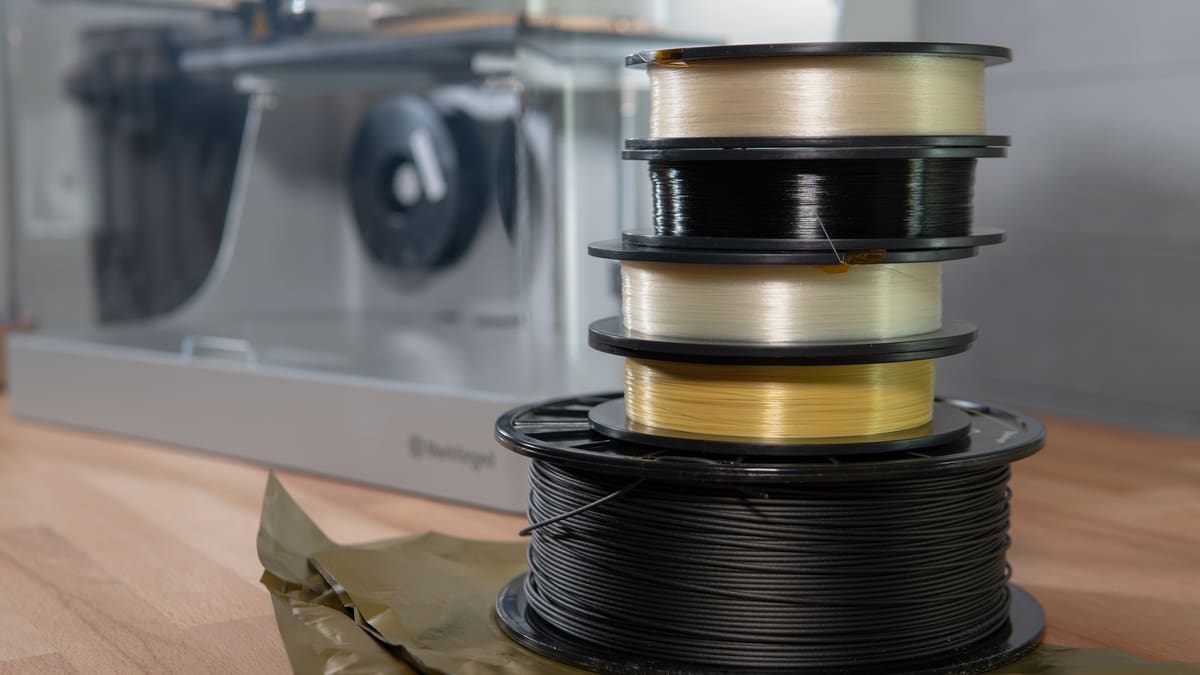
There are five types of continuous fiber to choose from in Markforged’s ecosystem: carbon fiber, carbon fiber flame-retardant, fiberglass, high-strength high-temperature fiberglass, and aramid fiber (otherwise known by the trademark Kevlar). Basalt is also a common reinforcement fiber, but not one offered in Markforged’s ecosystem.
As you might expect, each reinforcement material imparts particular characteristics to a print.
Of the selection, carbon fiber offers the highest flexural strength and stiffness at 540 MPa and 60 GPa, respectively. It is the standard-bearer for Markforged and the reinforcement material that backs up the claims of plastic parts that are “stronger than metal.”
A flame-retardant carbon fiber strand is also available, offering near-identical strength to the standard CF but with the benefit of compliance for use in aerospace and similarly restrictive industries. It only works with the Markforged X7 system, though, so it’s moot for us and the Mark Two we’re toying with.
Moving beyond carbon fiber, there’s fiberglass, which provides a cost-effective alternative to CF. It doesn’t reach nearly the same heights for strength but far exceeds fiber-filled and unreinforced polymers.
High-temperature high-strength fiberglass offers comparable strength to carbon fiber (though with lower stiffness) but excels in maintaining its strength at high and low temperatures. It’s positioned as the ideal reinforcement material for use cases involving high temperatures, such as autoclaves or molding.
Lastly, there is aramid fiber (also commonly referred to as Kevlar). A specialist reinforcement material designed for shock resistance and toughness, it’s ideal in situations calling for repeat loading and high-impact applications. It tends to bend where carbon fiber will shatter.
Counting Costs
The fibers for reinforcing your prints are not cheap. The most cost-effective – fiberglass – starts at $80 for a 50 cc spool, while a 150 cc spool of carbon fiber tops the list at $450. The trick to effective fiber reinforcement printing is to find the right reinforcement strategy for your purposes and suitable reinforcement material.
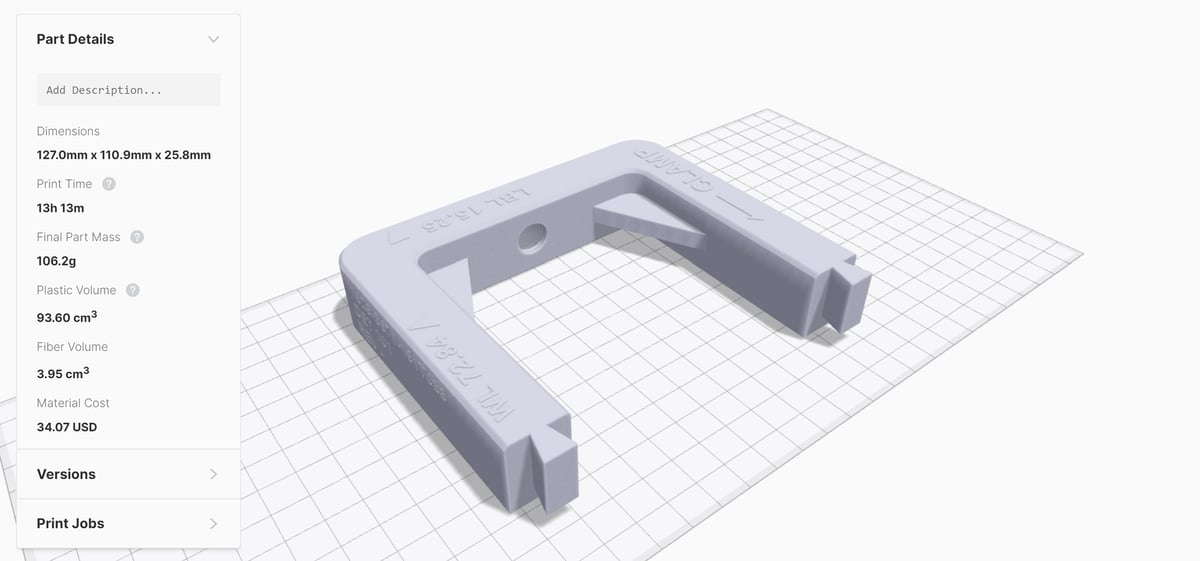
A vital element of systems such as the Mark Two is showing you, with high visibility, exactly how much the thing you’re printing is eating up in material costs. When configuring prints in Eiger, you’re shown how much your parts cost to the cent.
What's the Mark Two Actually Like to Use?
It’d be remiss of us to go hands-on with a near-$20,000 3D printer and not spill on our experiences using it.
It’s mentioned above that the Mark Two has a pretty spartan exterior. This rings true of the experience using the machine, too. It is all function. There’s little vestigial stuff to get in the way of churning through an ungodly number of prints.
Once the printer is set up, connected to the internet, registered to your Eiger account, and loaded with material, you barely need to touch it again unless you are removing prints or changing materials. It’s that easy.
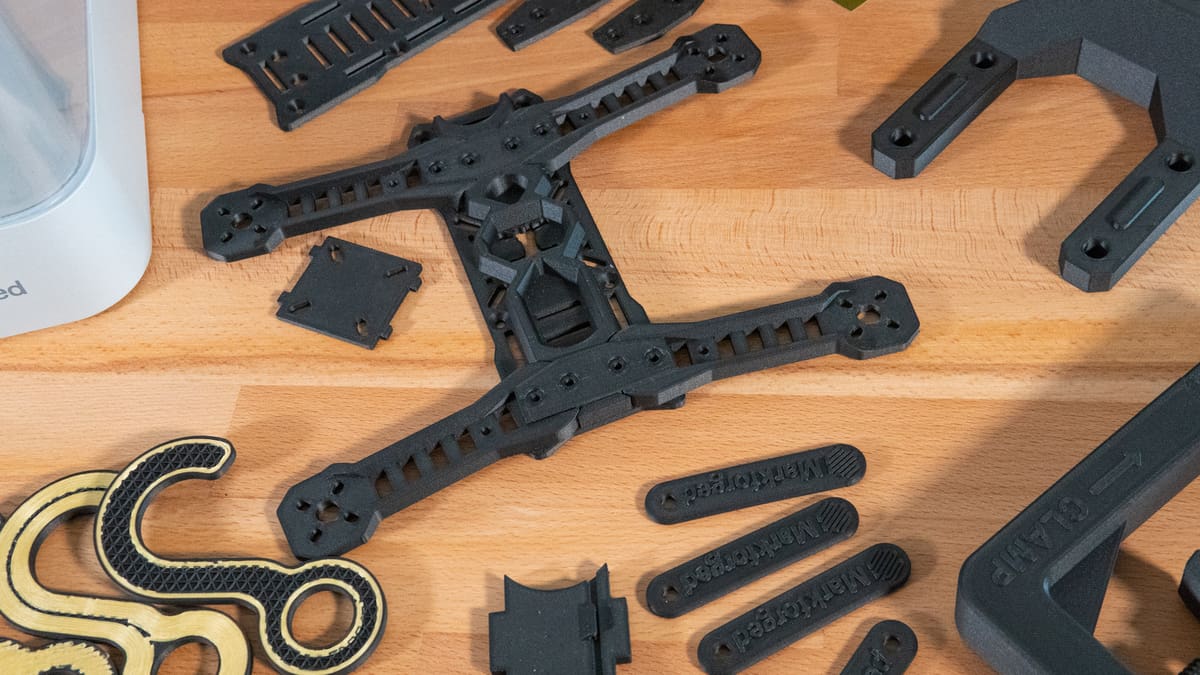
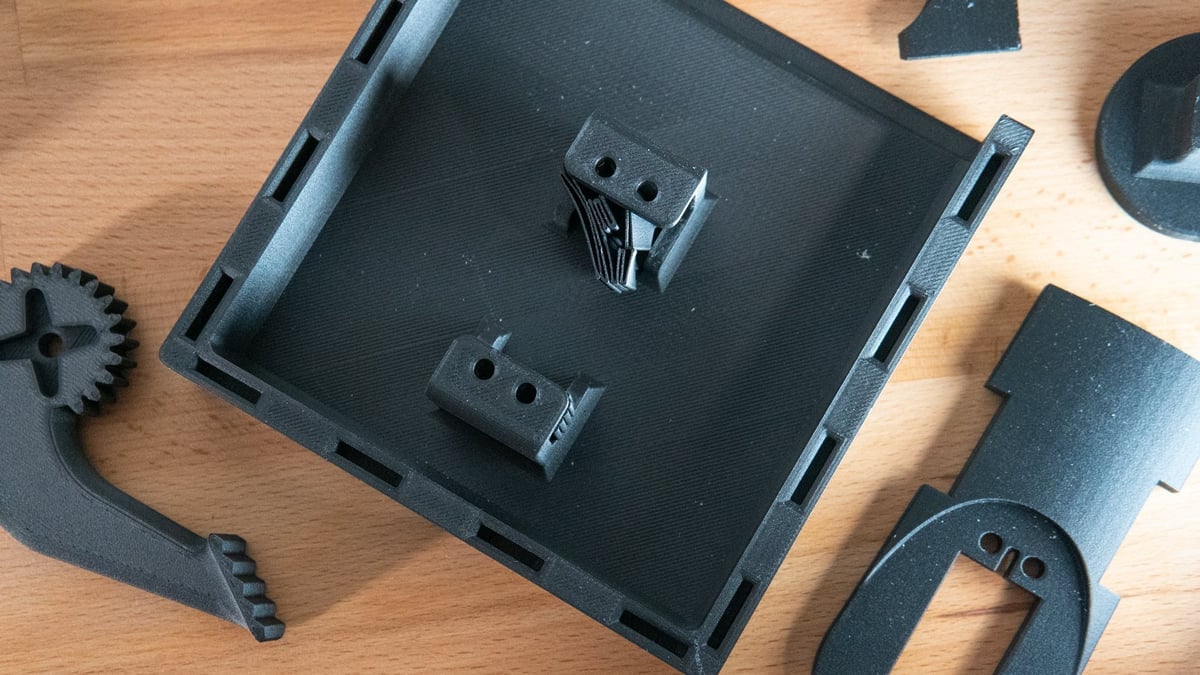
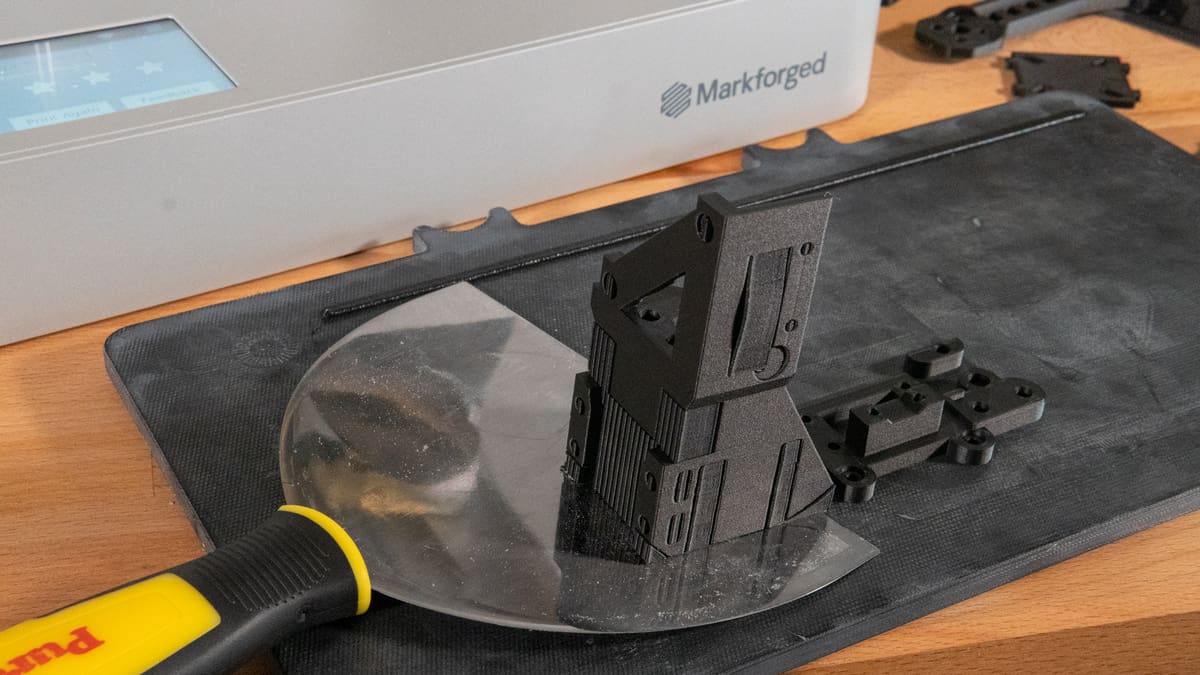
And reliable, to boot. Zero print failures and near-flawless print quality are what we’ve learned of the Mark Two in our extended time spent printing with it. Auto-support generation handles surprisingly tricky geometries well, and the support structures virtually peel away in hand. Ideally, you should design your parts to avoid needing support structures in the first place – basic design principles for 3D printing still apply here.
Vital printer maintenance tasks are tracked by the machine, prompting action at the appropriate intervals.
What’s in the Box?
The Markforged Mark Two is a ~$20,000 investment, not counting the ongoing material costs and, further along in the machine’s life, necessary maintenance costs.
Despite the sub-industrial pricing, the experience of receiving and setting the machine is not all that dissimilar from that of a consumer desktop 3D printer. There’s a more involved setup routine to fine-tune the machine’s belt’s tensions and offsets following shipping, but from unboxing to queuing up your first print could be a matter of one or two uninterrupted hours of work.
Included in the machine’s accessory pack are the following:
- Ball-head hex keys (for fine-tuning offsets)
- Pre-calibrated torque driver (with bits for the Mark Two’s two nozzle types)
- Fine-point tweezers
- Wide scraper
- Nickel-based lubricating compound
- Wire brush
- Data cables
- 3x Replacement plastic nozzles (for the primary printing material, usually Onyx)
- 3x Replacement fiber nozzles (for the continuous reinforcement material)
- 5x Spare replacement PTFE fiber nozzle tubes
- 2x Plastic and fiber nozzle offset shims
Also included as part of the package is a Dry Box – really, a modified Pelican case. This box keeps the highly hygroscopic Onyx filament in good working condition during printing.
At the time of our testing, the Mark Two also included a generous sample pack of materials, including two spools of carbon fiber plus single Kevlar, fiberglass, and HSHT fiberglass spools – all 250 g (50 CC). Also included was one ~1 kg (800 CC) spool of the company’s Onyx chopped carbon-fiber-reinforced nylon.

The dry box isn’t particularly elegant, nor is the act of unloading and loading the filament, which requires a combination of lid-flips to juggle the pneumatically held top cover plus friction-held enclosure to tap the touchscreen, decouple filament tubes and feed material from the umbilical Dry Box.
Getting Started
Upon unboxing the machine, you’re instructed to register it, which will, in turn, get you squared away with an account with Markforged’s cloud-based Eiger software. Unusually, it’s a requirement to use Google Chrome to set up and operate the Mark Two. This may pose a problem for organizations with strict IT setups, but Markforged tells us it’s planning on expanding this to other browsers in the future.
Launching into Eiger, you are presented with a flurry of tutorials and tips for using the platform, but in earnest, there’s still a lot to do to set up your machine. Next, the included initial guide has you jump over to the Markforged support site to find the Quick Start Guide.
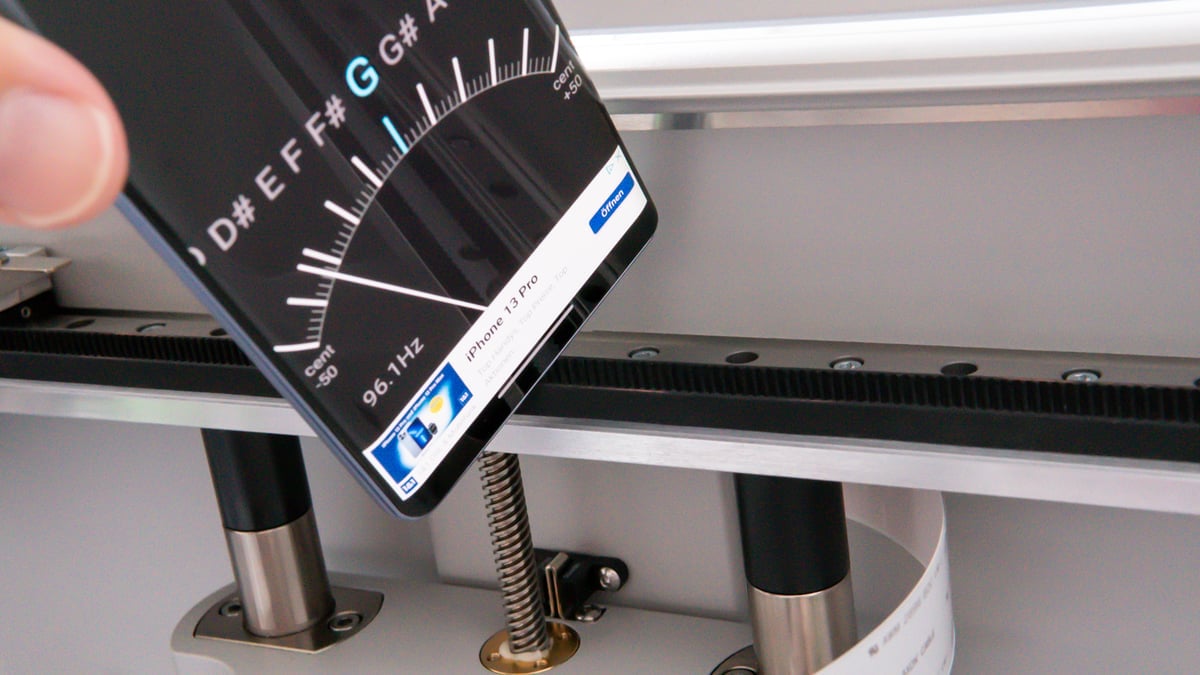
Step by step, you find yourself snipping shipping ties, unwedging foam wedges, and, exemplary of the kind of discerning detail that seemingly has gone into making the Mark Two an industry-suitable device, pulling out a guitar tuning app on your smartphone device to tighten your printer’s belts to the accepted frequency. We’re told any tuning app should do the trick, though Markforged recommends a couple in its setup guide, saving you a little time.
What follows is the step of connecting to your Wi-Fi (or Ethernet) network and over-the-air firmware updates. Handily the system’s large touchscreen display gives a clear readout of the progress of things, so you know you have ample time to get a coffee while it does its thing.
Things We Like
The Mark Two takes something that seems daunting at first and makes it utterly accessible. Even complete newcomers to 3D printing won’t find themselves adrift with the Mark Two. Fiber reinforcement is as simple as loading your chosen materials and using the Eiger software to decide where this fiber goes.
There are design limitations for using the fiber, such as no walls thinner than 3 mm – any smaller, and you’ll have no room to place the fiber. Otherwise, the process itself is a cakewalk – perhaps exactly what everyone trying to justify the $20,000 price tag up the chain is hoping to hear.
Things We Don’t Like
Something that feels like it’s missing from Eiger is some kind of reactive intelligence about the fiber strategy. The whole point of continuous fiber 3D printing is to let you create extraordinarily strong polymer parts, but there’s nothing to indicate to you if your chosen fiber reinforcement strategy with a part will actually achieve what you want.
You could play it safe and stuff your print with fiber to ensure it’s tough beyond measure, but this is inefficient with diminishing returns. The information is loosely available on Markforged’s online learning pages, but it would be better presented at the point of needing it.
We’re told that such intelligence is coming; Markforged’s recent acquisition of Teton Simulation Software will result in the latter’s SmartSlice validation software integrating with Eiger in the future. According to a press release, this feature will be behind a paywall.
The Mark Two’s touchscreen is terrible, with an input delay often leaving you wondering if it even registered your tap. Using a finger is too imprecise, even with large, clearly labeled buttons to aim for. Grab a hex key or other stylus-like apparatus if you want to have a tolerable time interacting with the printer.
And our final big bugbear is the inability to batch-upload files to Eiger. You’ll have to open the coffers for a premium subscription to Eiger to access this most obvious and obviously useful feature. This seems like an incredibly minor thing to cynically drop behind a paywall, especially for the individual users who have just shelled out $20,000 for a printer.
Markforged Mark Two Verdict?
There’s a lot to like about the Markforged Mark Two, not least of which is that you can print mind-bogglingly tough objects with minimal effort. Wrap your head around the basic principles of using fiber reinforcement, and you start to see the possibilities in every part you print.
It lets you iterate and test your parts quickly, with the results strong enough to fulfill demanding end-use applications without outsourcing or logistical hurdles. Part cost estimations that consider the fiber used put the value of using the machine into real terms, too.
The equation of whether it makes sense for you lies with your situation. A lone Mark Two isn’t going to be high output and demands more of the user in setup. But it is scalable to a fleet of machines that offer greater output and autonomy, like the X7. It is, without question, an appropriate gateway to the sprawling possibilities of continuous fiber 3D printing.

License: The text of "Continuous Fiber Reinforced 3D Printing: Mind-Blowing!" by All3DP Pro is licensed under a Creative Commons Attribution 4.0 International License.
CERTAIN CONTENT THAT APPEARS ON THIS SITE COMES FROM AMAZON. THIS CONTENT IS PROVIDED ‘AS IS’ AND IS SUBJECT TO CHANGE OR REMOVAL AT ANY TIME.