
Biqu B1 Review: Hot, (Not) Pink
Rating

The Biqu B1 is a sophisticated budget 3D printer with a virtually-everything-and-the-kitchen-sink approach giving it a punky feel beneath its utilitarian looks.
We’ll confess to being a little disappointed that our review sample of the B1 is not pink. Every image we see of this printer is the pink version and it looks fantastic, so we patiently waited for the chance to review the funkiest-looking printer in town.
Sadly, what arrived was the utilitarian-looking black version of the printer. Not quite the shot of color we needed in the midst of Covid-19-depressed winter doldrums.
The disappointment is fleeting, though, because the Biqu B1 is anything but dull. Actually, the Biqu B1 is one of the more interesting printers to cross our desks in the last year, and it seems almost criminal that it hasn’t gotten more attention.
Made by Biqu, a subsidiary of Big Tree Tech (BTT), a company held in good standing for its aftermarket parts – BTT is a go-to for inexpensive, current tech to enhance your 3D printer.
The result is an Ender 3-like 3D printer that’s, at its core, a pretty advanced and customizable “clean slate” for you to bend to your will – the SKR board has plenty of ports to keep adding functionality – or, comfortably live out, because even at stock it’s pretty great.
A curious dual-UI lets you hot-swap between the stock Marlin UI or a sexier, tiled touchscreen interface, and a myriad of other elements, all for around $250. On paper, it sounds pretty great. Having used one for the last couple of weeks, it mostly is.
Verdict
Pros
- Great features for the price
- Easy upgrade path
- “Super Steel Sheet” is convenient
Cons
- Too much going on in menus for inexperienced users
- Terrible spool holder
- Awfully loud fans
The Biqu B1 is brimming with possibility, thanks to an accommodating mainboard with ports to spare for added functionality, including near plug-and-play auto-bed leveling.
Paired to great print quality (provided the printer doesn’t throw you curveball, as it did with us), and it’s every bit the upgradable machine you could hope for. We never got quite comfortable enough with it to queue up a print and walk away, but others’ mileage may vary. A feature-rich desktop 3D printer with bags of potential to upgrade as you see fit.

The Tech
A long time ago, we reviewed the Biqu Magician mini delta 3D printer, which had uncommonly good features and ideas. Unfortunately, poor build quality and flip-flopping on components that were advertised but never released held it back from greatness. Like that “lipstick-sized 3D printer” (their words), the Biqu B1 also runs with a number of nice ideas. The difference here is that the B1 mostly pulls them off.
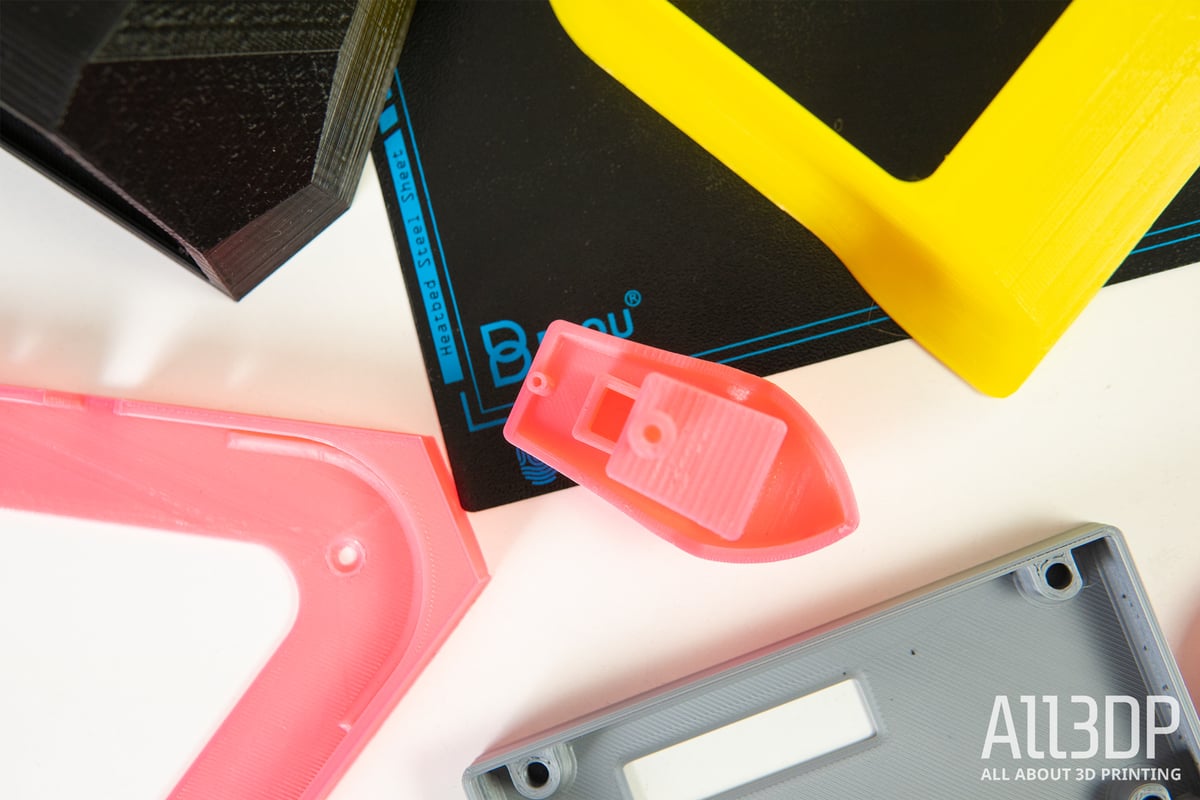
You get a 235 x 235 x 270 mm build volume – unusually tall – underpinned by a flexible magnetically attached steel print sheet. Once a print completes, you can whip it off, give the plate a flex to release the object, and place it back on the machine for more. It’s not dissimilar from the style of steel sheet used by Prusa Research on its fused deposition modeling (FDM) machines, but here has a glossy, rough texture instead of the Prusa’s standard matte smooth PEI sheet.
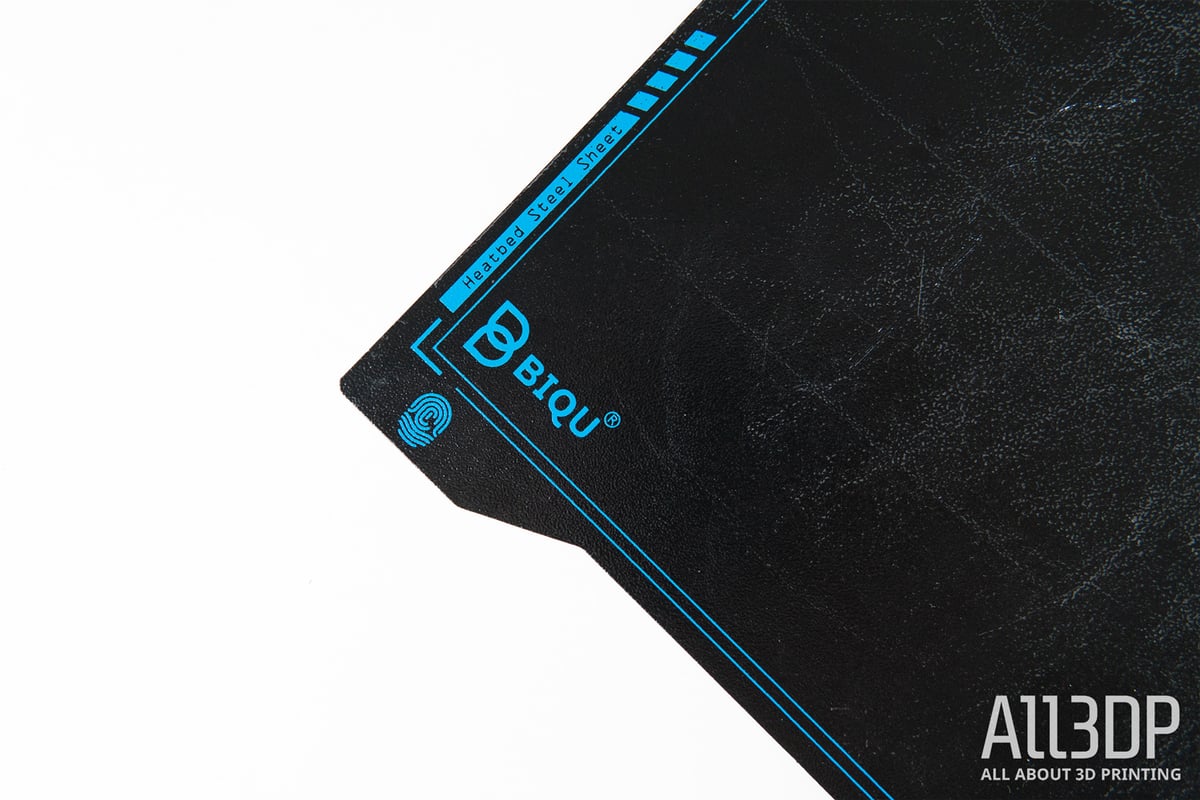
Super Steel Sheet
The B1’s print plate is much nicer to handle than the fridge-magnet style removable print beds seen on the likes of the Ender 3 Pro, with prints crisply springing free under the slightest flex. Throughout our time using it, we did find it tricky to get PETG to stick nicely – an infuriating game of cat-and-mouse between bed leveling and overly sticky filament. Ultimately though, the B1’s bed sheet is one of the nicer stock beds that we’ve used, although it could do with stoppers of some kind to butt up against when laying the sheet down. As it is, you lose some time trying to square it up.
Heating to temperatures standard for this class of printer, the B1 hits 260 ℃ at the hot end and 100 ℃ on the bed – both quickly. This loosely means that it can handle PETG and ABS in a pinch, and even nylon should be possible, though we didn’t try it since it’s best printed with an enclosure. Your typical lower temp regulars such as PLA print, unsurprisingly, very well. We had mixed success with “noodlier” filaments such as TPU, with even the constrained filament path present on the B1 not tight enough to force softer TPUs to the hot end, instead of shooting sideways out of the extruder.

Modularity
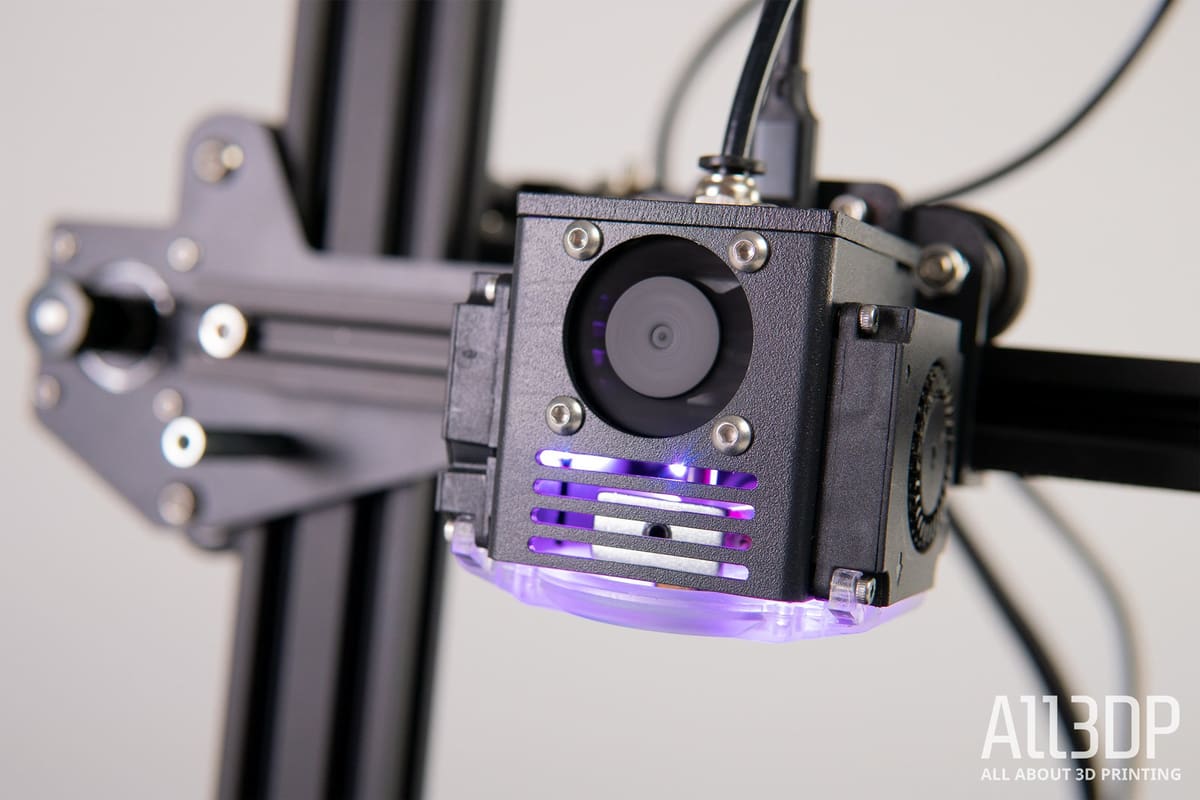
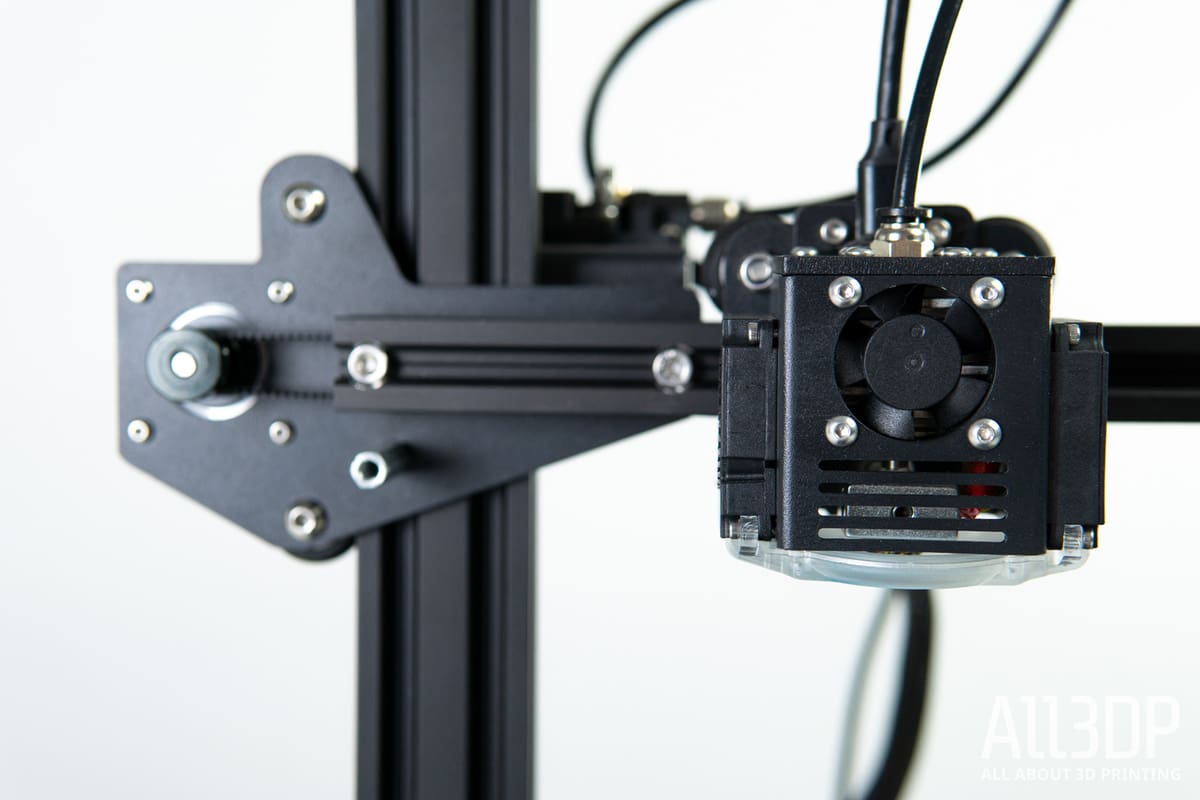
The Biqu B1’s print head is one of a growing number of printers to consolidate all of the print head’s cabling (hot end, fans and such) into a single data cable of sorts, meaning all wired components on the print head plug into a sister board, which routes all signals through a single cable to the printer’s mainboard. We can appreciate the elegance this gives through tidiness. It’s much nicer to simply plug in a USB Type-C cable than it is to zip tie a bundle of cables.
We saw a similar system in place on the much-maligned (but actually quite decent) Creality CR-6 SE and mused in our review of that printer that it could lead to a trickier time diagnosing problems. The chain of parts to fail for each electrical component increases from part and cable, to part, cable, board, and data cable. Still, we’ve yet to encounter such a problem on our loaner B1, and it would seem that Biqu is content to sell complete print head assemblies if the convenience of a straight swap does it for you.

A note on that USB Type-C cable though. Biqu states in no uncertain terms that you should use the cables provided with the printer or supplied by it.
Setting Up
While the B1 is far from a full-on DIY kit, hands-on time is required to piece together the jumble of extrusions, motor mounts, and whatnot. Handily the instructions provided are clear, leaving you in little doubt about what goes where (and which way around), and the screws and nuts are all packaged separately with labels corresponding to their type, so you can pinpoint the bits needed for each step.
For the wealth of options and choice the B1 gives you in its menu, you would expect some sort of breakdown of what all, or even some, of these toggles and switches do. The absence of anything like this leaves the B1 skewing more towards advanced users that could take advantage of this. Ultimately though, if you avoid poking around too much and changing things without understanding what you’re changing, the B1 still offers an easy enough time for newcomers.
Printing and Usability
The default print quality of the Biqu B1 when left on stock settings is pretty great. We began by rattling off prints in PLA with no hassle, getting perfectly pleasant results, even at extra fine layer heights.
Slicing
To slice models for the Biqu B1, Biqu provides a current version of Cura, with the process for setting up the printer’s profile detailed in the build instructions. We’ve no complaints about how this aspect of using the B1 plays out. There’s none of the charade that comes with a skinned or customized version of the same slicer, nor a half-baked proprietary slicer that’s limited compared to vanilla open-source options such as Cura. You can use any slicer that exports Marlin firmware-friendly G-code.
Something did go wrong mid-way through our time with the B1, though, with the X-axis carriage binding a few millimeters off the build plate. This caused a run of compressed prints with merged, messy layers and print failures. Our gut reaction to throw a little grease on the lead screw and readjust the eccentric nuts for the Z-axis appeared to iron out the worst of the issue. Subsequent prints suffer from minor extrusion inconsistencies, which we suspect may be down to a lingering partial blockage after the initial Z-axis issue caused a backup in the hot end.
Fortunately, the need to dig around and troubleshoot the printer lead us to one of the main conclusions of the B1 – how straightforward it is to get at its insides to maintain it or, should you wish, upgrade. Take the mainboard, for example. To access it, all you need to do is flip the printer on its side and unscrew the six screws holding the printer’s bottom plate in place.
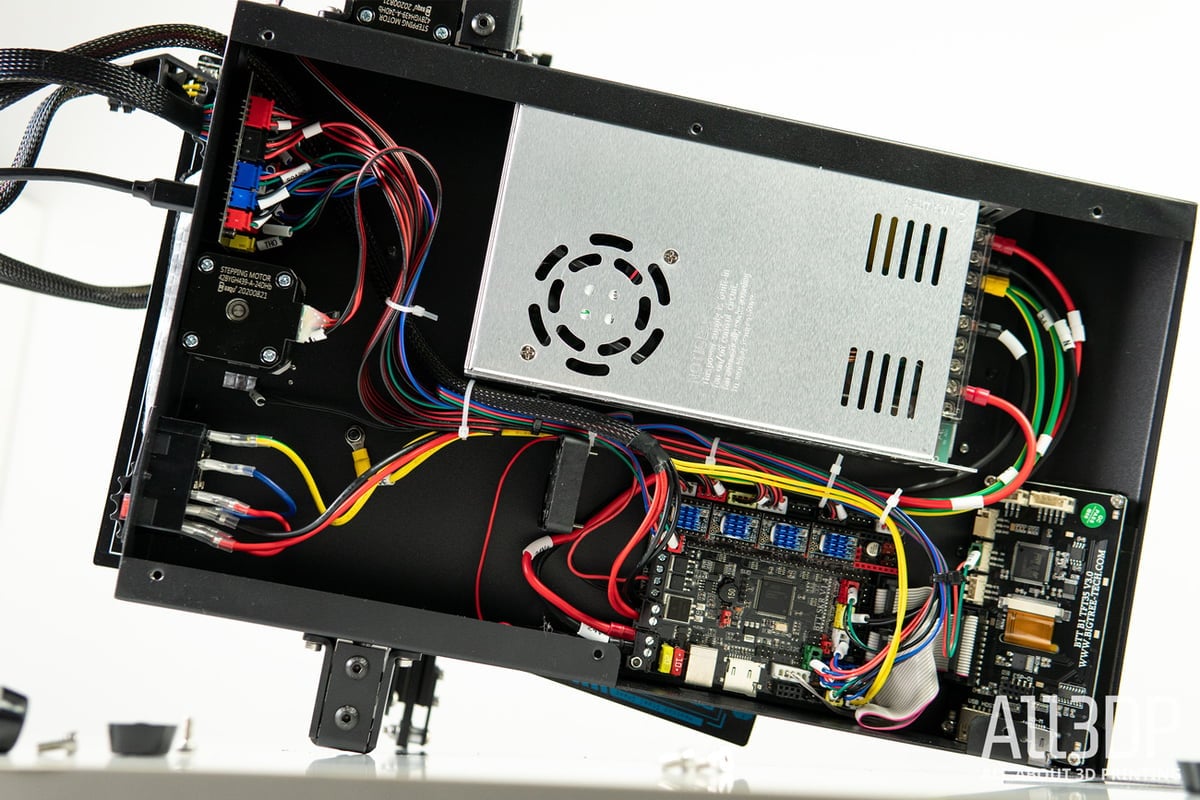
We’ve used printers in the past that make it needlessly difficult to access the mainboard, Creality’s Ender 3 V2 is a high-profile example of this. The B1 is almost comically easy by comparison – take the bottom plate off and the SKR 1.4 board, LCD board, power supply, and everything in between is neatly laid out in front of you. It is an exceedingly tinker-friendly printer.
Speaking to this side of user-friendliness, BTT puts the firmware and detailed diagrams of its SKR 1.4 board in its GitHub repo, giving you a lot of technical knowledge about your printer and the components and abilities that are compatible with it, should you decide to get your hands dirty. This 32-bit mainboard is one of the B1’s strengths, with near plug-and-play operability with several modules and extras that you’d consider adding to the printer.
There are dedicated ports on the back of the machine for a BLTouch bed leveling probe and the company’s own smart filament sensor (sold separately.) A BLTouch mount comes with the printer.
A filament sensor comes as standard, sitting shotgun next to the extruder. This standard sensor detects the absence of filament. The smart filament sensor is said to detect when the filament stops flowing, pausing the print and giving you the chance to take corrective action before the print is ruined.

Rip the printer open, and you have access to ports on the mainboard to add a second Z-axis motor and the solderless stepper motor driver boards. This is especially handy should you decide to upgrade the B1’s stock extruder stepper motor driver, which is incompatible with Linear Advance, a feature you can access and configure in the B1’s menu, but the printer is incapable of performing.
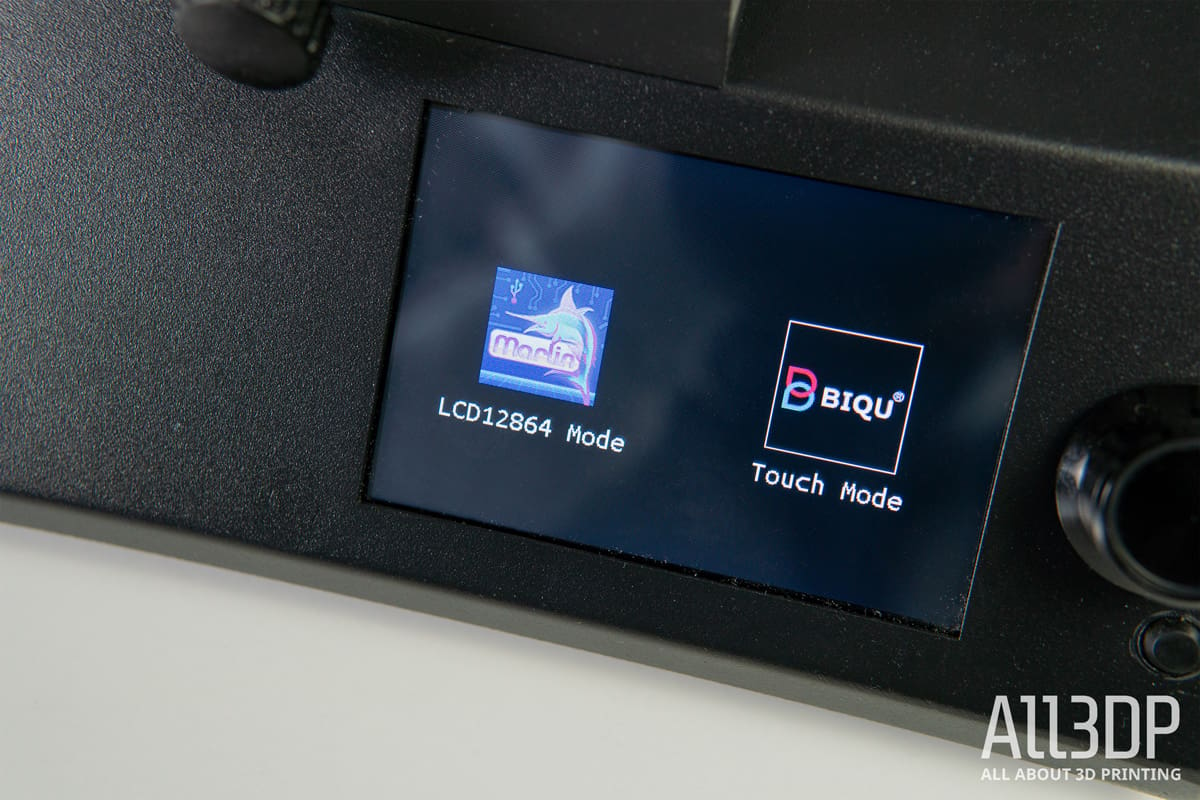
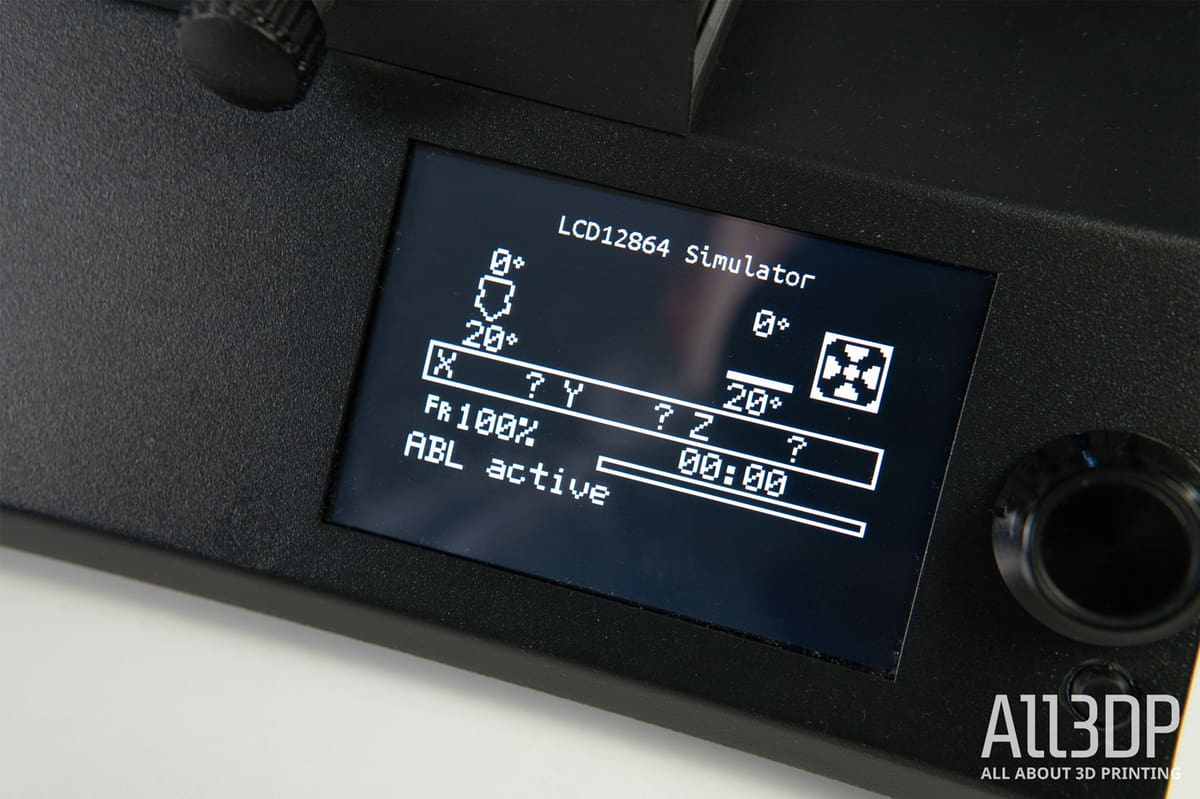
BigTreeTech’s newer machines also have a pretty neat trick in their ability to hot-swap between two different user interfaces. When you fire the printer up, you face the company’s touchscreen-friendly interface, with chunky bright icons and generally intuitive menus. Hold down the rotary knob for a few seconds (a control that’s redundant in touchscreen mode), and the printer switches over to the classic Marlin UI, all list menus and chunky pixels. This “classic” view is navigable using the rotary knob. Both are highly responsive – something most welcome with the touchscreen interface – and precise, and between them leave no reason to dislike interacting with the printer.
You could argue that versatility is the B1’s secret weapon. If you’re so inclined, you can port print jobs to the printer on the provided microSD card, a familiar, if irritatingly tiny, object that’s part and parcel of many desktop 3D printers. Better still, you can stow that card and use a full-size USB thumb drive, instead – way more convenient and more likely to plug straight into your computer for slicing and exporting your 3D models.
It’d be negligent of us to say the B1 has been perfect for us. Going from our first flawless prints to erratic extrusions and the dreaded tedium of troubleshooting is not much fun, but in doing so, it never felt like a fix was impossibly out of sight. You have a lot of room to maneuver with the B1.
Is It Worth It?
Biqu’s B1 feels like an opening shot across the bows of the few household names in budget desktop 3D printing. You get way more functionality and features that the same amount of money will get you from Creality. With the popularity of BTT growing thanks to its made-for-makers boards and components, there’s a groundswell of community growing for the printers, too.
Spelling it out, for the same money as Creality’s Ender 3 V2, the B1 gives you a user interface that can bend to your preference, a good touchscreen, deep onboard options to tweak and optimize and punchy RBG lighting on the printhead. On top of that, there’s easily upgradable everything with plug-and-play ports for auto-bed leveling and a pretty decent removable magnetic steel print bed. If it weren’t for erratic issues popping up and taking the shine off some of our prints, the B1 would be an easy top recommendation.
If you’re lucky, you might not even encounter the issues we did (such is the lottery of these cheap desktop 3D printers.) Whether you do or not, the B1 is devilishly good value for the features and starting point it gives you.
Features
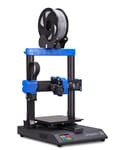
The Biqu B1 is, in essence, a buffed up Ender 3 clone. It features a substantially larger print volume of 235 x 235 x 270 mm, an adjustable Y-axis belt tensioner, and a compact base unit. It further packs a Bowden extruder, as well as an AC-powered heated bed that should provide fast and continuous heating.
Flexible Metal Bed
The heated bed’s surface features a magnetic steel print bed or as Biqu labels it: SSS. The triple-S stands for super steel sheet. In any case, this magnetic print bed should allow for easy removal of prints. Just take it off the platform, bend it slightly, and the print will pop right off. From the looks of it, the steel plate is coated to ensure proper adhesion of prints. Additionally, it can be used from both sides, prolonging the service life.
32-Bit Mainboard
The B1’s brain power comes from an SKR V1.4 32-bit mainboard, manufactured by – you guessed it – BigTreeTech. In combination with the silent TMC2225 stepper drivers, the printer should offer stable and quiet performance. According to the manufacturer, operational noise is, Biqu claims, as low as 42.8 dB (a little louder than the ambient noise in a library.)
Biqu appears to have had tinkerers in mind when designing the B1, the adapter board has a few extra connection slots and interfaces for DIY upgrades and fine-tuning. Be it Wi-Fi connectivity, a second Z-axis motor, a BLTouch auto-leveling probe, a BTT Smart Filament Sensor, or – as the B1 uses a USB Type-C connection cable instead of a ribbon one for the print head – a laser engraving head can also be installed. From what it looks like, you can really go to town when upgrading the B1.
Touchscreen interface
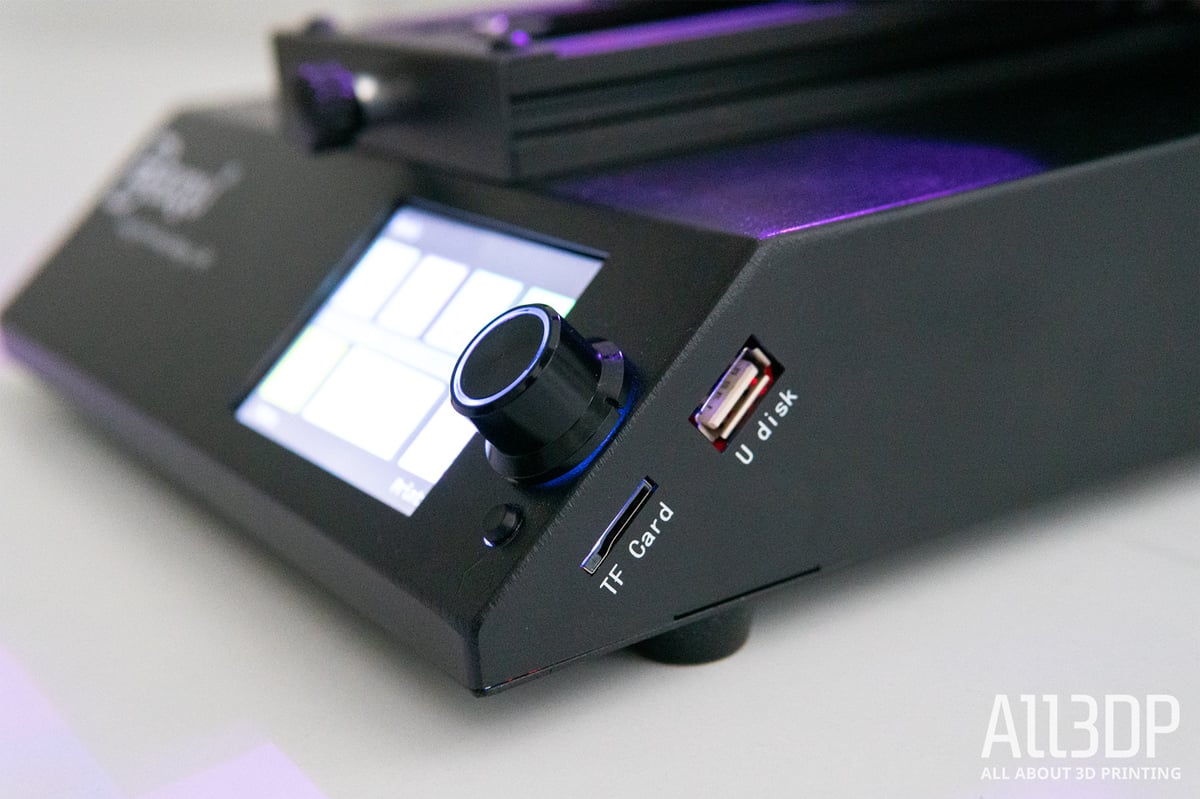
Those motherboard circuits can be controlled with the B1’s BTT TFT35 V3.0 color touchscreen. Features like model-preview or a G-code interface stand out from the usual bread and butter settings and data monitoring functions you can expect on a budget 3D printer. Plus, as the firmware is open-source (Biqu maintains a GitHub repo with its firmware), you can change the UI according to your preferences and select one of 15 languages.
What really sets the B1 apart, though, is what Biqu calls its dual operating system. In case you were wondering why the neat-looking touchscreen had a rotary knob on the side – this is it. You can switch from the Biqu’s flashy touch mode to the classic Marlin UI, navigable using the rotary knob. To keep it fancy, Biqu equipped the knob with color LEDs, which can disco through seven different color options.

Adding to that disco feeling is the B1’s hot end lighting and night-vision mode. Another LED in the print head allows you to monitor your print in the dark in flashy lighting.
Further Features
Additional features of the Biqu B1 include:
- Filament sensor
- Resume print function
Tech Specs
General Specifications
- Technology: Fused deposition modeling (FDM)
- Year: 2020
- Assembly: Partially assembled
- Mechanical arrangement: Cartesian-XZ-head
- Manufacturer: Biqu
3D Printer Properties
- Build volume: 235 x 235 x 270 mm
- Feeder system: Bowden drive
- Print head: Single nozzle
- Nozzle size: 0.4 mm
- Max. hot end temperature: 260 ℃
- Max. heated bed temperature: 100 ℃
- Print bed material: Steel
- Frame: Aluminum
- Bed leveling: Manual
- Connectivity: MicroSD card, USB
- Print recovery: Yes
- Filament sensor: Yes
- Camera: No
Materials
- Filament diameter: 1.75 mm
- Third-party filament: Yes
- Filament materials: Consumer materials (PLA, ABS, PETG, Flexibles)
Software
- Recommended slicer: Cura, Simplify3D, Repetier-Host
- Operating system: Windows, Mac OSX, Linux
- File types: STL, OBJ, AMF
Dimensions and Weight
- Frame dimensions: 412 x 492 x 402 mm
- Weight: 8 kg
Similar Printers
Here are some printers that closely match the Biqu B1. Our current favorite budget printers are explored over in our Best Budget 3D Printers Guide.
Creality Ender 3 V2
The Ender 3 V2 is Creality’s latest iteration on the popular Ender 3 series. It features a smaller build volume than the B1 but comes with a tempered glass build plate and a Mean Well power supply.

Artillery Genius
The Artillery Genius costs about $50 more than the Biqu B1 and also features a slightly smaller print bed, but comes with a direct drive extruder.
License: The text of "Biqu B1 Review: Hot, (Not) Pink" by All3DP is licensed under a Creative Commons Attribution 4.0 International License.
CERTAIN CONTENT THAT APPEARS ON THIS SITE COMES FROM AMAZON. THIS CONTENT IS PROVIDED ‘AS IS’ AND IS SUBJECT TO CHANGE OR REMOVAL AT ANY TIME.