Anycubic Photon M3 Max Review: Budget Bigness
Rating

The Anycubic Photon M3 Max is an affordable large resin 3D printer. Could this be the perfect entry into large resin 3D printing? We put it through its paces. Read on to find out.
The Anycubic Photon M3 Max is the largest of the three M3 (third-generation) Anycubic Photon resin printers and Anycubic’s first venture onto the large resin 3D printing turf. A subculture of resin 3D printing that’s enjoying a growing clientele as users are looking to create parts and miniatures ever larger and more at a time. Far from an abundance, a handful of large resin 3D printers are currently available, and the M3 Max is the latest to join the refined selection.

With a large build volume, a 7K LCD, and some nifty features such as an auto resin refill system or a matt textured resin vat for better part release, the Max looks to broach what’s needed to print XL. Moreover, the M3 Max does so at a relatively affordable price tag. In fact, it is currently the cheapest way to get into large resin 3D printing by a good margin.
We’ve put the Photon M3 Max to the test to see if Anycubic managed to put out a budget banger or cheaped out in the process. Read on to see how it fared in the review.
Verdict
Pros
- Large build volume
- Pretty affordable for its size
- Great performance
Cons
- Tricky-to-handle vat
- Limited UI
- Slow-ish print speed
The Anycubic Photon M3 Max is a large resin 3D printer capable of producing high-detailed models.
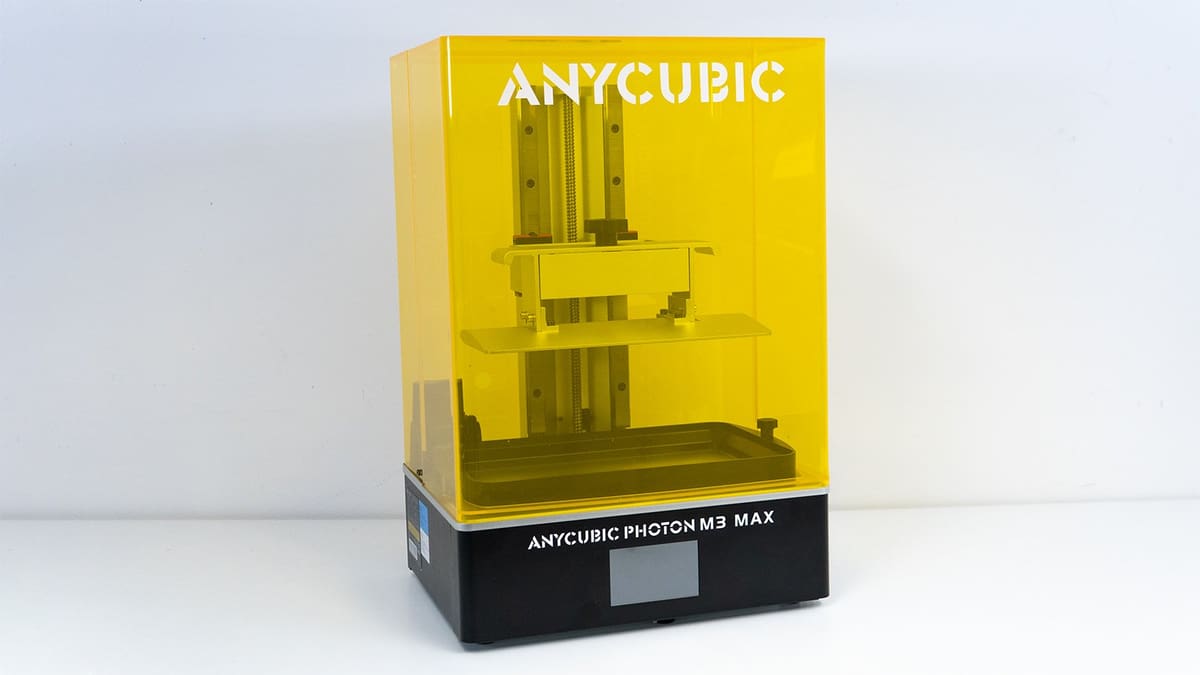
With a build volume of 298 x 164 x 300 mm and XY resolution of 46 microns, thanks to its 7K mono screen, you can print truly large and highly precise prints. Its price tag, currently just below $1,000, undercuts the comparable large-capacity consumer printers out there by a stretch.
What’s more, it does so without lowering one’s sight. The M3 Max comes with a two-piece acrylic enclosure, which does not look as sophisticated as the metal enclosures you’ll find on competitors and is a bit wonky at times. However, we found it to be more accessible, especially when wielding that massive build plate or vat. Further, Anycubic-inhouse innovativeness is thrown in there in the form of an auto-refill system, which works great and irons out the vat’s shallowness but is a bit cumbersome to reach, and Anycubic’s frosted-glass-style FEP sheet.
You will have to make do with a small touchscreen, limited UI, and the fact that Anycubic’s acclaimed printing speed of 60 mm/h is pretty far off. Besides that, the M3 Max is a well-rounded machine that performed reliably during our time with it.
If you want to get into large resin 3D printing without breaking the bank, the M3 Max should be high on your list. As it is on ours; it is currently our Budget Pick in our Best Large Resin 3D Printers Guide.

The Tech
Stripped Down
The M3 Max is Anycubic’s first large resin 3D printer, but from its looks, it doesn’t really put out a big printing vibe. You know, large resin 3D printers typically come in a fancy metal casing. Prime examples include the Elegoo Jupiter, the Phrozen Mega 8K, and Peopoly’s Phenoms. Name a large resin 3D printer that doesn’t have a metal enclosure. We’ll wait.
At first glance, you might put the M3 Max more in the mid-ish large build volumes simply because of its looks and the unwritten rule that medium-sized consumer resin 3D printers come with the genre-typical acrylic cover and above a certain build volume, you get that finessed, metal casing. Far from it with the M3 Max. As its name suggests, the M3 Max is the largest of Anycubic’s M3 series, with a build volume of 298 x 164 x 300 mm. Footprint-wise, it keeps it relatively tame at 400 x 408 x 596 mm.
So it’s pretty big, no matter its enclosure. It trumps the Elegoo Jupiter with its 277 x 156 x 300 mm build volume but is a little shy of the Mega 8K’s mega-ness. Nonetheless, that’s an impressive volume to work with, all the more so because of the affordable price tag attached to it, which partially can be attributed to the enclosure as well: Acrylic is cheaper than metal, easy as that.
Slide out
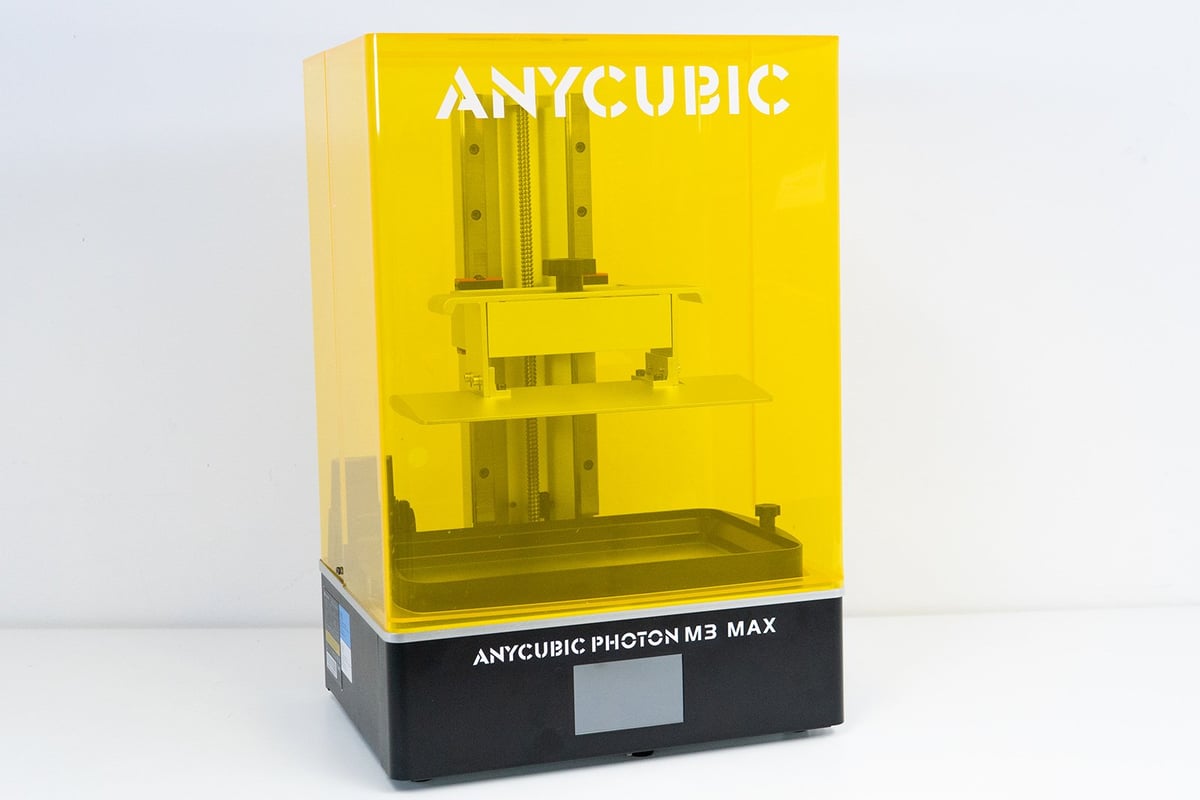
Instead of the top removable lid, which you are probably familiar with from smaller companions, the M3 Max comes with a two-piece enclosure that allows you to slide out the front part and access the printer’s insides.
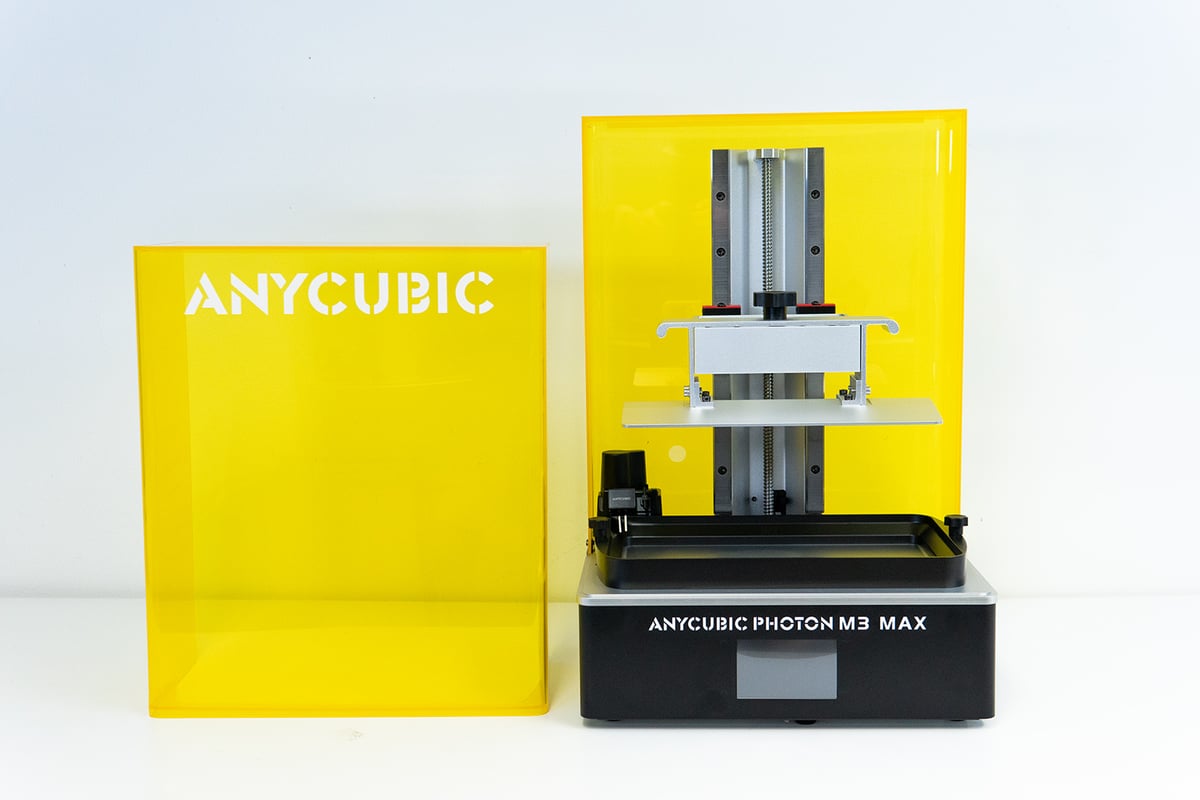
It does give you all the access range you want to load the large build plate and vat and take out prints. Clever design by Anycubic because with this size, you wouldn’t want a top removable lid. You would need extra large shunting space to take it off. And we found the half-lid design to actually provide better access than its hinged door companions, especially in tight settings.
The slideout piece is a little wonky, though, and you should watch out not to drop it or jostle it around too much as it can break more easily, but that’s that. Manhandling your printer isn’t advised in any case.
13.6-inch 7K Monochrome Screen
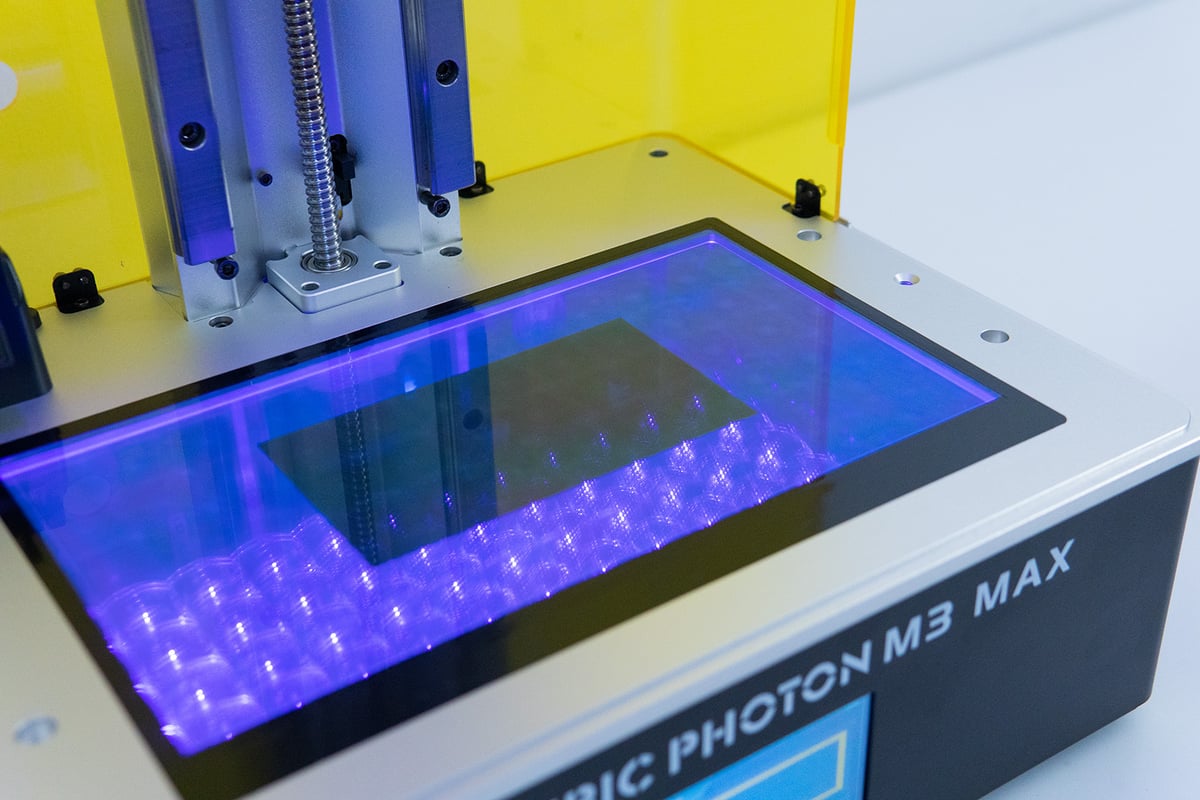
At its heart, the M3 Max comes with a 13.6-inch monochrome screen. Being 7K and housing 6480 x 3600 pixels translates to an XY accuracy of 46 microns. Pretty smack down in the middle between the Jupiter’s 51 microns (6K) and the Mega 8K’s 43 microns. Having printed with all three big chaps and compared countless ten-micron-difference prints, we can’t really make out the ever-so-subtle difference.
For the Max’s light source, Anycubic lined up 84 LEDs that make up the light matrix. Having held a lux meter to it, we can say light uniformity is fairly decent at about 90%. Nothing to write home about, but we did not encounter any effects on the prints no matter where they were on the build plate.
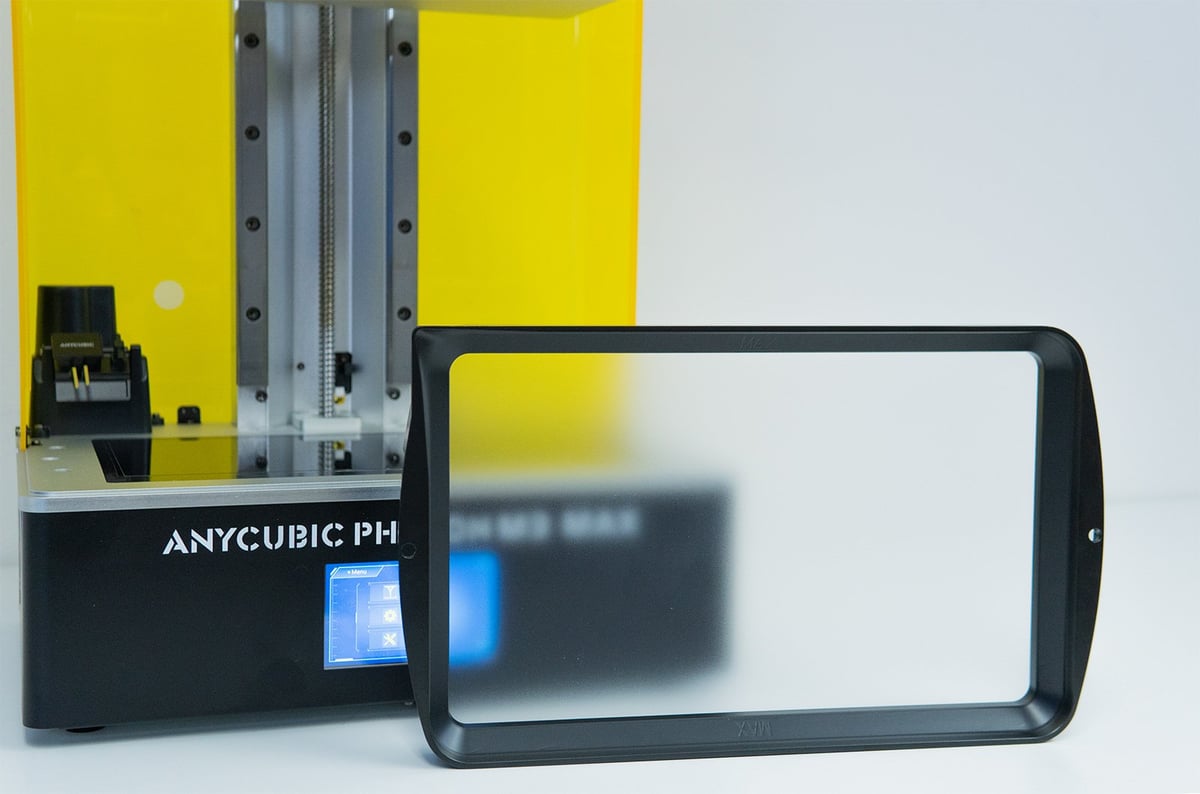
To protect the screen from unwanted keying, it comes with a protective film on top and a spare sheet. Having some protection for your valuables can never hurt, as scratching or any other damage to the screen can lead to print inconsistencies and failures. You even get a spare.

Being a consumable after about 2000h of use, you will have to replace the LCD and fork out another $250. Not too much to ask for a printer this size, but you want to avoid having to replace it beforehand due to some big scratch. The protective film comes in handy here.
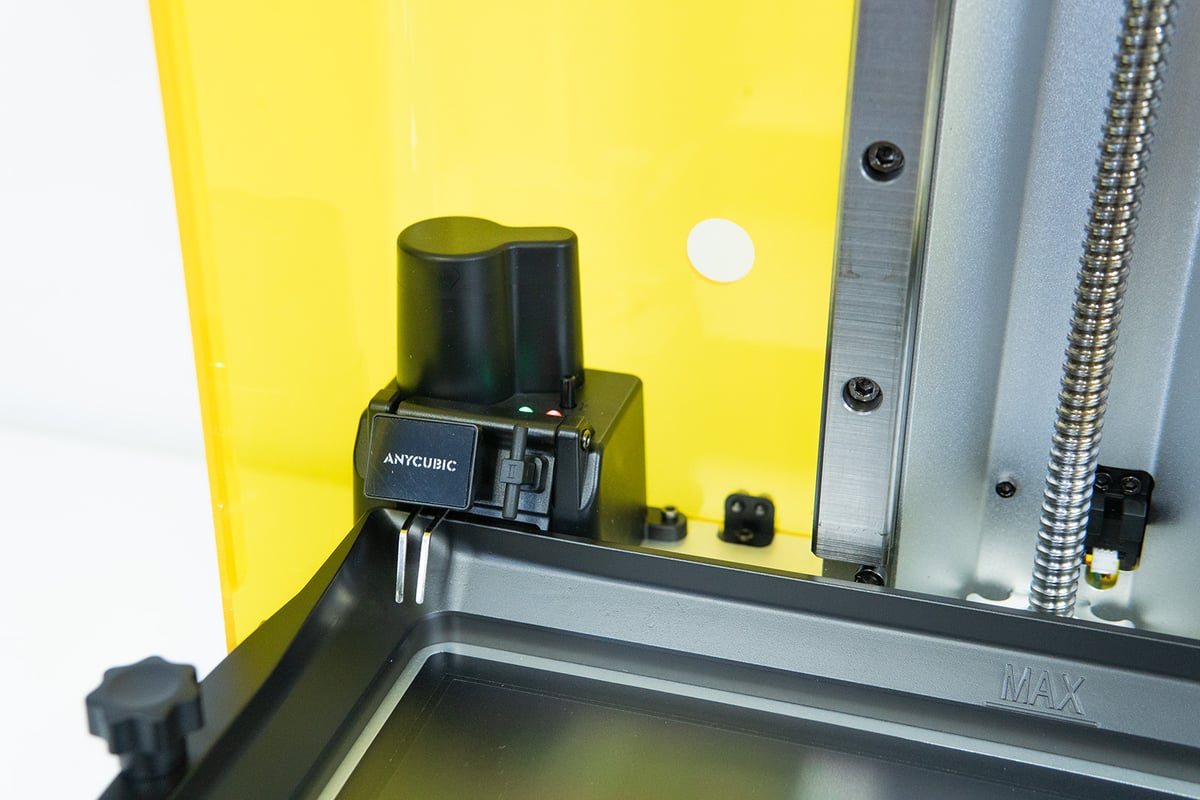
Auto-Refill
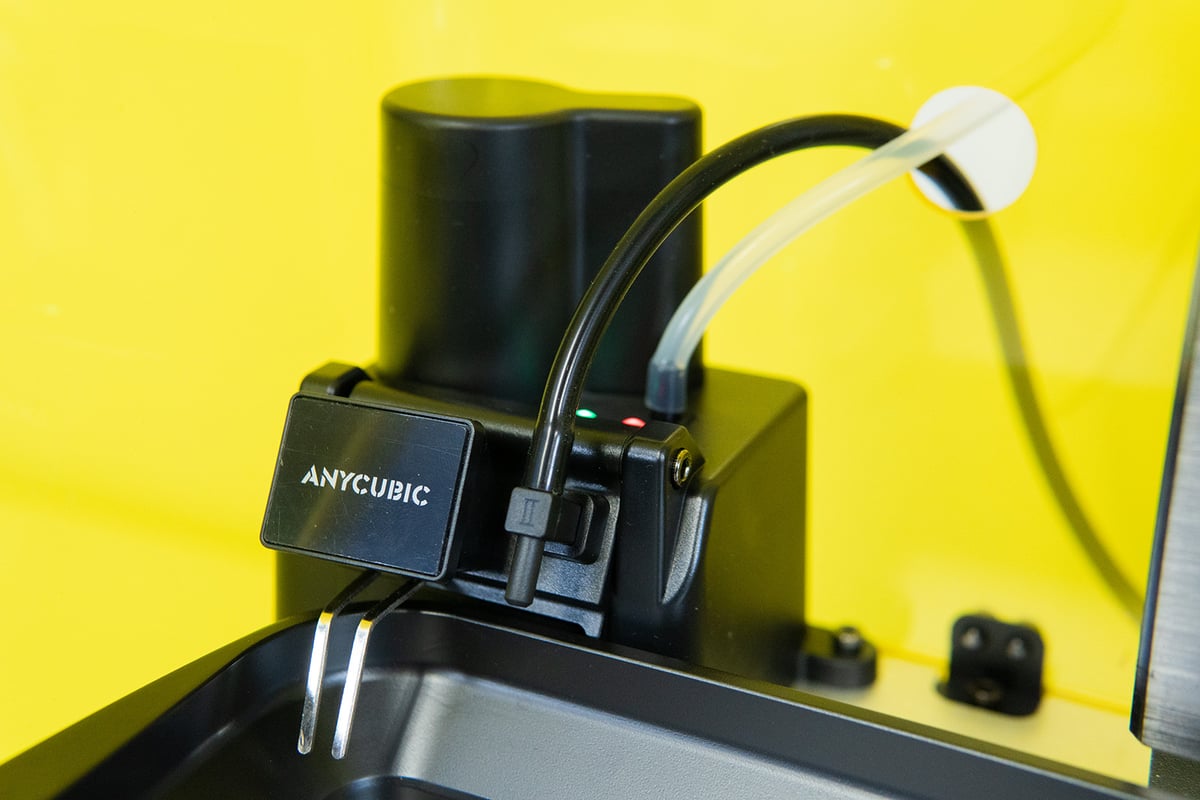
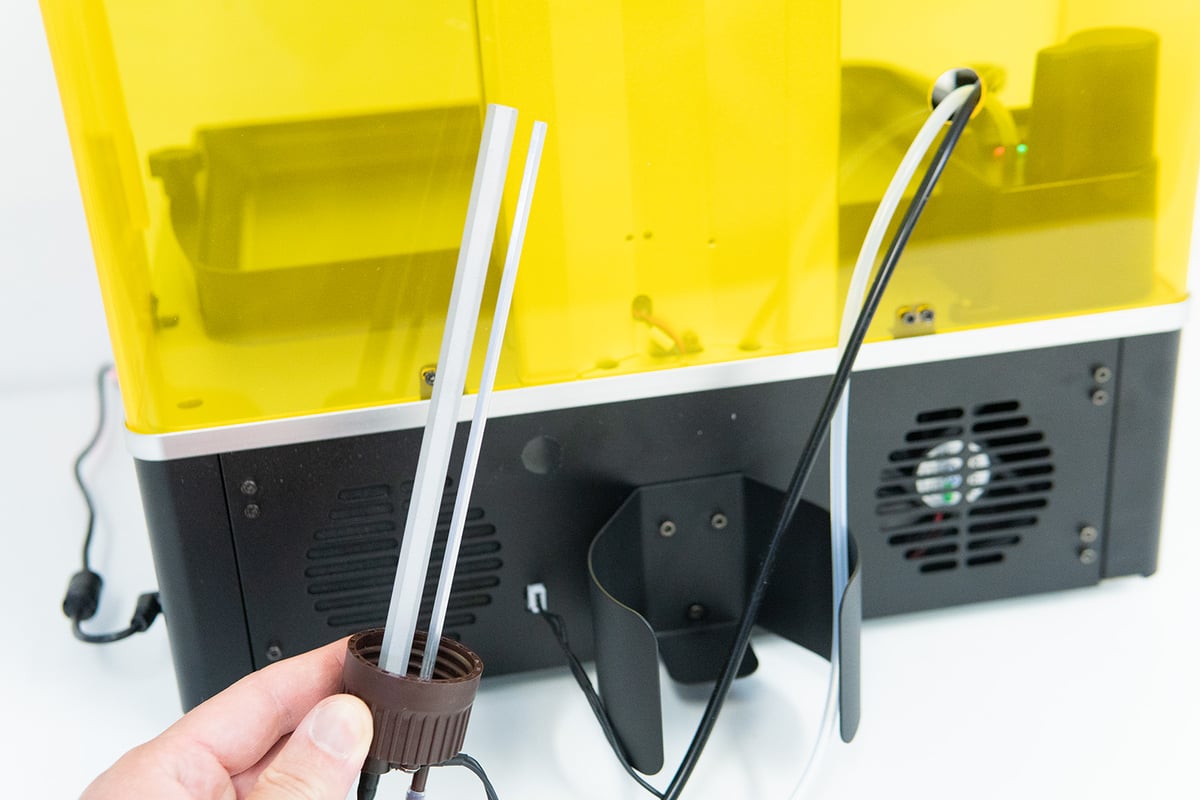
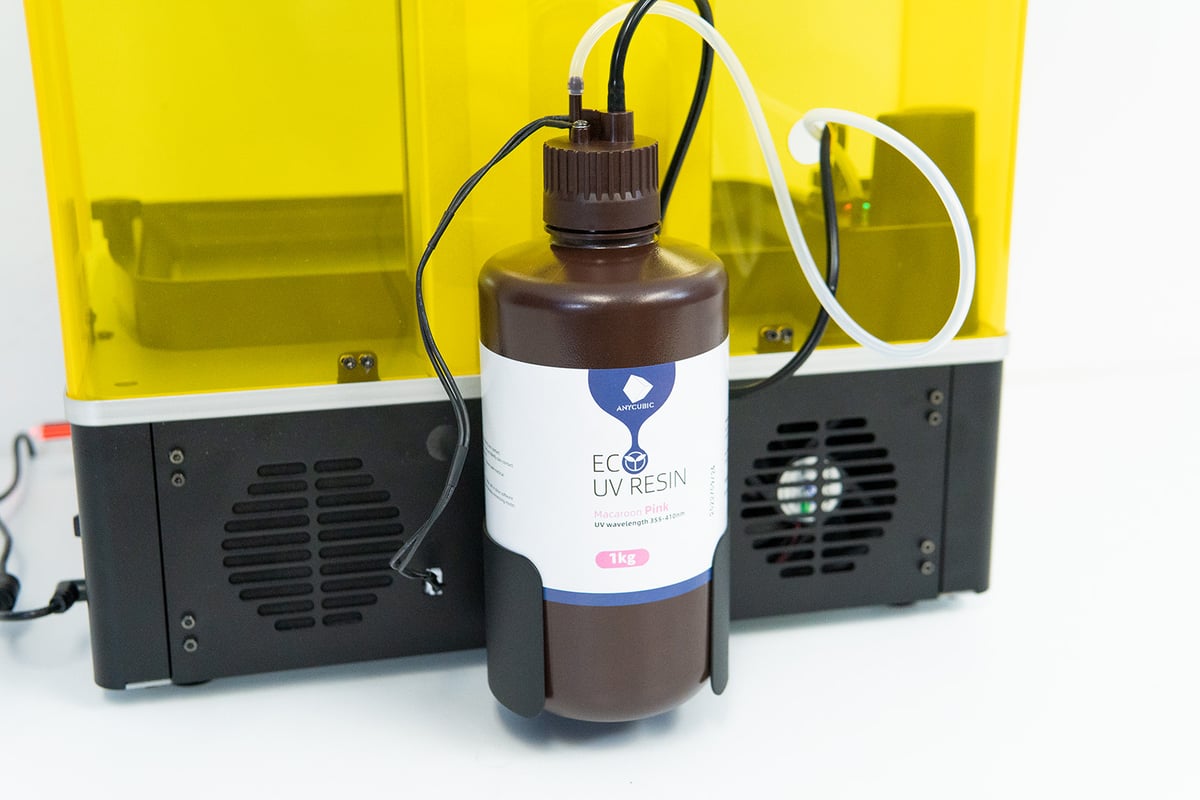
One of the most eye-catching novelties on the M3 Max is the auto-refill mechanism. Developed by Anycubic for its large M3 Plus and M3 Max, the pumping mechanism automatically refills fresh resin when the tank is running low. It works via an (Anycubic) resin bottle at the back of the machine fed with an air tube, creating positive pressure and pushing the resin through another pipe into the vat. The vat level is checked by two metal prongs, running a small electrical charge that is disrupted every time the vat drops below a certain level.
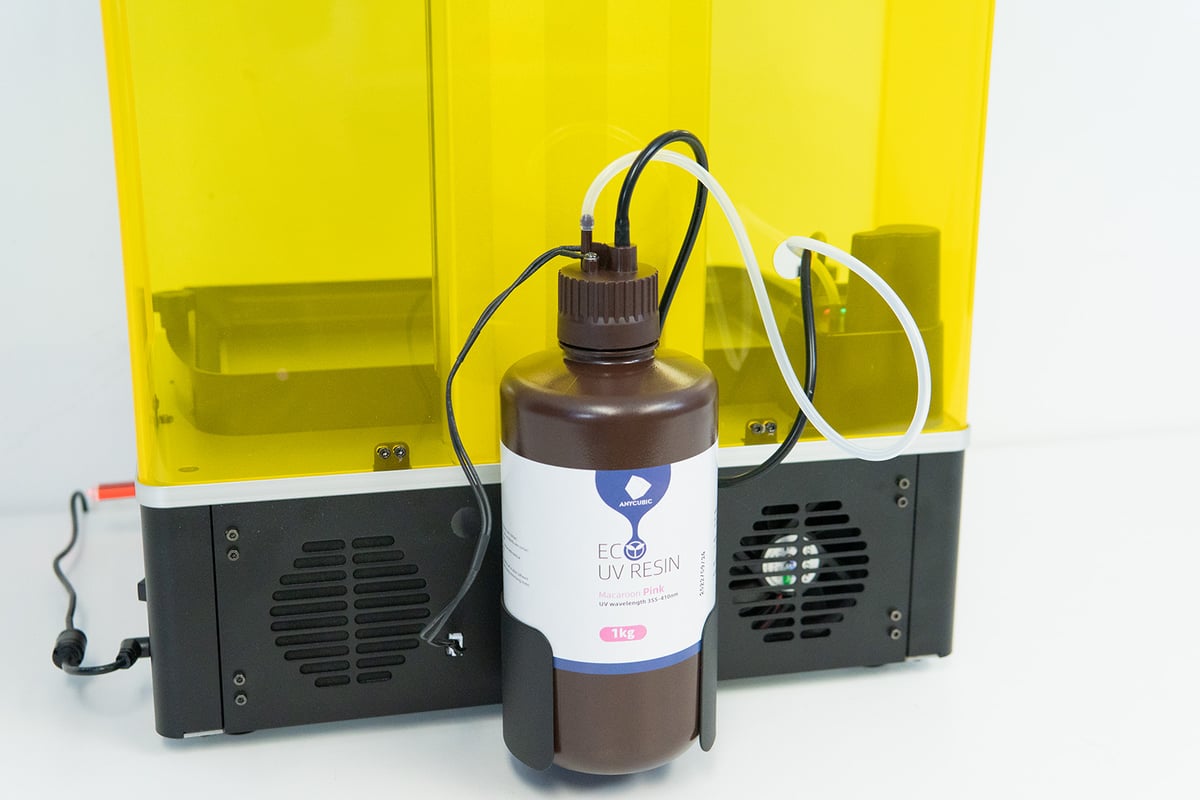
Unlike the arguably simple place-a-bottle-upside-down-inside the print-chamber approach that Elegoo opted for on its Jupiter, the Anycubic system is quite elaborate in its setup. During our time with the printer, we had the refill running for most prints, just in case our estimated resin consumption was off, and found the vat to be topped off sufficiently all the time. A little too topped off even. The vat on the M3 Max is relatively shallow with a flat edge, which makes using the refill function for large prints advisable in the first place because it might not be able to hold a sufficient amount of resin from the get-go. However, having such a shoal vat, swapping out large amounts of resin is pretty tricky. Think: water drop challenge.
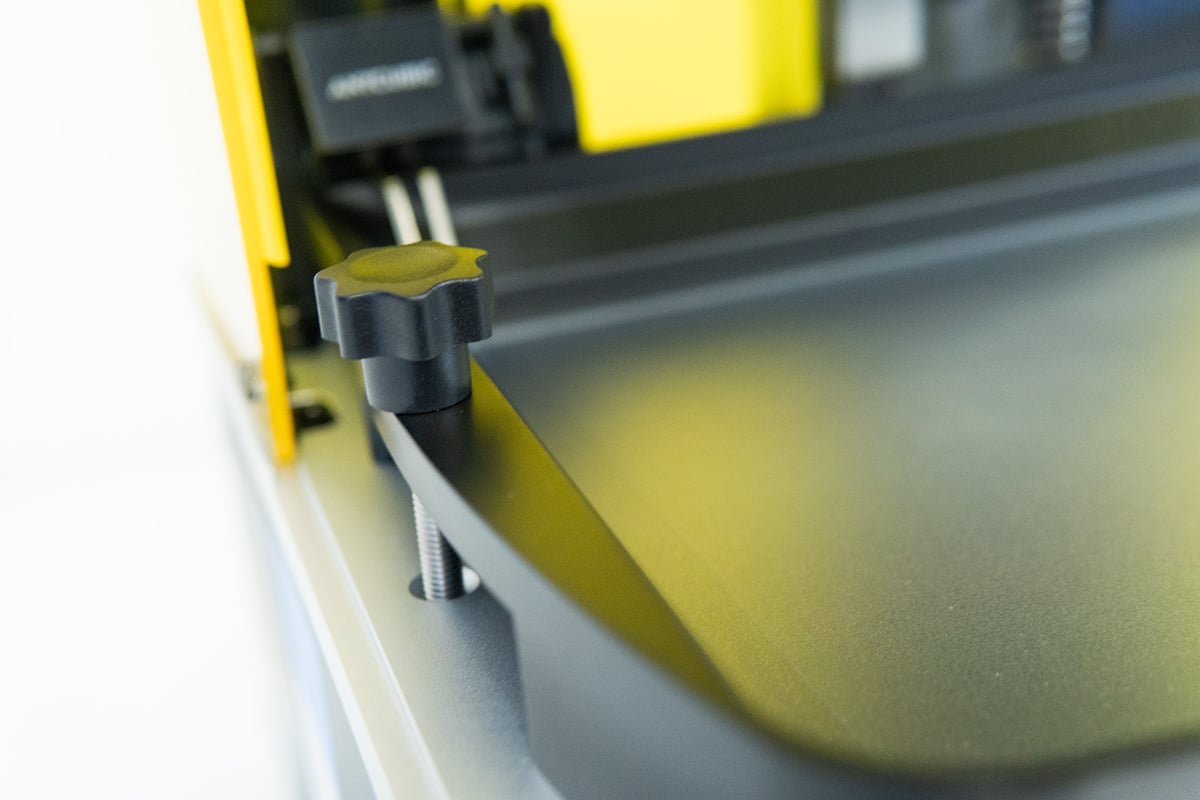
Frosted Glass
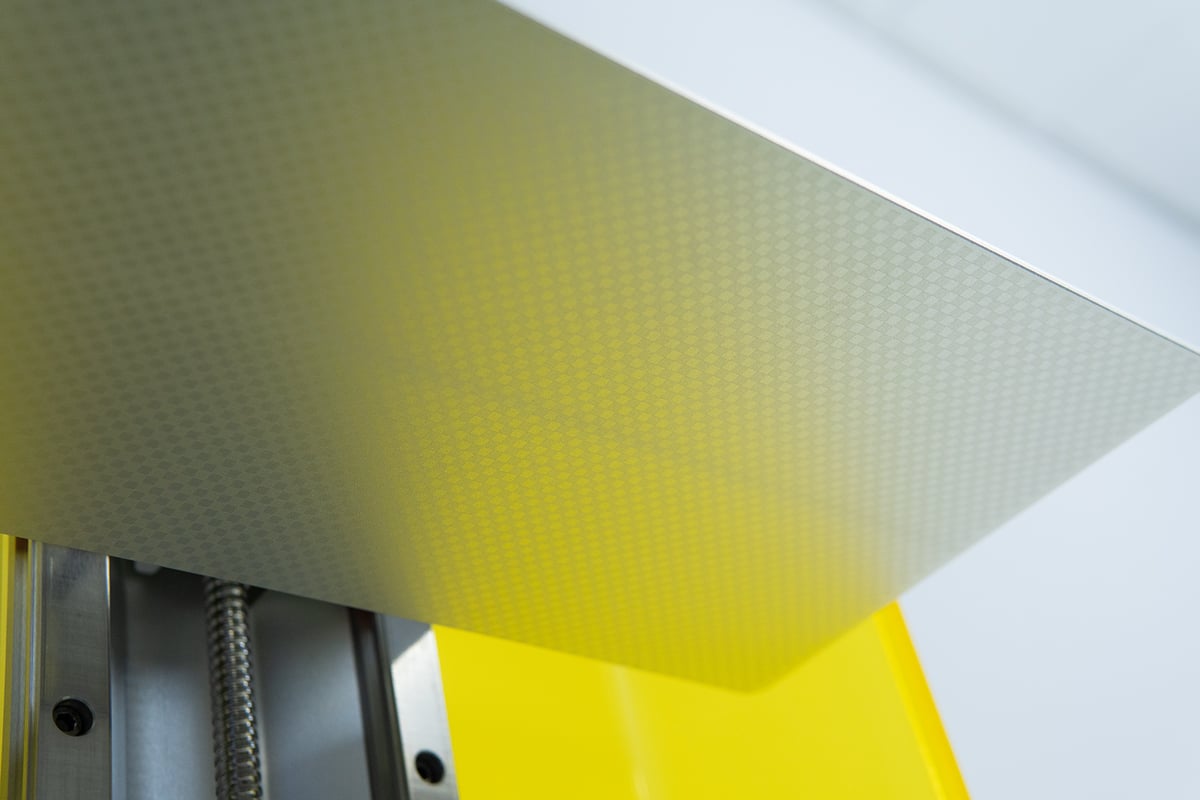
Don’t panic when unpacking your printer’s vat and noticing that it doesn’t come with the typical transparent, see-trough FEP sheet. For its new M3 series, Anycubic came up with a matt, frosted film.
This milk-glass-looking FEP film consists of a smooth side, which faces the display, and a rough side facing the inside of the tub. Fear of the frostiness messing with the print resolution or light transmittance is unwarranted and the inward-facing rough side is said to allow for an easier part release.
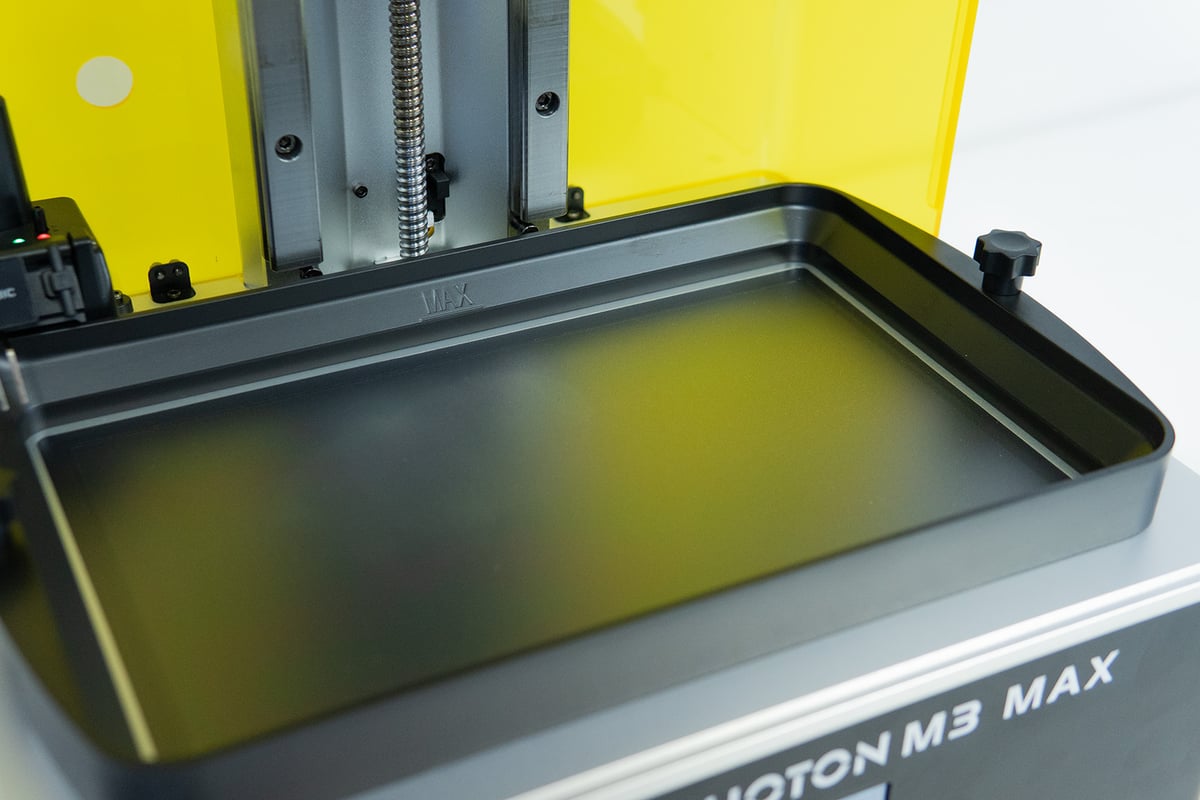
Using our ears as a measuring tool, the typical thump sound accompanying the print every time a cured layer gets lifted is considerably quieter. To a point where you are inclined to check if your first layers are even sticking as you are typically accustomed to a far more distinctive sound.
Plate & Fixture
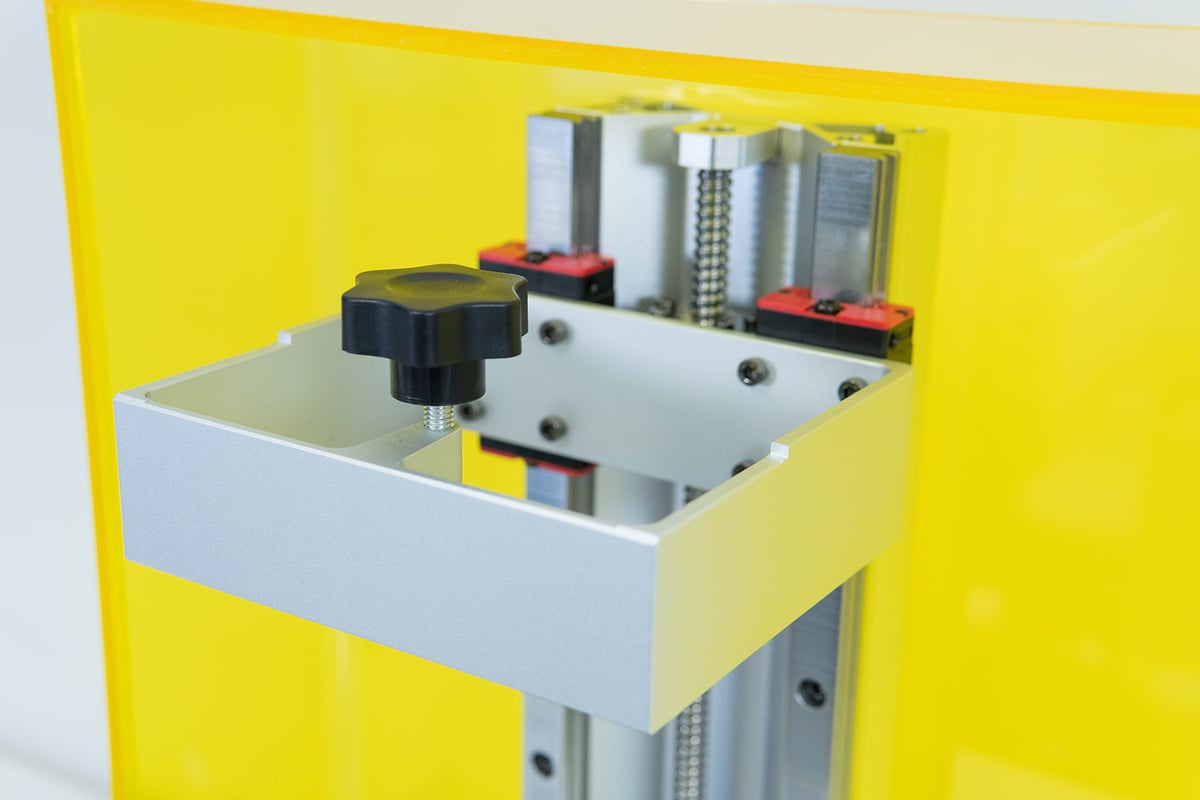
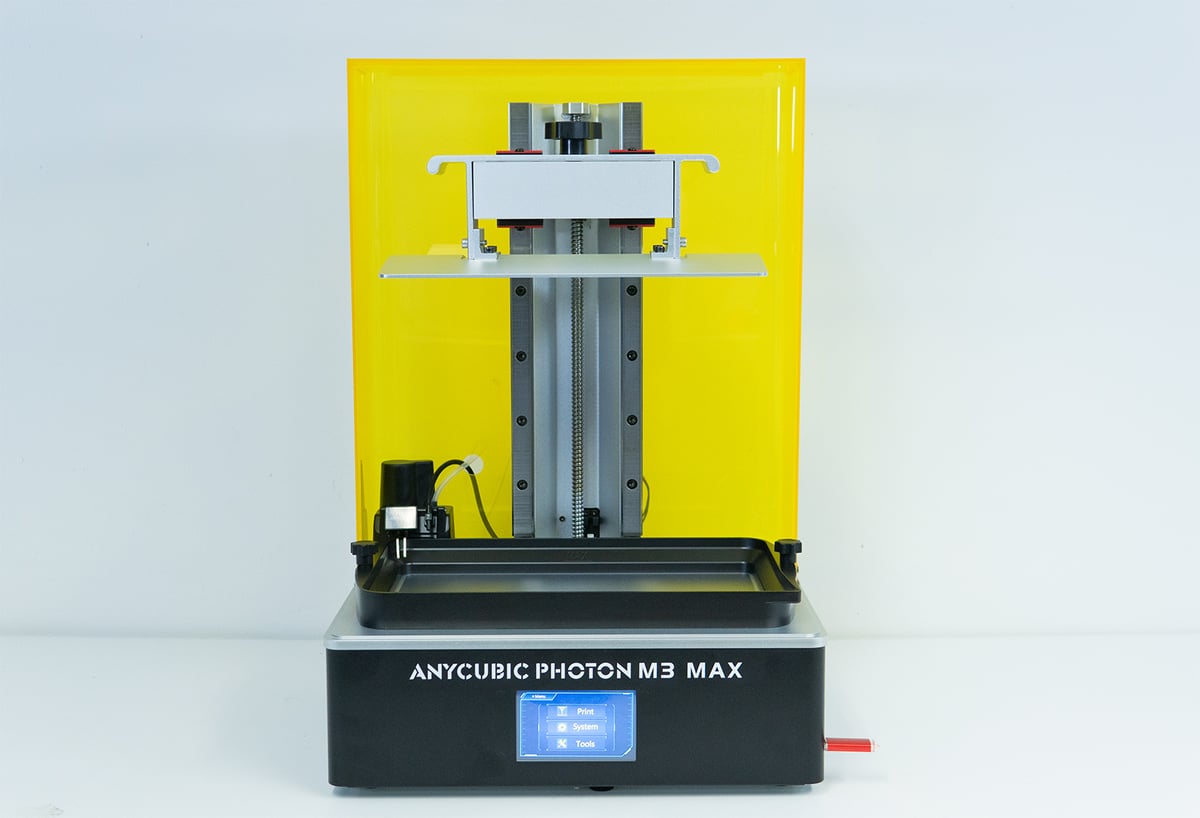
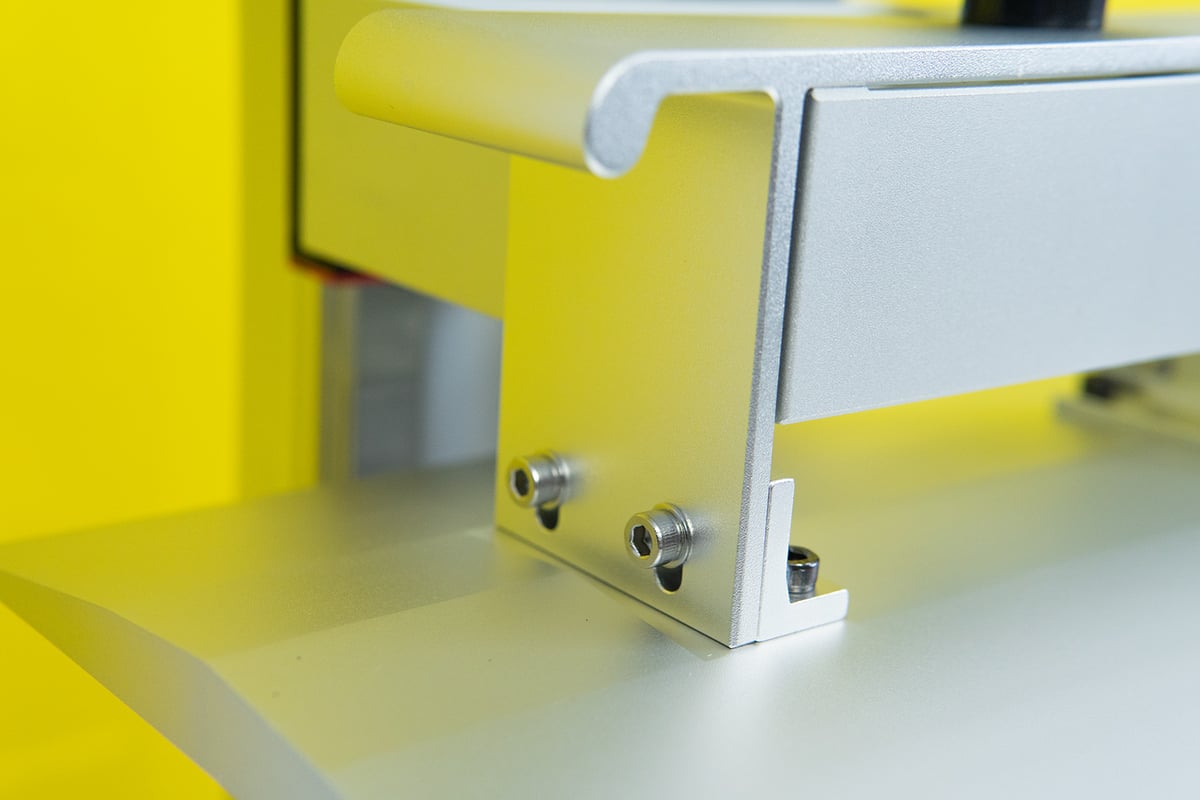
Speaking of distinctive, the M3 Max does come with quite a distinctive cantilever riding up and down the sturdy, dual-guided Z-axis. The aluminum bracket is easy to load the plate onto, although the fixture knob on top could be a little bigger.
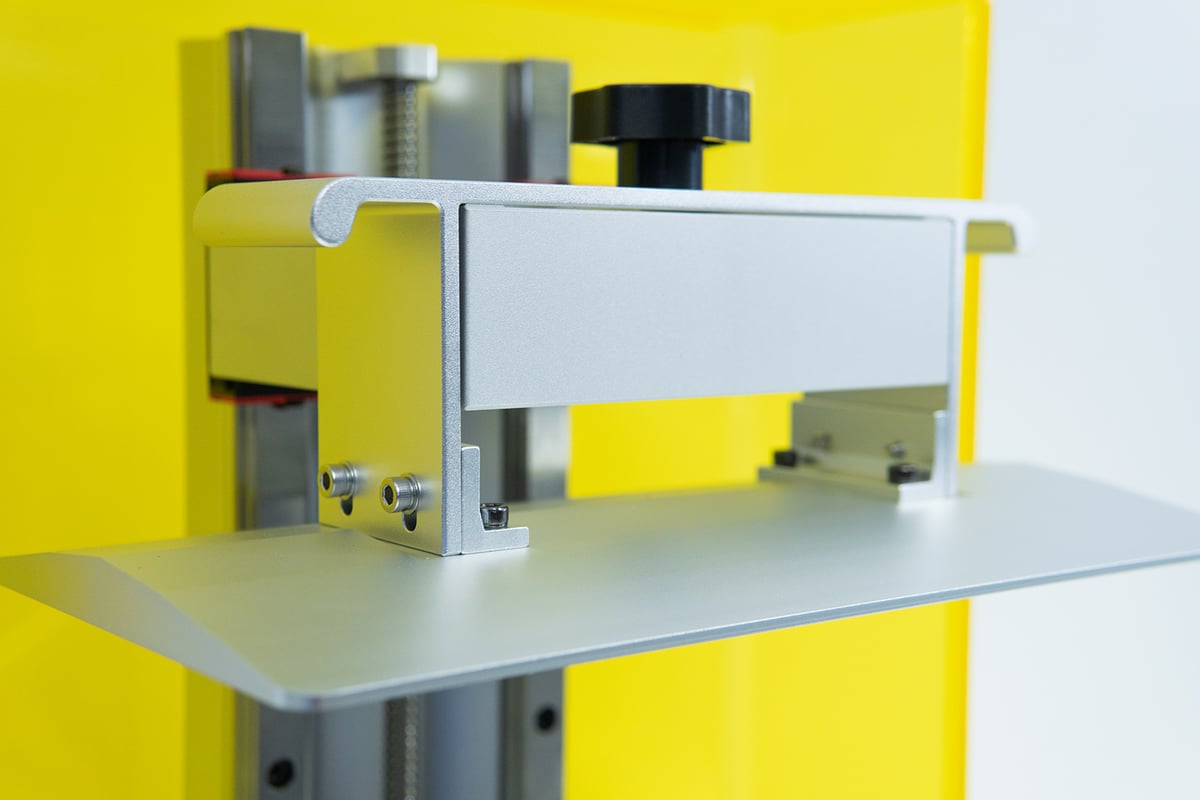
The print plate itself is fairly convenient to wield thanks to its aluminum side handles and the fact that the fixture itself can be used as a massive handle to grip the print plate. Adhesion-wise it performed great (a little too great at the beginning) with prints sticking firmly to its laser-edged checkerboard-style surface.
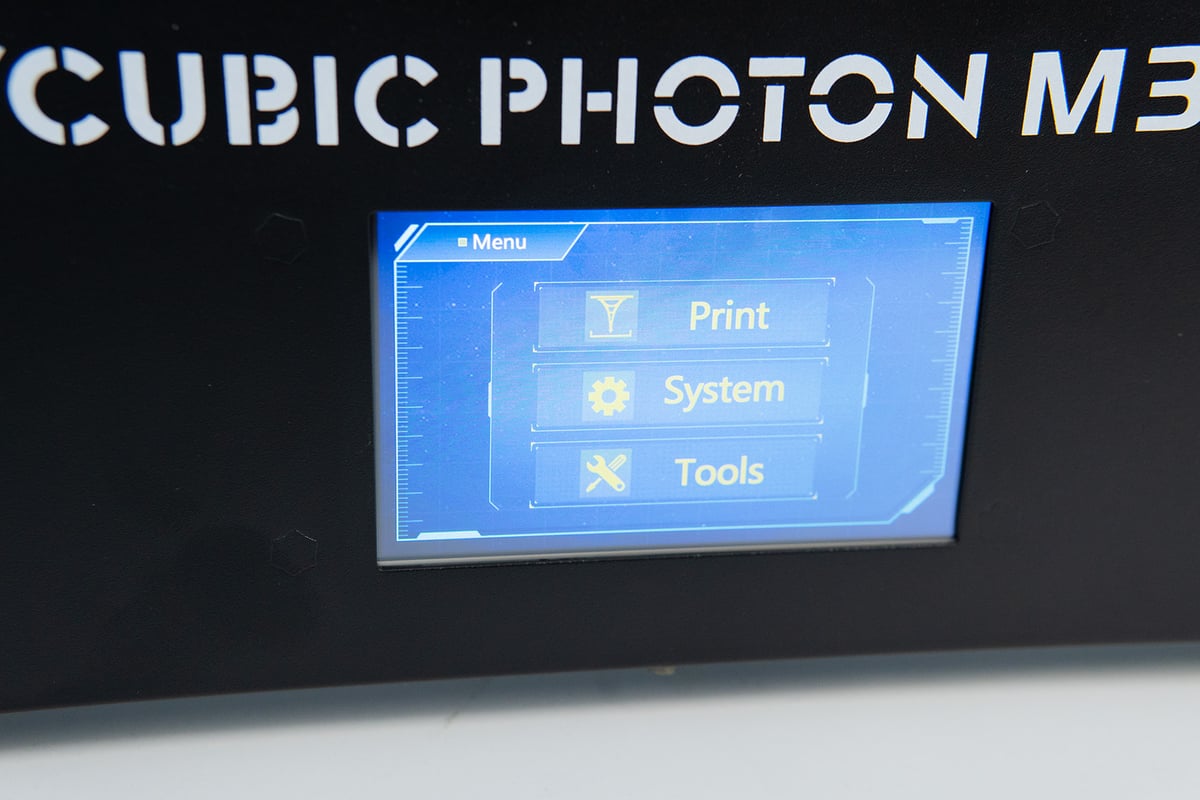
User Interface
Well, here is where we would have hoped for a bit more innovativeness from Anycubic; they have shown it in so many other parts of the printer.
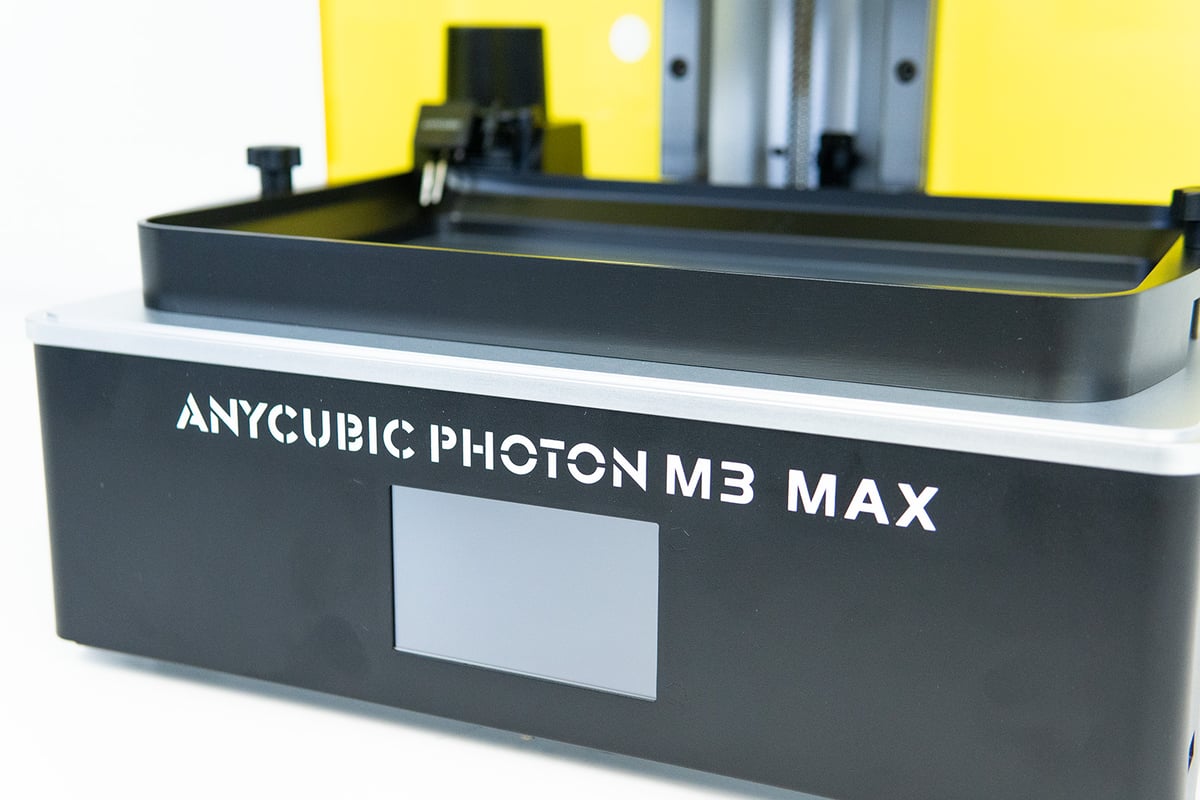
Anycubic is one of the few manufacturers not bound to the CBD-Tech boards and ChiTu software for its printers but comes with its own motherboard and interface. On the M3 Max, you will get a 4.3-inch color touchscreen with the Anycubic UI we are already familiar with from past machines such as the Mono X and others. It has all the essentials but does come across as a bit old in the tooth.
Combined with the rather small-ish touchscreen given the printer’s size, Anycubic cheaped out here a little. Especially as the contemporary released M3 Plus got a larger touchscreen, new UI, and even Wi-Fi accessibility. You’ve got to cut corners somewhere, we guess.
Printing & Usability
Unboxing & Assembly
The M3 Max comes in a simple cardboard boxing, which, depending on the carefulness of your shipping provider, might show some signs of transport, but the printer should be well protected inside.
Casing is the buzzword here, the Max comes laced up in a metal frame and with plenty of styrofoam that protects it from any dents or bends. We have to hand it to them, this simple but effective boxing is a clever thought by Anycubic, as with the acrylic lid, the printer has quite a lot of shatter potential. Definitely, a different approach from the massive wooden boxes some of the other big boys typically come in. Your back will probably thank you, less weight to lift. At 26 kg, the M3 Max is almost a featherweight. Best get a second set of hands on deck, though, to carry the printer around.
After disassembling the metal casing by unscrewing a handful of screws, the first order of business is assembling the printer. Yes, you read that right: this resin 3D printer needs some actual putting together. Not to worry, though, we are not talking DIY kit here, but the permanently installed back half of the enclosure needs to be screwed to the printer’s base. Quite the unfamiliar interim step, as resin 3D printers, typically do come fully assembled and are virtually ready to go. Nonetheless, a couple of hex bolts later, your 3D printer is ready for pre-flight leveling and liftoff. In the process, you will also have to attach the auto-resin-refill bottle holder in the back and connect the tubes with the pump.
Leveling the print plate is the typical paper affair. The M3 Max does come with a thick-ish leveling paper that helps you get the spacing for the vat’s FEP right and once you homed the print plate onto it, you simply need to retighten the four screws on the build plate. Once leveled, we never had to revisit the process, the print plate stayed leveled throughout our whole review. Even when we had to butcher at it with a spatula and hammer to get some of the over-cured prints off (more on it below).
Slicer & Print Preparation
Once you got the M3 Max all set up, it is time to throw some prints on there. To do so, you will have to choose your weapon of choice, that is, your slicer. The M3 Max does come with Anycubic’s proprietary Photon Workshop slicer, but the printer is also available in Lychee and ChiTuBox (not the Pro version for some reason, though).
With the Photon Workshop’s latest version (V2.2.16), the slicer does get a slight revamp and access to a few more settings, but overall the software still feels rather cumbersome compared to the alternatives out there. It does have all the essentials, but especially for print preparation settings such as model orientation or even support placing, the Photon Workshop just doesn’t seem on par in terms of ease of use with the likes of Lychee or ChiTuBox.
What’s more, Anycubic does not provide dedicated settings for its many different resins. A shortcoming we do call out manufacturers more and more on, as resins may require different cure times depending on the material and color. It might be nuances and negligible in most cases, but especially as the larger a print gets, the more it succumbs to physical forces and you ideally want your curing to be spot on. Having a proprietary slicer, one can at least expect to have settings for its proprietary resin as well, we think. For the record, we left the vanilla settings as is for the most part and had no problems printing with a bunch of different resins.
One setting we had to fiddle around with, though, was the first layer cure time. Some reigning in was required as trying to take our first prints off the build plate resulted in a lot of shattering and shrapnels flying around. For the sake of this review, we did stick to Photon Workshop for slicing (although we sidestepped to ChiTuBox occasionally for model preparation and support, Shhh!), and its default first layer cure time of 35 seconds was a bit much for our liking. Your mileage may vary, but we found the best results – that is, good adherence but easy popping-off prints after – when dialing it down to 22-25 seconds. Best start with some smaller test prints before taking on large projects.
Usability
Once the settings are dialed in, you can take that 298 x 164 x 300 mm build volume for a spin and print some exceedingly large models. Whether it be scaled-up miniatures, batches, or even functional parts, the M3 Max does provide ample space to create in. What doesn’t provide ample space is the print vat, though. Especially when you fill up that print plate with tall prints, the rather shallow vat might not be able to hold enough resin. Its flat brink does make it extra tricky to take the resin-filed vat out of the printer to boot.
To not run dry on resin mid-print, you can use the auto refill function, though. After all, that’s what it is there for. To do so, you will need an Anycubic resin bottle, screw the tubed-up lid onto it and enable the function in the printer’s menu. You can also do that mid-print, but be sure to mix potential resin concoctions separately first, should you wish your prints in uni-color. Don’t be shocked by the unfamiliar sounds the printer (precisely the air pump) makes during printing, though.
The resin refill definitely makes large, two-to-three-day prints more relaxing on the user part: you simply don’t have to worry about running out of resin mid-print anymore. Our main gripe with the setup is its reachability, though. The bottle holder sits in the back of the printer, which for most users, who presumably will have the printer on some sort of a shelf, will prove to be difficult to reach. Especially if you got resin floating around in your vat, any kind of printer-turning for better reach might be extra tricky. The lack of accessibility gets further aggravated when you have to switch out bottles. The wiring and tubing of the lid are rather short, which makes swapping out cumbersome. In theory, a great feature, but in execution a bit ill-considered, we feel. If you have it set up, it works perfectly well, though.
To keep the tube clean and uncluttered, the system does do an auto-cleaning cycle every now and then but there is no button in the UI to trigger it manually. During our fortnight-long time with the printer, we did not encounter any blockage or clogging with the pump or tubes, even with having the printer set up next to a window (and the sun, aka UV rays shining directly at it). It worked great for us but about its longevity, we can’t really speak too much. However, from what we gather online, no major problems seem to arise so far. The tubes can be replaced fairly easily in case, and there is even a purchasable and affordable replacement pump you can get from Anycubic directly.
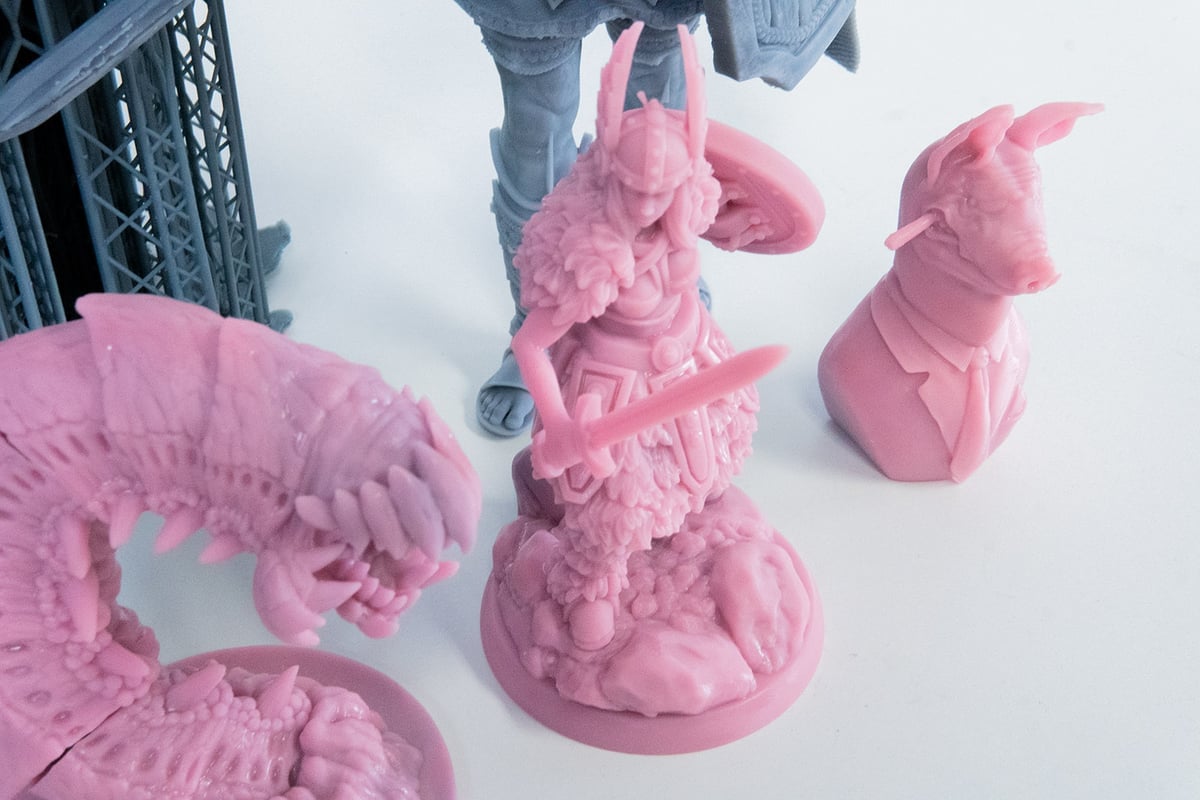
The Prints
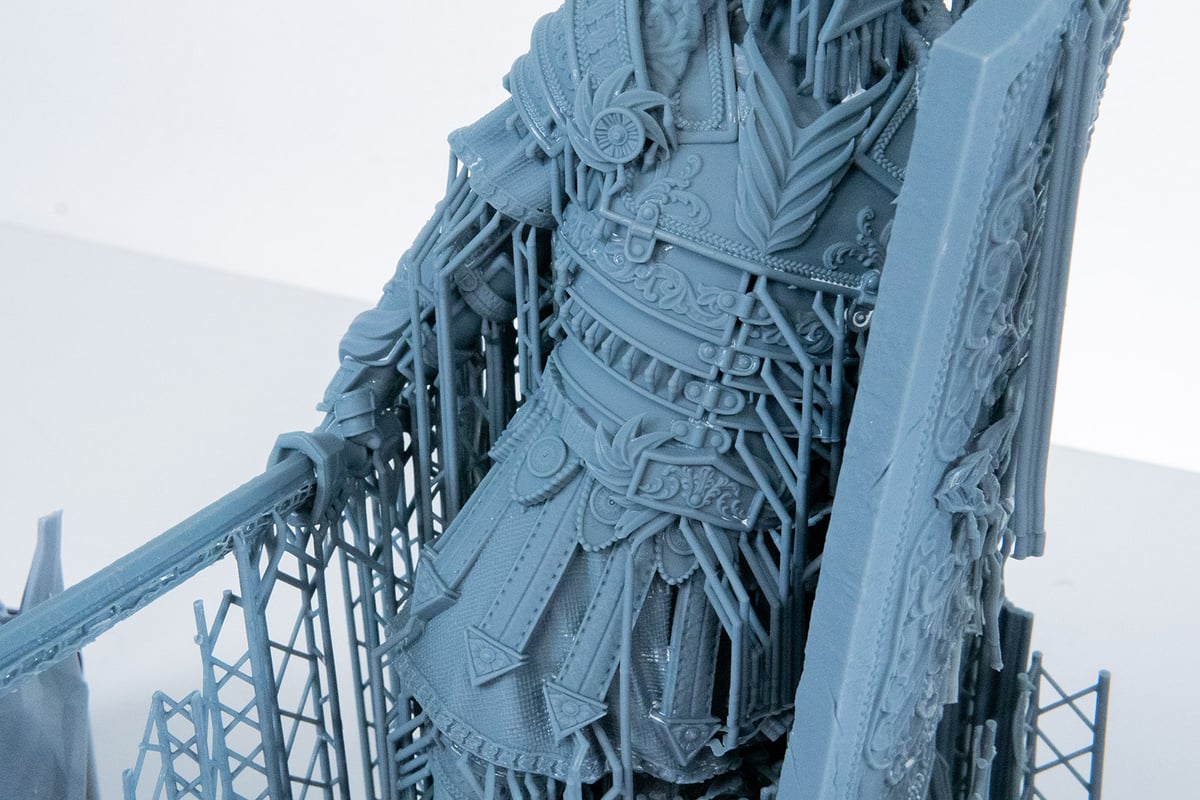
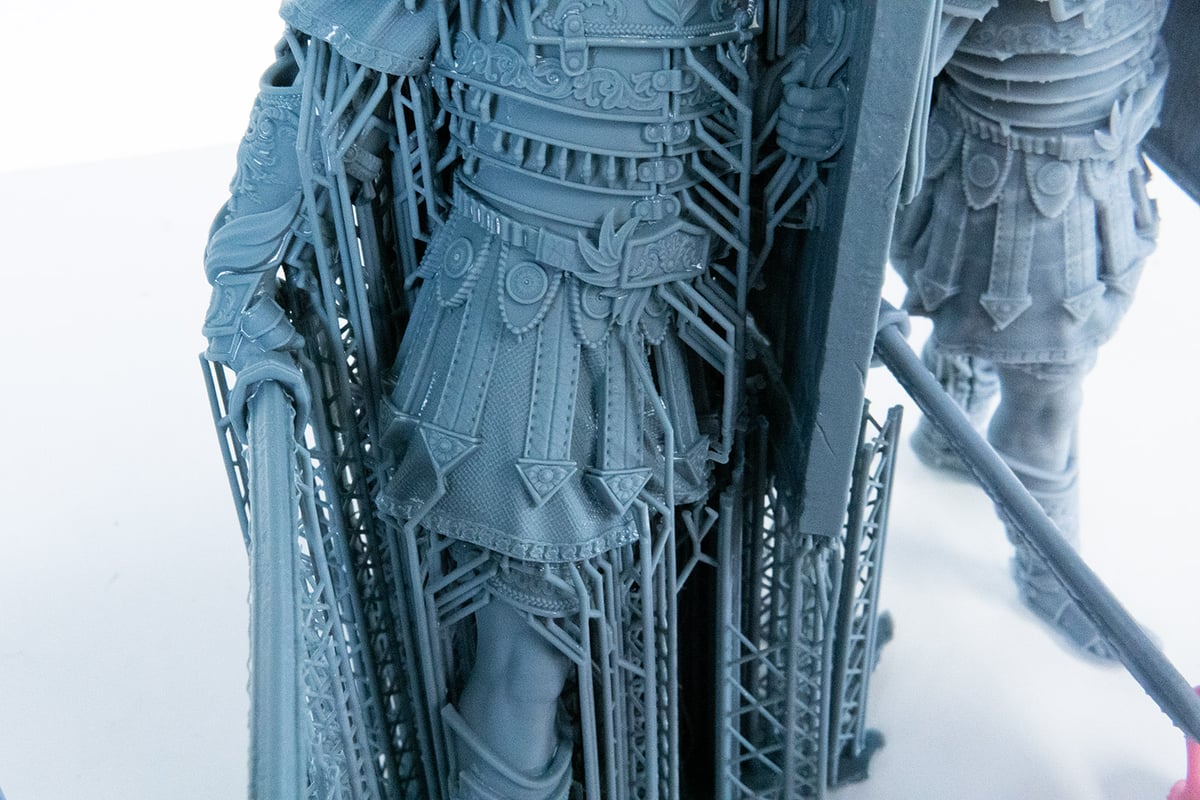
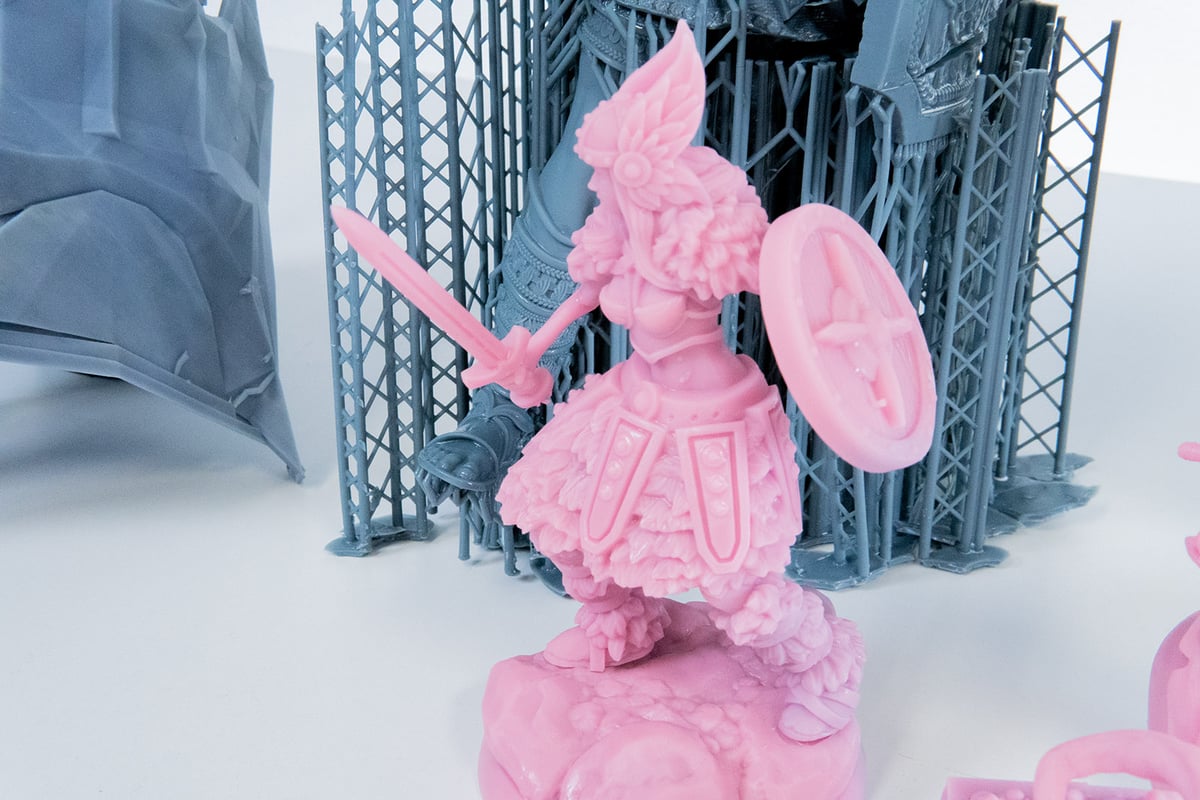
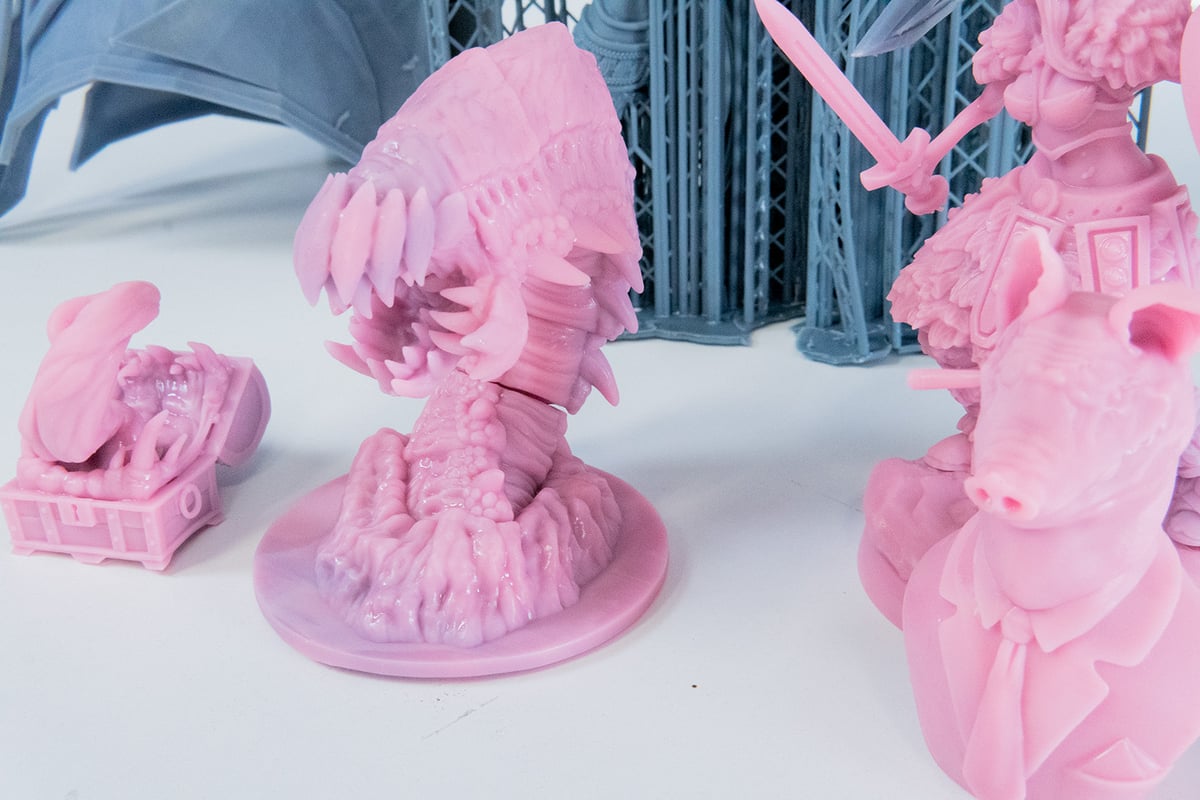
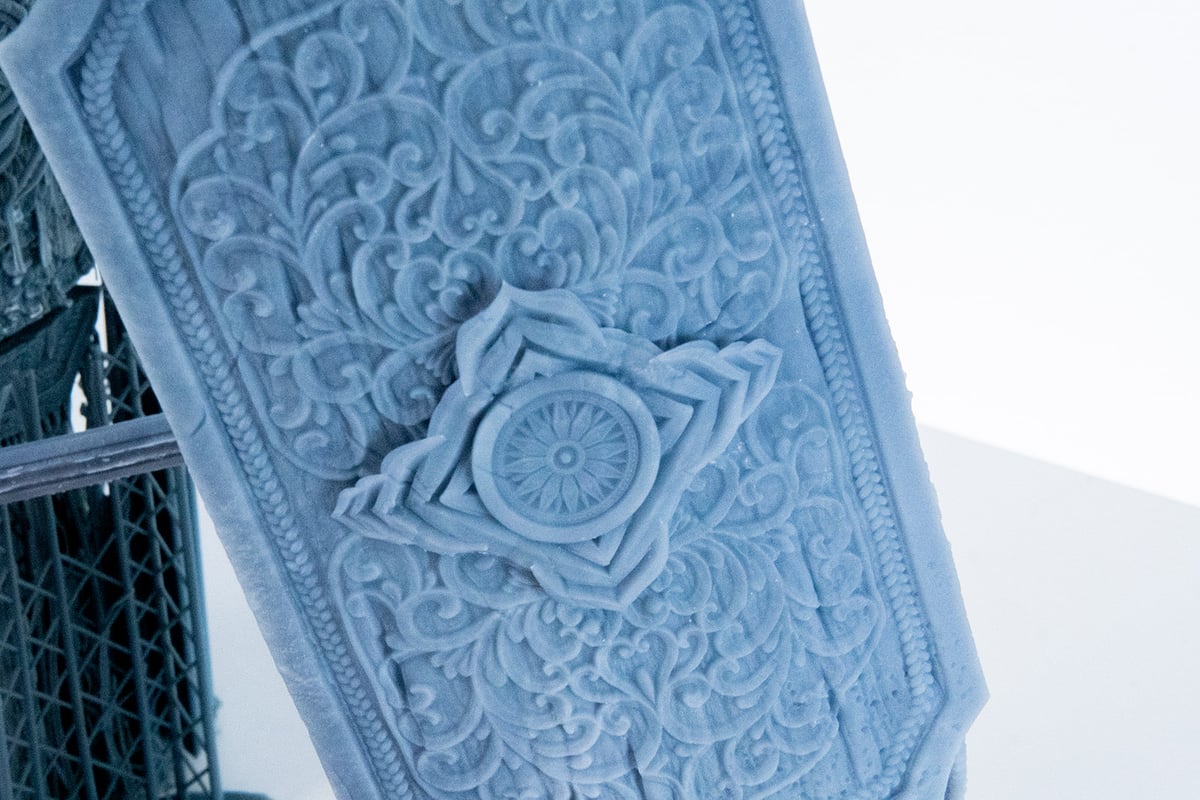
We already mentioned the initial dialing-in we had to undergo before we could actually pull some prints off the plate without shards of shrapnel flying about. A couple of test prints in, we found our sweet spot and had (almost) no further problems with our prints. Models came out with great detail and little effort. The Photon M3 Max’s 7K display rendered every feature crystal clear and distinct.
Of course, one of the big benefits of having such a large build plate and volume is that you can also print a lot of models simultaneously. Whether we printed one large model or a batch of smaller parts, the M3 Max handled it all. Except for the one time we didn’t set up the auto feed and ran out of resin or messed up the model and support placing. After all, printing large is kind of a different beast; it is less forgiving.
Having tested the Jupiter and Mega 8K, with respective 50 and 43 microns along the XY-axis, we can full-heartedly say: a margin of a handful of microns does not precipitate print quality in a noticeable way. Just in case you were hinging your buying decision on that.
In terms of print outcome, we had a great time with the M3 Max, leaving us wanting only one thing: a quicker turnaround time. Anycubic does advertise its M3 Max to “enable fast printing.” A characteristic we found quite the opposite to be true. From our experience, and with the base settings, the M3 Max is rather on the slow side of things when it comes to printing. You can play around with the settings a bit, but don’t expect this to be anywhere near the acclaimed 60 mm/h.
Is It Worth It
The Anycubic Photon M3 Max is one of the best large-format resin 3D printers you can purchase right now. In fact, with the Photon M3 Max, Anycubic managed what other manufacturers set out to achieve but seemingly failed due to price creeps: provide a large volume resin 3D printer at an affordable price.
Compared to the alternatives out there, the M3 Max is positively cheap, given its build volume and capabilities. For less than $1,100 (currently even $999 only), it undercuts the Elegoo Jupiter and Phrozen Sonic Mega 8K, the two other popular consumer-geared big-volume printers out there. With a capacity of 298 x 164 x 300 mm, you can embark on some truly large prints, and thanks to its 7K mono screen and 46 micron XY resolution, those prints will be highly detailed too.
Throw in a resin auto-refill setup to never run out of resin on your large prints again, a newly developed frosted-glass-looking FEP for better part release, and an easy-to-handle print plate, and you got all the prerequisites for printing large.
Anycubic even came up with a new style of enclosure, a two-piece acrylic cover that gives ample access to the printer’s interior. Presumably, one of the reasons the M3 Max scores so low on the price ladder is the abundance of a fancy metal casing you can find on its competitors and the Max’s approach even allows for more accessibility.
What could do with a bit more accessibility, though, is the auto refill system. In theory, a fine treat: you just hook up a bottle of resin to Anycubic’s in-house developed air pump system that will gradually top off the vat should the resin be running low. However, with the bottle holder and tubing being located at the back of the printer, switching out bottles is cumbersome. The printer is quite the obstacle to reach around and with the vat full of resin, any kind of moving the printer is ill-advised. Anycubic made things even worse with the vat being pretty shallow. For your large prints, you should take recourse to the refilling, as you might run out of resin otherwise.
Other than that, there is relatively little to grime about with the M3 Max. Yes, the UI feels a bit old in the tooth, the printer could do with a larger touchscreen, and Anycubic’s claim of the M3 Max printing in a speedy manner did not particularly stand the test. What you will get is a reliable machine that produces large prints or batch productions with relative ease and it is currently the best pick should you wish to get into large resin 3D printing without breaking the bank.
Features
Bigness is Bestness
The M3 Max is significantly larger than its siblings, with a build volume of 298 x 164 x 300 mm. The print volume places it between the Elegoo Jupiter and the Phrozen Sonic Mega 8K. The 298 x 164 mm printing area is supported by a 13.6-inch 7K monochrome screen. The printer has an accuracy of 6480 x 3600 px and claims a contrast ratio of 450:1. The resulting XY resolution is 46 microns, which again places it between the Phrozen Mega 8K and Elegoo Jupiter.

The platform is laser engraved, which helps with the adhesion. The resin vat on the inside features a matt texture which is meant to help with the release of individual layers. The print plate also features a laser-etched surface which will help with overall adhesion. Considering the 14.7-liter maximum build volume, the larger prints will be fighting gravity.
Flex Specs
The UV light source comprises a parallel matrix of 84 integrated LEDs. Anycubic claims the array makes for a powerful light source, thereby increasing printing speed.
The Z-axis rail on the printer features a precision ball screw mechanism with an accuracy of 10 microns and can handle the weight of larger prints while keeping its precision.
The printer also has an auto resin filler that automatically feeds resin into the vat without opening the cover – a novel feature at this price point. It works with a bottle of resin at the back of the machine fed with an air tube, creating positive pressure and pushing the resin through another tube into the vat. The level is checked by two metal prongs that runs a small electrical charge that is disrupted every time the vat drops below a certain level.
A decently sized 4.3-inch touch screen in the front of the printer gives you control of the printer’s functions and print setup.
FURTHER FEATURES
What else is interesting in the Anycubic Photon M3 Max?
- Screen protector: A dedicated screen protector makes sure your 13.6-inch screen doesn’t get damaged during the printing process. The screen protector is replaceable.
- Anycubic Photon Workshop slicing software: The Photon M3 Max comes with Anycubics proprietary slicing software. It has fun features like a head scanner that can produce a 3D model of a head from a few photographs but feels a little cumbersome compared to other slicer alternatives out there. You can use the M3 Max with Lychee or ChiTuBox Slicer as well, though.
- “Fast prints”: Anycubic claims that their printer is capable of printing 60 mm/h. During testing, we found that’s not the case. It’s not the fastest printer.
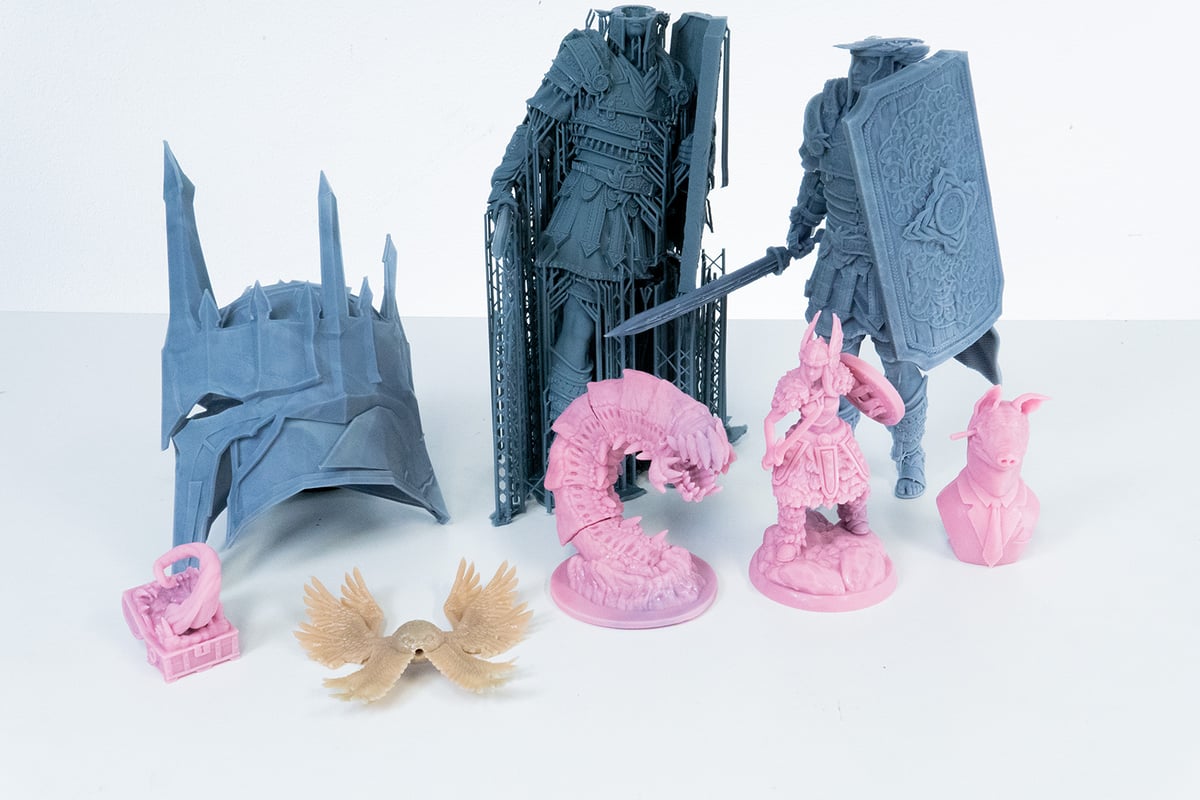
Featured Prints
Like what you see? Here’s a list of the 3D models we printed over the course of the review, as well as who designed them.
- Imperial Centurion by DM-Stash, via MyMiniFactory
- Biblically Accurate Angel Tree Topper by Miguel Zavala, via MyMiniFactory
- Sauron Armor Helmet by Arifsethi, via Cults3D
- Shield Maiden by Petrichor Miniatures, via MyMiniFactory
- Purple Worm by Schlossbauer, via MyMiniFactory
- Toothy Treasure Chest by Yasashii Kyojin Studio, via MyMiniFactory
- Pig Bust by Nacho Romero Perez, via MyMiniFactory
Tech Specs
General Specifications
- Technology: MSLA
- Type: Resin
- Year: 2022
- Assembly: Fully assembled
- Manufacturer: Anycubic
3D PRINTING SPECIFICATIONS
- Build Volume: 298 x 164 x 300 mm
- Layer Height: 10 microns
- XY Resolution: 46 microns ( 6480 x 3600 pixels)
- Z-axis positioning accuracy: 0.01 mm
- Printing Speed: 60 mm/h
- Bed-Leveling: Manual
- Display: 4.3-inch touchscreen
- Third-Party Materials: Yes
- Materials: 405 nm UV resin
SOFTWARE REQUIREMENTS
- Recommended Slicer: Anycubic Photon Workshop
- Operating system: Windows / macOS
- File types: STL
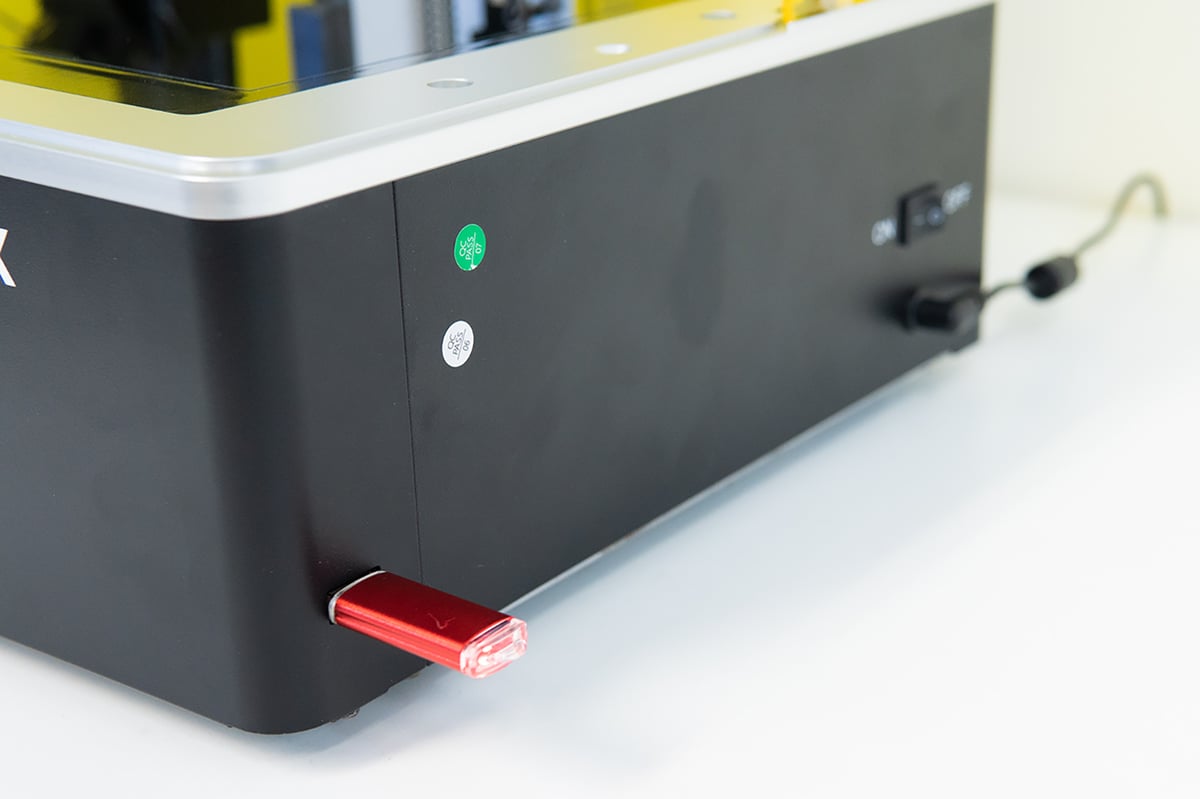
- Connectivity: USB
DIMENSIONS AND WEIGHT
- Frame dimensions: 400 x 408 x 596 mm
- Weight: 26 kg
Similar Printers
You may also be interested in the following printers:
For further information, feel free to check out our Best Large Resin Printers Guide.
Elegoo Jupiter
The Elegoo Jupiter is a similarly large printer with a 12.8-inch 6K monochrome screen and 277 x 156 x 300 mm print space. The XY accuracy is 51 microns, lower than the Anycubic Photon M3 Max. It also has a resin feeding system, but it works differently from that on the M3 Max. The housing for Jupiter is made of metal, which makes it very heavy at 40 kg, almost double the weight of the Max. It is also considerably more expensive at $1,300.

Phrozen Sonic Mega 8K
The Phrozen Sonic Mega 8K offers one of the biggest print volumes, at 330 x 185 x 400 mm. Coming with an 8K mono panel, it can print at an XY accuracy of 43 microns as well. It doesn’t have a resin feeding mechanism like the Jupiter and M3 Max. The housing, like the Jupiter’s, is metal, making it very heavy at 35 kg. These features, of course, come at a much higher price point of $2,200.

Peopoly Phenom Forge
The Forge is Peopoly’s latest MSLA 3D printer. With a build volume of 288 x 163 x 350 mm, it’s pretty tall and its 6K screen gives an XY voxel size of 50 microns. The Forge does come with a Vlare control board and promises to bring greater control with features such as multi-layer exposure, Wi-Fi and remote control, and even a temperature-controlled vat. You can get one for $1,499.
License: The text of "Anycubic Photon M3 Max Review: Budget Bigness" by All3DP is licensed under a Creative Commons Attribution 4.0 International License.
CERTAIN CONTENT THAT APPEARS ON THIS SITE COMES FROM AMAZON. THIS CONTENT IS PROVIDED ‘AS IS’ AND IS SUBJECT TO CHANGE OR REMOVAL AT ANY TIME.