![Featured image of [Project] 3D Print a Rotating Lithophane Box](https://i.all3dp.com/workers/images/fit=scale-down,w=1200,h=675,quality=79,gravity=0.5x0.5,format=auto/wp-content/uploads/2019/05/21161346/titel.jpg)
[Project] 3D Print a Rotating Lithophane Box

For this week's project you can now create a rotating, 3D printed, lithophane lamp that lets you turn your favorite photos into a moving lantern of memories.
Generally, 3D printers are best known for creating objects out of different plastic materials. For this weeks project though, we will use the 3D printer to create something completely new: Memories.
Thanks to Instructables maker ChrisN219, who provided us with this cool lithophane lantern, the pictures of your dearest will brighten up your future days. Or you can equip it with pictures of yourself and you have a custom present for your family and friends.
Lithophanes are basically 3D printed embossed photos. Fresh out of the printer, the results won’t show much at first, but shine some light through and you’ll be amazed by the details, brought out by the difference in picture thickness. The light passes through the thin parts while being blocked by the thick parts. But you probably knew that already. So let’s get on to what you need for this project hand how to assemble it.

What You Need
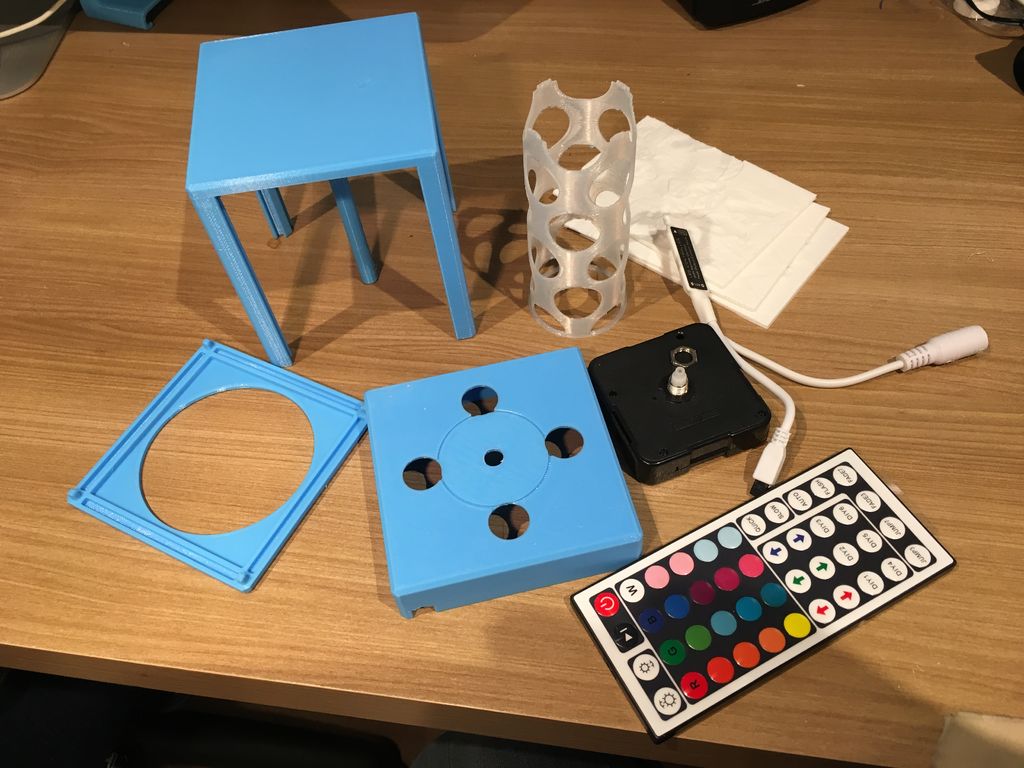
For this 3D rotating lithophane box you will need the following:
Lithophane Motive
The hardest part up front: Finding the right pictures for your lantern.
Having decided on the motives you want, it is time to transform them into a 3D printable format. Online conversion tools like 3DP.rocks allow you to easily take photos and transform them into three dimensional etches. Upload the files and it will automatically create 3D printable STL files for you to download. Just make sure to switch to positive image in the settings, or otherwise, the lithophane print will not function. If you want to find out more on the topic, check out our Lithophane – simply explained article.
Having created the STL files, it is time to fire up the printer and start printing the lithophane pictures and lantern parts. Generally, printing should be simple. No extra settings are required, but there are few tips to keep in mind:
The panels should automatically have the right size needed (75mm x 100mm), but best to double check before starting the print. For the best results of the lithophane panels, it is advised to use white PLA, but not any translucent filament. Layer hight should be as low as possible (0.1 or 0.2 mm) and printing speed should be moderate (max. 200 mm/s). Also, setting the infill to 100% will let the light do its trick better.
Apart from the four lithophane panels, you will need to print out the lantern parts. Get the files for free here and print them as you like. No special requirements needed. They are designed to automatically fit the panels, so do not interfere with the size.
Parts
If you have the STL files printed out, you will need to purchase two items (plus one AA battery) to assemble this project.
You can also use an old clock mechanism if you have one laying around. Just make sure it has a minute hand, as the lithophane box will be operated by said hand, resulting in a slow and steady rotation over the course of one hour.
How to Build It
If you have printed out the lantern as well as the lithophane panels and ordered the remaining parts, it is time to assemble them. This is actually pretty straight forward and no additional tools are needed.
Assemble clock mechanism
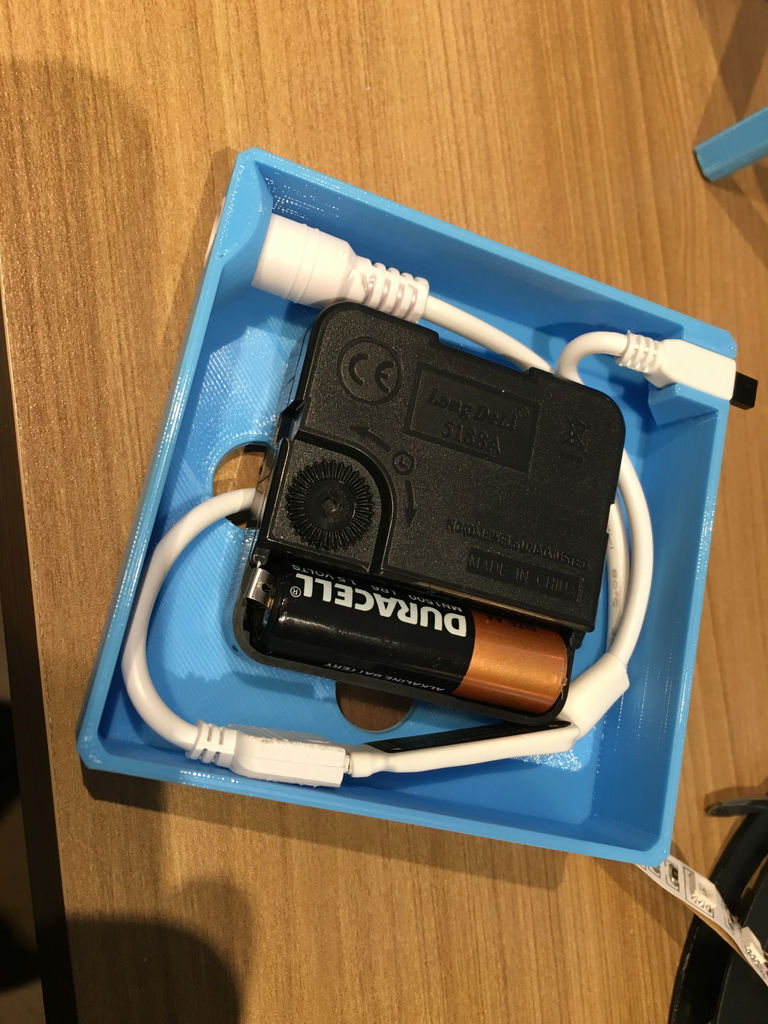
The LED cable should installed first, by press-fitting each end in the base as shown above. Next up is the clock mechanism. The clock may require a washer between the base acting as a shim, to achieve the correct protrusion height. The goal is to have the lithophane box installed on the base of the clock mechanism and leaving about a 1 mm gap between the rotating part and the base to rotate freely.
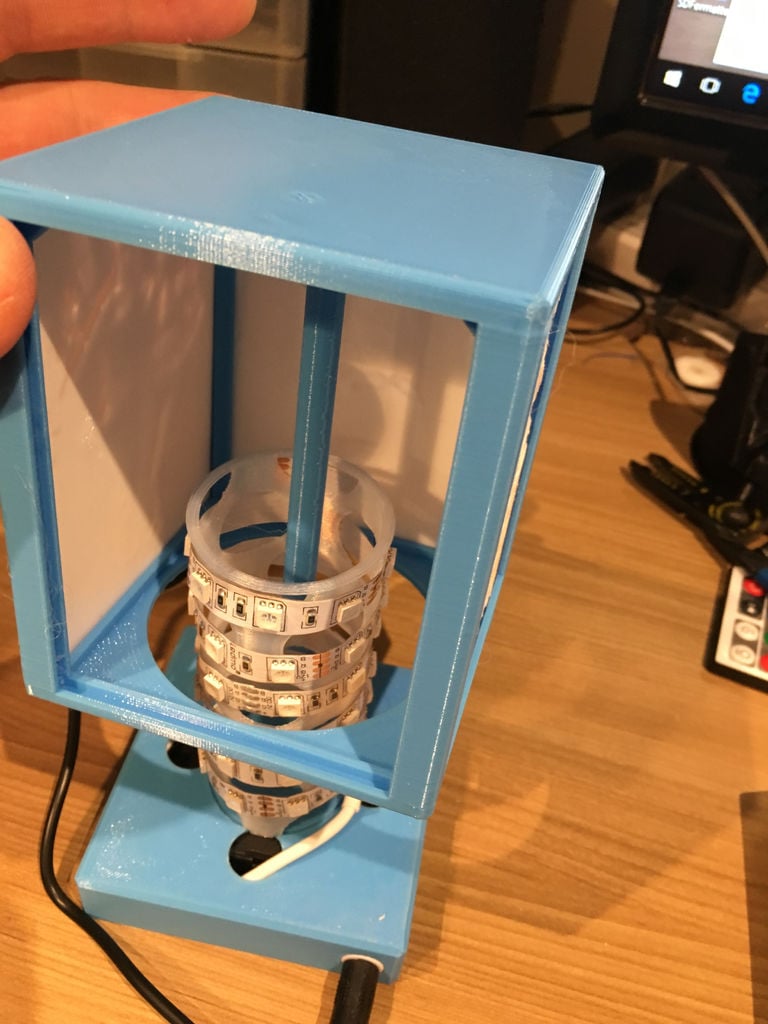
Assemble light tower

The light tower is wrapped with the LED light strip and adhered with the included tape. Next, cut the strip on one of the LED cut lines to the desired length and assemble the tower on the base by clicking it into position, via the holes. A little hint: It may be easier to insert the LED cable connector through one of the holes before setting up the clock mechanism.
Assemble Lithophane Box
Lastly, it is time to slip in the lithophanes upside down into the frame. The bottom plate is then pressed in, with the guide pins pressing it into place.
Our tip: Try to install the panels such that the assembled box is as close to being balanced on the central post. This will ensure the box rotating without sticking or binding on the base.
The assembled lithophane box just slips on top, with the central post slipping over the minute hand post of the clock mechanism. A light press-fit is all it’s needed and the 3D printed rotating lithophane lantern is good to go.
Just dim the lights and enjoy the memories to your pictures as they keep rotating by.
License: The text of " 3D Print a Rotating Lithophane Box" by All3DP is licensed under a Creative Commons Attribution 4.0 International License.