What's wrong with the stock MOSFET?
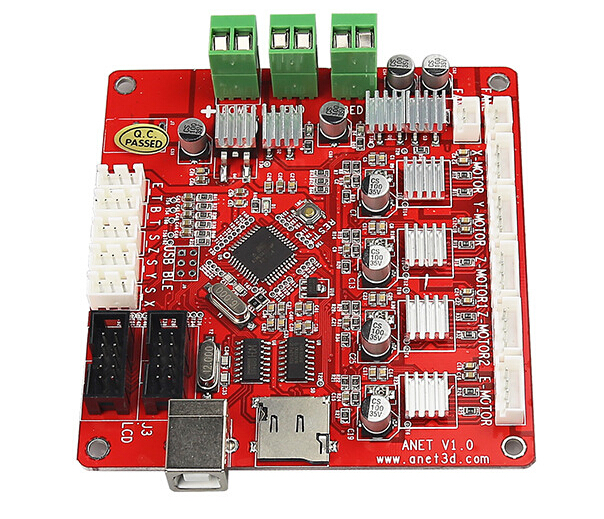
The issue with the MOSFETs that ANET have installed on the motherboard of their A8 is that they’re not correctly rated to deal with the amount of applied current. As a result, they’re prone to failures due to short circuits. While there are only a small number of recorded cases of the ANET A8 causing a fire, we feel that spending just a little extra cash on improving your printer’s safety is essential.
See also:
What is a MOSFET?

A MOSFET is a type of transistor where the voltage determines the conductivity of the device. Because they can be used to amplify voltages, a lot of 3D printers use MOSFETs to supply a high voltage to their heated beds and hot ends. The issue with the Anet A8 MOSFET is that it’s not rated highly enough to deal with the voltages and currents that the 3D printer uses. By adding a MOSFET that is correctly rated and has a heatsink, there’s a much lower chance of anything overheating and, in the worst case scenario, catching fire.
What kind of MOSFET should you buy?
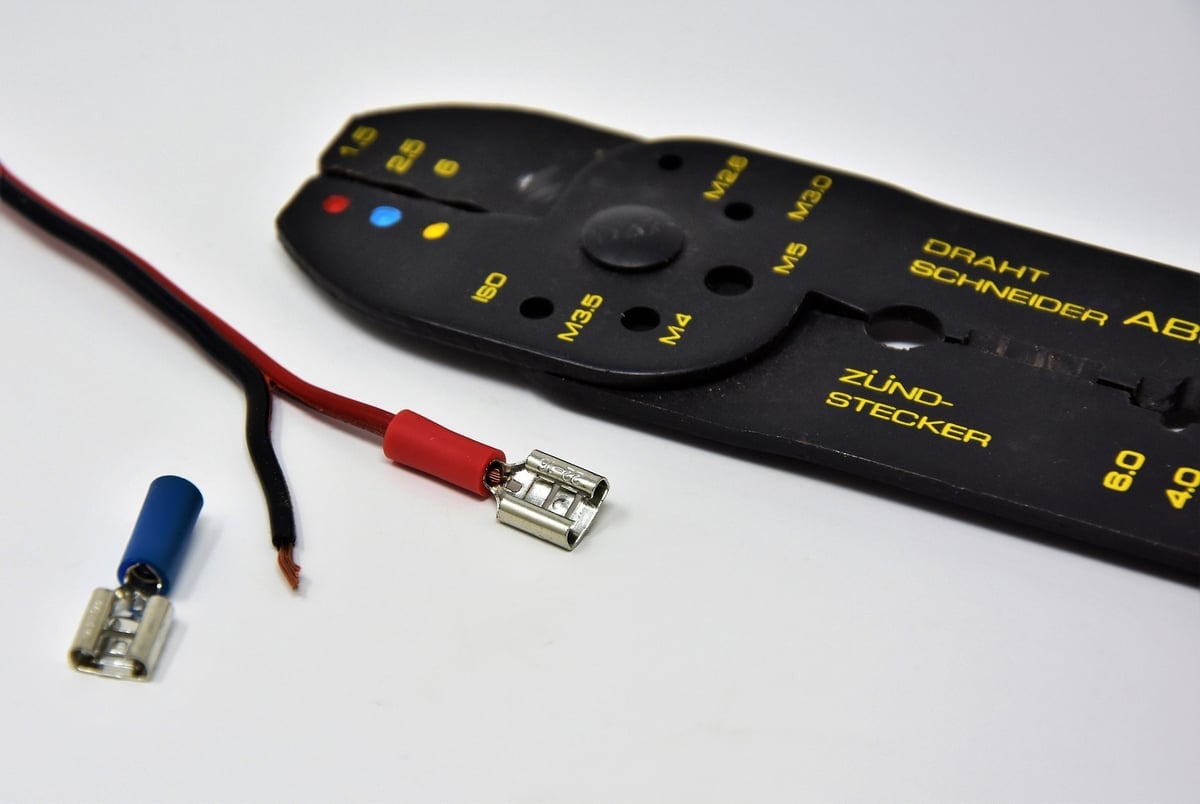
Thankfully, there are many MOSFETS that have been specifically manufactured for 3D printers. One that we can recommend is the Ramps 1.4 from Hesai. It’s around $3 and is worth every cent. If you want to go the extra mile, you could get two of these and connect one to your heated bed and one to your hot end. We also recommend using some thicker wires and crimp connectors to ensure solid and safe electrical connections.
How do you install an external MOSFET?
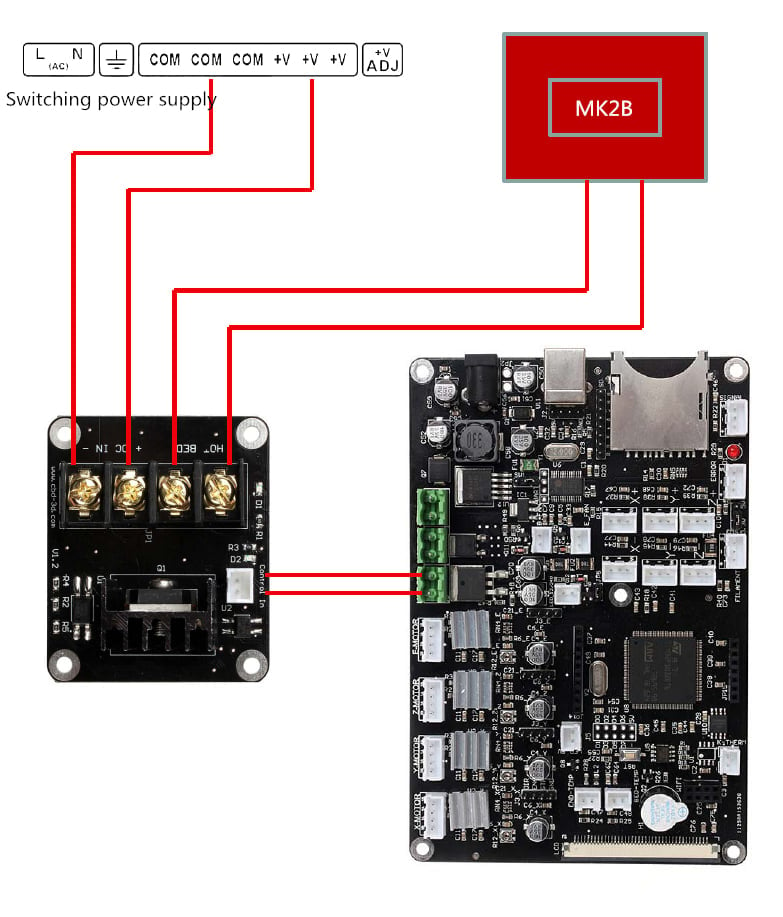
As these MOSFET boards are made for 3D printers, the installation process for them is very simple. These boards come with a set of pre-crimped wires that go from your control board to the MOSFET. Once you have connected the control wires, you will need to connect the DC +/- terminals to your printer’s power supply. This is where you will want to use wires with a crimped connection as opposed to bare wires to reduce the risk of any short circuits. Next, insert you heated bed or hot end wires into the terminals labeled “HOT BED” and you’re all set. We would also recommend you use crimp terminals for the end of the wire that goes to the MOSFET as its screw terminals are better suited to these connectors.
Mounting the MOSFET to your Anet A8
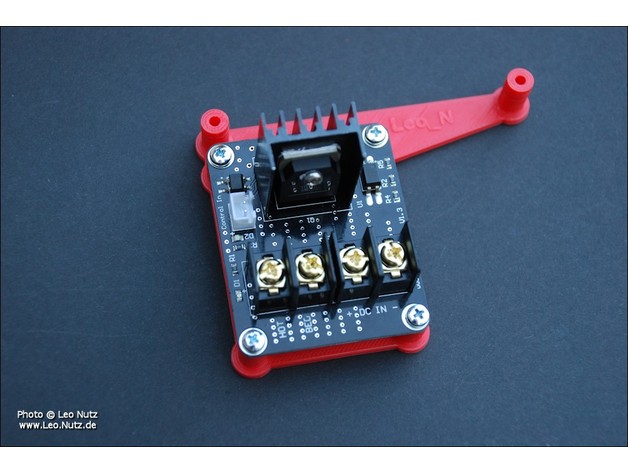
Now that you’ve wired up your external MOSFET, you can print out a simple bracket to keep it secured to your printer. This will keep the area around your printer tidier and will reduce the risk of snagging any loose wires from your MOSFET. Whether you’ve installed just the one MOSFET or have chosen to add a second one for your hot end, you can print out one of Leo_N’s brackets to securely mount it to your Anet A8.